
Cross-stitch patches are a unique way to add artistic flair to garments or accessories. Furthermore, they can be made with household items and require minimal effort. With just a few simple steps, you can create beautiful cross-stitch patches that will personalize any item of clothing or bag. And the best part is that once you’ve mastered the technique, you can make endless combinations and designs without buying new supplies.

Cross-stitch patches are an excellent way to add a unique, creative touch to any project. Cross-stitch patches allow you to customize your project with a beautiful, intricate design that will stand out from the rest. Not only are they visually appealing, but they are also extremely durable and can withstand heavy wear and tear. Additionally, making your own cross-stitch patches is relatively easy and can be done without any professional stitching equipment. You can find step-by-step instructions on how to make cross stitch patches in this blog article.
How Should You Prepare the Fabric Before Stitching a Cross Stitch Patch?
Before you start stitching your patch, it is essential to prepare the fabric. Ensure that the fabric you plan on using is clean and free from any damage or discoloration. Check for any loose threads, and if necessary, trim them off. Cut out the shape of the patch into a small square or rectangle, depending on your design.
Once you have cut out the patch, secure it with a few pins on an even surface, such as a foam board or pillow stuffing. Make sure that the fabric is not stretched too tightly and is nice and flat. Using the tailor’s chalk, you can also transfer your design onto the fabric. This will help to ensure that you stitch the design accurately. Finally, once the fabric is ready for stitching, thread your needle with a length of embroidery floss and use it to make small cross-stitches over the pattern on the fabric.

What May Other Materials Be Necessary to Complete the Patch-making Process?
- Embroidery hoop: This is a circular frame that stretches your fabric and keeps it taut while you work on your project. You’ll find this at any craft store or online.
- Needle & Thread: For stitching, you will need an embroidery needle and thread in the color of your choice.
- Scissors: You will need a pair of sharp scissors to cut any excess fabric and thread when you are done stitching.
- Iron-on backing or embroidery stabilizer: This is an optional material to help secure the patch onto a desired garment or item. Iron-on backing or stabilizer is available in varying weights and can be found online or at craft stores.
- Fusible web: Another option for attaching your patch to a garment or item is the fusible web, which is also available online or at craft stores.
By following these simple steps, you have everything you need to make your own cross-stitch patches. Have fun, and let your creativity shine through.
11 Step-by-step Instructions for How to Make Cross Stitch Patches
Step 1: Inspect the Fabric
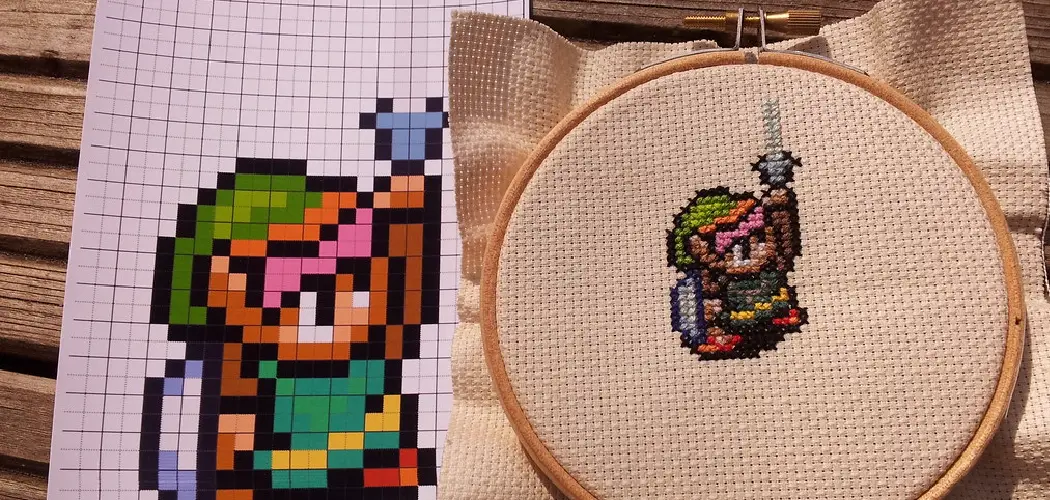
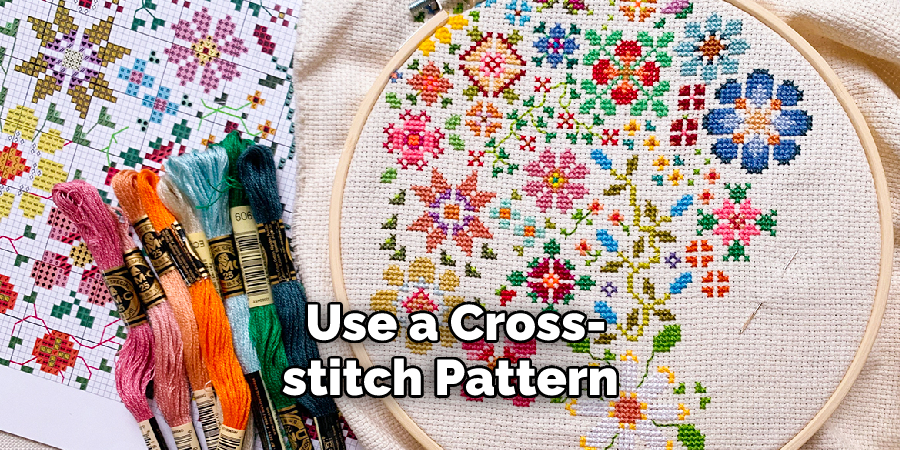
Before you begin stitching, ensure the fabric is clean and free of wrinkles. Choose a design that fits your desired size and shape for the patch. Use a cross-stitch pattern or draw one yourself on graph paper. Remember that the same fabric will be used on both sides of the patch. It is essential to keep this in mind when choosing a fabric. The design must be symmetrical. The fabric can have a pattern, but the design will be more visible if it is not too busy. You can also use a plain fabric and add your own design with different colors of embroidery floss.
Step 2: Prepare the Needle and Thread
Thread the needle with embroidery thread, making sure it is not too tight or too loose. Use a single strand for smaller designs and multiple strands for larger ones. Secure the end by making a few stitches on the wrong side of the fabric. This will prevent the thread from pulling through while you stitch. You can also use a knot for extra security. It is essential to choose a color that will stand out against the fabric so that your design is clearly visible.
Step 3: Begin Stitching
Start by using a single stitch to outline the design on each side of the patch. This will create an even frame and help to keep your thread secure as you cross-stitch between them. After outlining, begin stitching back and forth between the top and bottom lines of your design. Make sure to keep your stitches consistent in size and tension for a polished look. Otherwise, your design may appear uneven or crooked.
Step 4: Finish Stitching
When you reach the end of the pattern, secure the thread by knotting it on the wrong side of the fabric several times. Cut off any excess thread close to the fabric. Use a needle and thread to make small adjustments if there are any obvious gaps or flaws in your stitching. The patch should be neat and tidy, with no visible knots or loose threads. It may also be helpful to iron the patch to ensure it lays flat and looks crisp.

Step 5: Remove the Patch
Once you have completed stitching, remove the patch from the foam board or pillow stuffing. Carefully remove any pins and lay it flat on a smooth surface. Check for any loose threads and trim them off. It is essential to inspect the patch thoroughly before moving on to the next step. You want to make sure the patch is flawless before attaching it to your desired item. The next steps will vary depending on the method you choose to secure your patch.
Step 6: Iron-on Backing (optional)
If you are using an iron-on backing, place it adhesive side down onto the back of your patch and gently press with a hot iron. Be cautious not to burn the fabric. Once the adhesive is heated, slowly peel off the paper backing. Then, carefully place the patch onto your desired item and iron it again to secure it in place. It is essential to follow the instructions on the iron-on backing for best results.
Step 7: Trim excess backing
Trim any excess backing from around the patch, leaving about 1/4 inch of fabric around the edge. This will prevent any fraying and give a clean finish to your patch. You can also use a small amount of fabric glue around the edges for extra reinforcement. But, be sure to let it dry completely before moving on to the next step. Always follow the instructions on the fabric glue for best results.
Step 8: Attach Fusible Web (optional)
If you are using fusible web, carefully cut it to fit the size and shape of your patch and place it between the fabric and backing. Iron on using a hot iron, following the manufacturer’s instructions. The adhesive will secure the patch in place without any additional stitching. You can then trim any excess fabric and fuse the edges with fabric glue for a clean finish.
Step 9: Cut out Patch Shape
Cut out the patch along the desired shape, keeping a small margin around the edge for sewing onto garments or accessories. You can use pinking shears to add a decorative edge and prevent fraying. it is essential to be careful when cutting so that the patch does not become distorted or lose its shape.
Step 10: Attach Patch to Desired Item
Place your patch onto the desired item and secure with pins. Using a needle and thread, sew around the edge of the patch, making small stitches to secure it in place. But, be sure not to pull too tightly, as this could distort the shape of the patch. Once you have completed sewing around the edge, knot and trim off any excess thread.
Step 11: Show off Your New Cross Stitch Patch!
Congratulations, you have successfully made your own cross-stitch patch! Add it to any garment or accessory for a unique touch that showcases your creativity. You can also make multiple patches and design your own patchwork patterns for a truly personalized look. Have fun and happy stitching! Finally, don’t forget to share your creations on social media and inspire others to try their hand at making cross-stitch patches too.
Tips for How to Make Cross Stitch Patches
- Make sure your workspace is well-lit to see the intricate details and stitches of your patch.
- Work on a flat surface to ensure accuracy when stitching and also to avoid any strain or fatigue on your body from an uneven workspace.
- Use a hoop or frame for your fabric to stay taut during stitching.
- Choose a fabric that is suited to your design, such as Aida cloth for traditional patterns and more heavy-duty fabrics for items like patches.
- Select the right type of thread for the project; DMC embroidery floss provides many color options and is thick enough for precise stitching.
- Use a sharp needle that is suited to the thickness of your fabric and thread.
- Use small scissors to cut any excess threads or frayed ends to maintain a neat patch.
- Take regular breaks while stitching, as this can help prevent strain on your hands and eyes from focusing for long periods.
Following these tips can help you create beautiful cross-stitch patches with ease and precision. With the right materials and techniques, you can make stunning handmade creations that can be used to decorate clothing, accessories, and much more.
How Should You Maintain the Quality of Your Patch While Stitching?
- Make sure to use a quality-grade thread, which will ensure your patch’s durability and color.
- Choose an appropriate fabric for your patch to support the stitching without distorting or fraying over time.
- Before beginning, mark out the area where you will be stitching, and make sure to use the correct-sized needle.
- Use a sharp pair of scissors or fabric shears to cut your thread in even lengths that are easy to manage when stitching.
- Carefully follow the stitch pattern you have chosen, and pay attention to how tightly you’re pulling your thread so that your stitches don’t become distorted.
- After you’ve finished stitching, use a damp cloth to brush away any loose threads, and then use an iron on low heat to press your patch into place.
- Finally, use a sewing machine or hand stitch the edges of your patch with some thread that matches its color for it to have a neat and professional finish. These steps will help you create a high-quality patch with long-lasting results.

Are There Any Special Tricks for Creating Intricate Designs With Cross Stitch Patches?
- Start with a pattern with larger sections and simple shapes like circles or squares. This will make it easier to follow the pattern without making mistakes.
- Use a fine-tipped needle when stitching intricate designs to create more precise stitches. A blunt-ended needle can cause frayed edges, which won’t look as neat.
- Use a single strand of floss when stitching intricate designs to give a smoother finish, rather than making double or triple stitches.
- Take your time and be careful when stitching intricate patterns because it is easy to make mistakes with these designs. Check the pattern regularly and mark off sections that have already been stitched.
- Use a hoop to hold the fabric and pattern in place when stitching intricate designs. This will help keep the stitches even and prevent puckering of the fabric.
- Consider using a water-soluble pen to draw out your design on your fabric before starting to stitch, giving you a clearer idea of how the finished design will look.
Finally, don’t be afraid to experiment with colors and stitching techniques when making cross-stitch patches – this is part of the fun. Creating intricate designs can be a great way to explore your creativity and show off your skill.
How Do You Avoid Making Common Mistakes When Stitching Cross Stitch Patches?
- Make sure you have the right supplies: It’s important to make sure that you have all of the necessary supplies for stitching your cross stitch patches, such as high-quality fabric, a hoop or frame, embroidery floss in the colors you need, scissors, and needles.
- Follow the pattern closely: Make sure that you look at the pattern carefully before you begin stitching, and take note of any special instructions to help ensure accuracy. Always follow the pattern exactly as indicated, and don’t skip or add extra stitches.
- Keep your stitches even: When making cross-stitch patches, it’s important to keep them even in size and tension. Maintaining even stitches will help ensure that the finished patch looks neat and uniform.
- Use a frame: Using an embroidery hoop or frame can make stitching much easier because it keeps the fabric taut and makes it easier to see your stitches as you go along. This is especially helpful for larger patches or when you’re stitching intricate designs.
- Count your stitches: As you go along, count your stitches to make sure that you don’t lose track of where you are in the pattern. This will help reduce the risk of mistakes and ensure that your patch looks as precise as possible.
- Trim away excess threads: Once you’re done stitching, gently trim away any loose threads or fabric that isn’t part of the finished patch. Doing this will help give your patch a neat and professional look.

By following these steps, you can help avoid making common mistakes when stitching cross-stitch patches.
Is It Necessary to Hire Any Professional to Make Cross Stitch Patches?
If you want to make a cross-stitch patch, you do not have to call a professional. It is a hobby that can be done easily by yourself. All you need is some basic knowledge of embroidery stitching and the right materials. To begin, you will need fabric for the patch and threads, needles, and scissors.
Once you have these materials, you can start stitching. Cross-stitch patterns are commonly made by following a grid pattern and counting squares. You will need to choose the right colored threads and needles for your project and determine what size of patch you want to make. Make sure to measure carefully so that the finished product is accurate.

Once your stitching is complete, you must ensure that the back of your patch looks neat. You may choose to use a stabilizer to help keep it in place and provide more support. An iron-on adhesive can also be used for extra reinforcement. Finally, if you are looking for a finishing touch, a custom label or button can be added to the back of your patch.
Conclusion
One disadvantage of how to make cross stitch patches is the amount of time needed. Making a cross-stitch patch can take anywhere from several hours to days, depending on the design’s complexity and the sewer’s skill level. Additionally, it may be difficult for beginners who have not had much practice with embroidery needles or stitching thread to complete more complex designs. Cross-stitch patches can also be expensive if the materials needed for a project are not already owned or on hand. Additionally, cross-stitching requires a lot of patience and concentration, so it may not be suitable for those who easily become frustrated with detailed tasks.
In conclusion, cross-stitch patches can be made with some basic supplies and techniques. With practice, anyone can create their own unique cross-stitch patch designs for various projects and purposes. Cross-stitch patches are a great way to make your clothing, pillows, and other fabrics look more attractive and eye-catching. Whether you’re experienced in stitching or just starting out, following these instructions will help you create beautiful cross-stitch patches with ease. I hope reading this post has helped you learn how to make cross stitch patches. Make sure the safety precautions are carried out in the order listed.
You Can Check it Out to Crochet Stitch and Scrump
You Can Check it Out to Make a Scarecrow Hat Out of Paper