
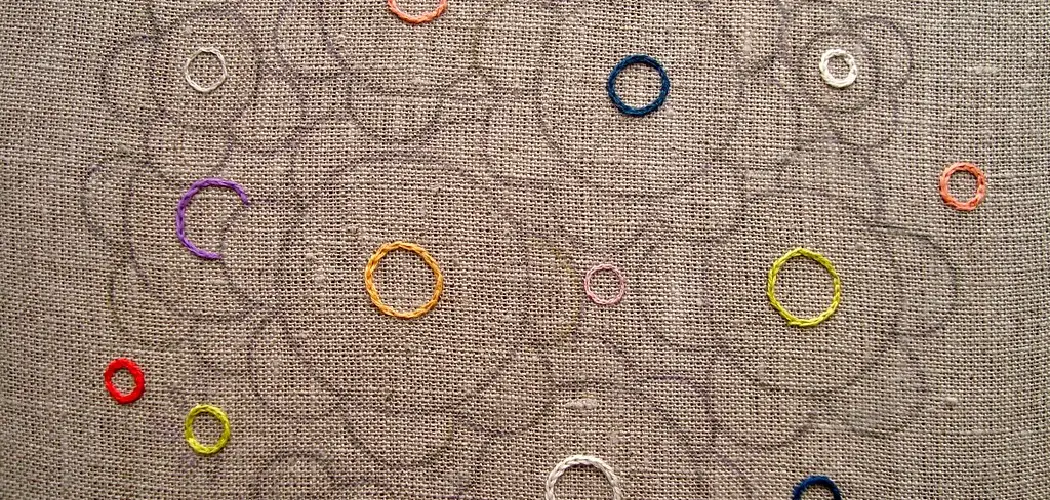
Mastering embroidery techniques can be a rewarding and creative endeavor. Among the many stitches in an embroiderer’s arsenal, the split stitch stands out as a fundamental and versatile choice. Whether you’re a seasoned stitcher or a novice looking to dip your needle into the world of hand embroidery, learning how to do a split stitch is a skill worth cultivating. This stitch is perfect for outlining, creating fine lines, or adding texture to your designs.
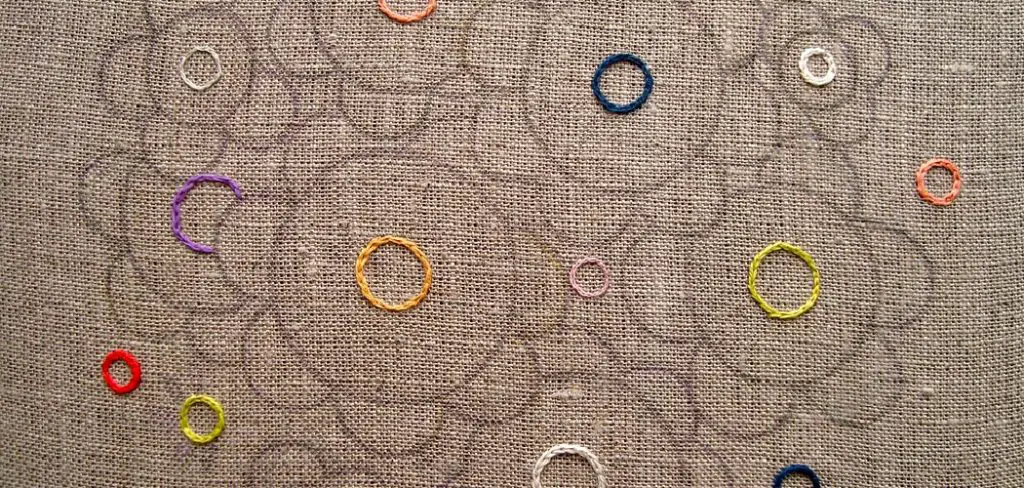
Its unique construction involves splitting the previous stitch with your needle, resulting in a beautiful braided appearance that adds depth to your embroidery work. In this article, we will guide you through the step-by-step process of mastering the split stitch, from selecting the right materials and preparing your fabric to executing the stitch itself.
With a bit of practice and patience, you’ll soon be incorporating split stitches into your embroidery projects, elevating your creations to a new level of artistry.
Importance and Uses of the Split Stitch
Before diving into the how-to’s of split stitching, it’s essential to understand why this stitch is an essential tool in any embroiderer’s toolbox. Here are some of its key benefits and uses:
- Versatile: As mentioned earlier, the split stitch can be used for a variety of purposes, making it a versatile choice for any embroidery project.
- Neat Appearance: The split stitch creates a clean and tidy look on the surface of the fabric, making it perfect for precise outlining or adding detail to your designs.
- Texture and Depth: Due to its braided appearance, the split stitch can add texture and depth to your embroidery, giving your work a more intricate and professional finish.
- Suitable for Any Fabric: This stitch can be used on a wide range of fabrics, from delicate materials like silk to heavier fabrics like denim. It also works well with both embroidery floss and thicker threads, making it a go-to stitch for many embroidered for
- Lettering: The split stitch’s unique construction makes it an excellent choice for lettering or writing on your fabric, allowing you to create smooth and even lines with ease.
- Blending and Layering: The split stitch can also be used to create blending or layering effects in your embroidery, adding dimension and interest to your designs.

10 Methods How to Do a Split Stitch
1. Gather the Necessary Supplies
Before you begin, make sure you have all the supplies you need to complete your project. You will need embroidery floss, an embroidery hoop, a needle, and fabric. You may also want to use a thimble for added protection on your finger when pushing the needle through the fabric.
2. Prepare Your Fabric
Once you have all of your supplies ready, it’s time to prepare your fabric for stitching. Start by laying your fabric in the embroidery hoop and tightening it until it is taut but not too tight. This will help keep the fabric from bunching up while you stitch.
3. Thread Your Needle
Thread your needle with two strands of embroidery floss and tie a knot at the end of the thread to secure it in place. Make sure that both strands are even length so that they don’t get tangled during stitching.
4. Create Your First Stitch
Begin by making a small stitch in one corner of your design and then bring the needle back up through the same hole as before, creating a loop with the thread around the needle’s eyelet (this is called an anchor stitch). Pull tight to secure this first stitch in place and then insert your needle into another point of your design where you would like to create another stitch.
5. Create The Split Stitch
For each subsequent split stitch, insert your needle into the same hole as before but make sure that you come out slightly above or below where you entered previously (this creates a split between each stitch). Continue this process until you have reached the end of your design or until you have completed all stitches desired for that particular area of work.
6. Secure The Last Stitch
When finished with a section, secure your last stitch by bringing it up through one side of its loop and down through another side (this is called a “lock” stitch). This will ensure that all stitches remain secure even if they become loose over time due to wear or tear on fabrics or threads used in stitching projects.

7. Tie Off The Thread
Once finished with an entire section or project, tie off any remaining thread by inserting your needle underneath several other stitches and pulling tightly to secure them in place before cutting off any excess thread with scissors (make sure not to cut too close so as not to unravel any stitches).
8. Remove From Hoop And Trim Fabric
After completing all stitching work on a project, carefully remove it from its hoop and trim away any excess fabric from around edges using scissors if desired (this helps give projects clean lines).
9. Press For A Professional Finish
Finally, press down lightly on completed stitched areas using an iron set on low heat (be careful not to press too hard as this can cause fabrics or threads used in stitching projects to become damaged). This step helps give projects a professional finish that looks neat and tidy when displayed or gifted!
10. Enjoy Your Finished Project!
Now comes perhaps one of our favorite parts – admiring all of our hard work! Take some time now to admire how beautiful and intricate split-stitching can be when done correctly – we promise you won’t be disappointed!
Things to Consider When Doing a Split Stitch
While the split stitch is a relatively simple and versatile stitch, there are some things to keep in mind when using it for your embroidery projects. Here are a few tips to help you achieve the best results:
- Keep your stitches small and even for a neater appearance.
- Use shorter strands of thread to avoid tangling.
- Make sure your fabric is taut in the embroidery hoop to prevent puckering.
- Use a sharp needle to avoid snagging or damaging your fabric.
- Experiment with different thread thicknesses and colors for unique effects in your designs.
Common Mistakes to Avoid When Doing a Split Stitch
Split stitch is a popular embroidery technique that is used to create smooth and fluid lines in hand embroidery. It’s a simple and versatile stitch that can be used for outlining, filling in shapes, or creating texture.
Using the Wrong Thread
One of the most common mistakes when doing a split stitch is using the wrong type of thread. Split stitch works best with embroidery floss or other stranded threads that can be easily separated into individual strands.
If you use a thicker thread, such as pearl cotton or yarn, it will be difficult to split the strands and your stitches may look bulky and uneven. Always make sure to choose the right type of thread for your split stitch project.

Using Too Many Strands
Another mistake that can affect the overall look of your split stitch is using too many strands of floss. While you may think that using more strands will make your stitches stand out, it can actually have the opposite effect. Too many strands can lead to bulky stitches and make it difficult to split them evenly. Stick to using one or two strands for split stitch to achieve a smoother and more delicate look.
Not Keeping Tension Consistent
Maintaining consistent tension is crucial when doing a split stitch. If your tension is too loose, it can lead to loose and loopy stitches that will not lie flat. On the other hand, if your tension is too tight, it can cause your fabric to pucker and distort the shape of your split stitch lines. Practice keeping a steady tension as you work on your split stitch to achieve clean and even stitches.
Skipping the Split
As the name suggests, split stitch requires splitting the previous stitch with the needle as you work along your design. However, one common mistake is skipping this key step and simply stitching over the previous stitch without splitting it.
This can result in a messy and bulky line of stitches that doesn’t have the smoothness and fluidity of a properly done split stitch. Always remember to split the previous stitch as you work along to maintain the integrity of your split stitch lines.

Conclusion
In conclusion, the split stitch is a basic, yet versatile hand sewing stitch that should be in every sewer’s toolbox. This versatile stitch can be used to sew hems, reinforce buttonholery and other applications. Even if you think learning how to do a split stitch is beyond your skills, give it a try! With practice and some patience, you will most likely find that this simple stitching pattern is much easier than expected.
With just a few tools and materials, anyone can use the split stitch! Once you learn how to do this impressive fabric embellishing technique, you’ll be able to create beautiful projects or add elements of style you simply cannot get with standard sewing stitches. Take the first step in mastering the art of split stitching today!