
Crafting is a hobby that has been popular for generations. It encourages creativity and allows people to express themselves through their own unique projects. One of the most beloved crafts around is yarn crafting!

If you’re looking for an enjoyable way to spend your time, why not give it a try? With its interesting textures, vibrant colors and endless possibilities, yarn crafting truly has something for everyone. Here are some tips on how to make yarn crafts for getting started with making beautiful yarn creations.
What is Yarn?
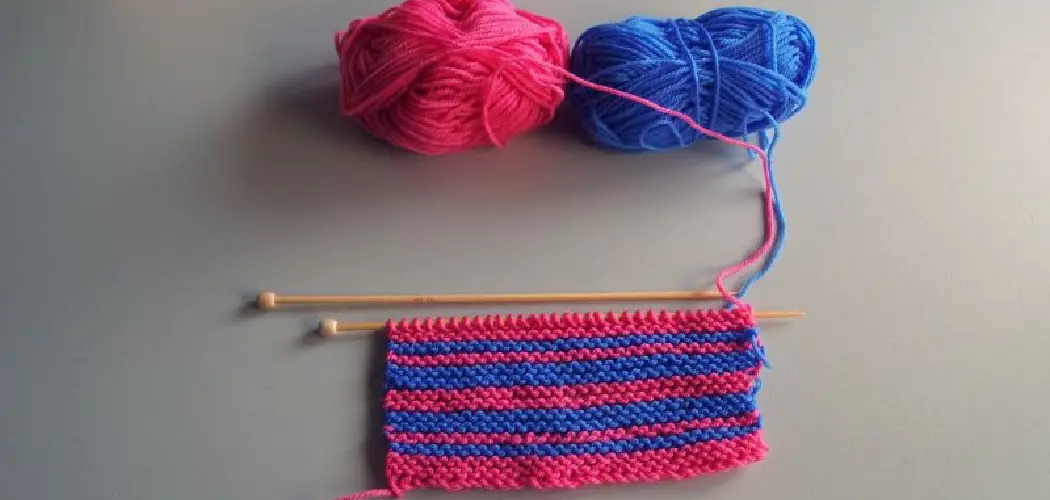
Yarn is a long continuous length of interlocked fibers, commonly used for knitting, crocheting and weaving. It can also be made into other types of crafts such as pom poms, tassels, and even wall hangings. The most common materials used to make yarn are wool, cotton, acrylic or a blend of these fibers. Each type of yarn has its own unique characteristics, making it suitable for different types of projects.
Needed Materials
Before you can start your yarn crafting journey, it’s important to have all the necessary materials. Some basic tools you will need :
- Yarn of Your Choice
- Scissors
- Knitting Needles or Crochet Hooks (Depending on the Type of Project)
- Tapestry Needle for Weaving in Ends and Finishing Touches
- Stitch Markers to Keep Track of Your Stitches (Optional)
- Ruler or Measuring Tape (Optional)
These materials can be found at any craft store or online, and there is a wide range of options available to suit different budgets and preferences.
12 Step-by-step Guidelines on How to Make Yarn Crafts
Step 1: Choose the Type of Yarn
As mentioned, there are various types of yarn to choose from. Consider the weight, color, and texture that will work best for your project. You can also mix and match different types of yarn to create interesting effects.

But as a beginner, it’s best to stick with one type of yarn until you get the hang of it. It’s also important to make sure you have enough yarn for your project. But don’t worry, you can always buy more if needed! This is where the ruler or measuring tape comes in handy.
Step 2: Gather Your Materials
Make sure you have all the necessary tools and materials ready before starting your project. This will save you time and prevent any frustration along the way. It’s also a good idea to have a clean and clutter-free workspace to help you stay organized. But don’t worry, crafting can get messy too! This is all part of the fun. You can always tidy up afterward.
Step 3: Choose a Simple Project
As a beginner, it’s best to start with a simple project rather than jumping into something complex. This will help you get comfortable with the basics before moving on to more advanced techniques. A basic scarf or dishcloth is a great place to start for knitting, while a simple granny square or headband can be perfect for crocheting. You can find many free patterns online or in crafting books.
Step 4: Learn the Basics
Before you start your project, make sure you understand the basic stitches and techniques. You can find numerous tutorials and resources online or attend a local class or workshop to learn from experienced crafters.
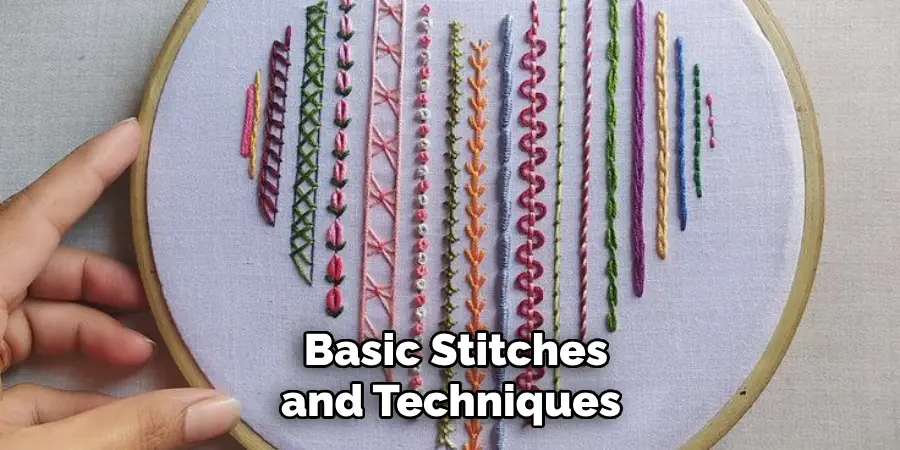
Practice these techniques until you feel confident before moving on to your project. But remember, mistakes and imperfections are part of the charm of handmade crafts! It’s all about having fun and enjoying the process.
Step 5: Follow a Pattern
To make your project easier, it’s recommended to follow a pattern. This will guide you through each step and ensure that your finished product turns out just as you envisioned.
There are plenty of free patterns available online or in craft books, so don’t be afraid to explore different options and find one that suits your style. Always make sure to read the pattern carefully before starting and keep track of your progress as you go.
Step 6: Start Casting On or Creating a Chain
For knitting, you will need to cast stitches onto your needle before beginning. For crocheting, you will need to create a chain of stitches with your hook. The number of stitches or chains required will depend on the pattern and size of your project. It’s important to count your stitches or chains to make sure you have the right amount before moving on.
Step 7: Practice Your Tension
Tension is the amount of tightness or looseness in your stitches. It’s important to practice and maintain consistent tension throughout your project to ensure a polished and professional-looking finished product.

This may take some practice, so don’t get discouraged if it doesn’t come naturally at first. But with time and practice, you will get the hang of it! You can also use stitch markers to help maintain your tension.
Step 8: Read and Follow the Instructions
Make sure you carefully read and follow each step of the instructions in your pattern. This will prevent any mistakes or confusion along the way. If you’re unsure about a specific instruction, refer back to tutorials or ask for help from experienced crafters. It’s always better to ask for help than risk making a mistake that could ruin your project.
Step 9: Take Breaks and Relax
Crafting can be time-consuming, so it’s important to take breaks and relax throughout the process. This will prevent any strain or fatigue on your hands and eyes, and also allow you to step back and admire your progress.
You can also take this time to make any adjustments or fix any mistakes before continuing. This is also a great opportunity to sip on some tea or coffee and enjoy the relaxing nature of yarn crafting.
Step 10: Finishing Touches
Once you complete your project, it’s time for the finishing touches. This includes weaving in any loose ends and adding any decorative elements if desired. You can also block your finished project to give it a neat and professional finish.

You can find tutorials and tips on how to block your specific type of project online or in craft books. Although this may seem like a small step, it can make a big difference in the overall appearance of your project.
Step 11: Admire Your Finished Project
Congratulations, you have completed your first yarn craft! Take a moment to admire your hard work and enjoy the satisfaction of creating something with your own hands. This is also a great opportunity to take pictures and share your creations with others.
Who knows, you may inspire someone else to start their own yarn-crafting journey! You can also make adjustments and notes for future projects based on your experience with this one.
Step 12: Keep Practicing and Learning
Yarn crafting is a continuous learning process, and there are always new techniques and patterns to explore. Don’t be afraid to try new things and challenge yourself, as this will help you improve your skills and create more complex and beautiful projects.
Keep practicing and learning, and most importantly, have fun with it! Yarn crafting is a wonderful hobby that allows you to express your creativity and make something special for yourself or others. Happy crafting!
Following these steps on how to make yarn crafts will help you get started on your yarn-crafting journey and set you up for success. Remember to take your time, practice, and most importantly, enjoy the process!
Before you know it, you’ll be creating your own unique designs and mastering new techniques. So gather your materials, choose a project, and have fun crafting with yarn!
How Much Will It Cost?
One of the great things about yarn crafting is that it can be a relatively inexpensive hobby. Basic yarn and tools can be purchased at affordable prices, and there are plenty of free patterns available online.

However, as you become more experienced and start creating more complex projects, the cost may increase depending on the materials and techniques used. But don’t let this deter you from pursuing your passion for yarn crafting!
Creating something with your own hands is priceless and the joy it brings is worth every penny. Plus, handmade items make great gifts that are both personal and unique.
So don’t be afraid to invest in quality materials for your projects and enjoy the process of creating something truly special. So why not give yarn crafting a try? You may just discover a new hobby that brings you joy and relaxation. Happy yarn crafting!
Additional Tips and Ideas
- Experiment With Different Types of Yarn, Such as Wool, Cotton, or Acrylic to See Which One You Prefer Working With.
- Use Interchangeable Knitting Needles or Crochet Hooks So You Can Easily Switch Between Sizes for Different Projects.
- Take Inspiration From Nature, Art, or Your Favorite Colors When Choosing Colors for Your Project.
- Join a Local Crafting Group or Attend Online Forums and Social Media Groups to Connect With Other Yarn Crafters and Share Ideas.
- Repurpose Old or Unwanted Clothing, Towels, or Bedding by Cutting Them Into Strips and Using Them as “Yarn” for Crochet or Knitting Projects.
- Add Personalized Touches to Your Projects by Incorporating Buttons, Beads, Ribbons, or Other Embellishments.
- Create Gifts for Family and Friends That Are One-of-a-Kind and Made With Love.
- Experiment With Different Techniques, Such as Knitting in the Round or Adding Texture With Different Stitches.
- Don’t Be Afraid to Make Mistakes – They Can Often Lead to Unique Designs and Unexpected Surprises.
- Most Importantly, Have Fun and Enjoy the Process of Creating Something Special With Yarn!
Frequently Asked Questions
Q1: Can I Start With a Complex Project as a Beginner?
A: It is recommended to start with a simple project before moving on to more advanced techniques. This will help you get comfortable with the basics and build your skills before taking on more complex projects.
Q2: Do I Need to Follow a Pattern?
A: Following a pattern is recommended, especially for beginners. This will guide you through each step and ensure that your finished product turns out just as you envisioned. However, once you become more experienced, you can also experiment with creating your own designs.
Q3: Can I Fix Mistakes in My Project?
A: Yes, mistakes are common in crafting, and it’s important to not get discouraged. You can often fix mistakes by carefully undoing stitches or adding extra stitches where needed. If the mistake is too severe, you may need to start over, but remember that imperfections are part of the charm of handmade crafts!

Q4: How Do I Maintain Consistent Tension?
A: Maintaining consistent tension takes practice and patience. You can use stitch markers to help guide your tension and also try different techniques such as holding the yarn at a certain angle or using your fingers as guides.
With time and practice, you will develop a natural feel for maintaining tension in your stitches. Overall, the key is to stay relaxed and not pull too tightly or loosely on your yarn. So keep practicing, and your tension will improve over time!
Conclusion
Crafting with yarn is a wonderful way to turn any craft project into a unique and eye-catching piece. It’s fun, creative, and easy to learn how to make these awesome yarn creations. From basic weaving projects to stuffed animals, the possibilities are endless when it comes to crafting with yarn. Get creative and try something new today!
Get out your supplies and let the crafting begin! Share your favorite yarn crafts on social media or show them off at the next family gathering! And don’t forget – if you ever get stuck while making your project no worries, because there are plenty of tutorials online for just about any style of yarn craft you can think of. So why wait? Start creating your own unique works of art now with our tips for how to make yarn crafts!