
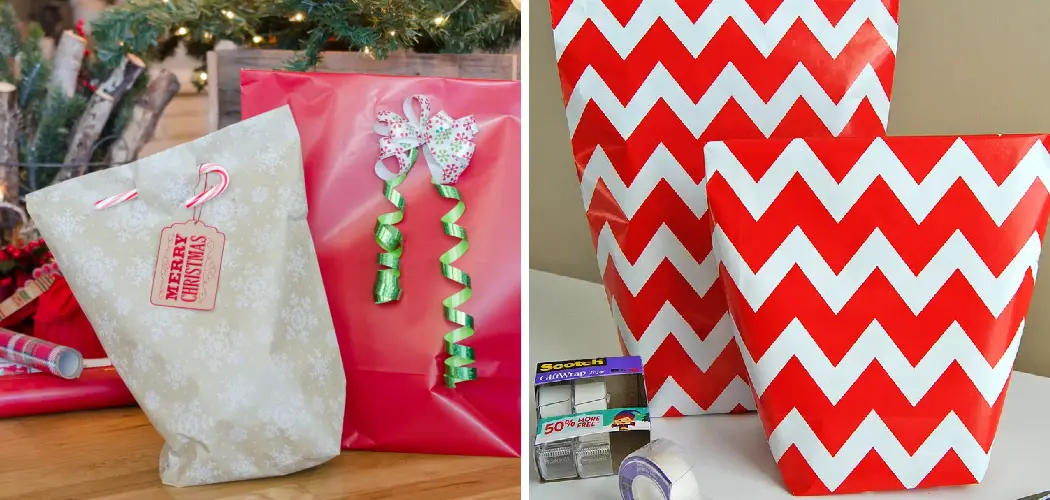
Who doesn’t love receiving gifts? Whether on holiday, birthday or just randomly during the year, presents are always a joy to receive. However, sometimes the unique way your presents are wrapped can add an extra bit of specialness and character. Adding personal flare to something like gift wrapping can really rev up the surprise factor.
This blog post will show you how to use some simple materials like paper, ribbon & glue in order to make great looking mini bags from wrapping paper! With lots of variations available (like colors, patterns, decorations), you’ll surely find this project both fun and useful for when you need to beautifully add those final touches of surprise when giving someone various items like candy, jewelry, etc.
So without further ado, let us dive into how to make a small bag out of wrapping paper!
What Will You Need?
Before starting your project, make sure you have all the materials needed in order to complete it. For this tutorial, we’ll need the following:
- Wrapping paper of your choice
- Scissors
- Ruler (optional)
- Glue and tape
- Ribbon or string to decorate it with.
Once you’ve got these items, you are now ready to begin!
10 Easy Steps on How to Make a Small Bag Out of Wrapping Paper
1. Cut the Wrapping Paper:
Cut a 19”x12” inch piece of wrapping paper or whatever size works best for your bag. You can use a ruler to make sure everything is cut consistently. Be careful when cutting, and make sure all edges are straight.
2. Make the Bag’s Bottom:
Fold in half and then unfold. You will now have two 12”x 9.5” pieces of paper that you can use to make the bag’s bottom and sides. Ensure that the folds are nice and neat. Otherwise, it might affect how your bag looks.
3. Make the Bag’s Sides:
Take one of the pieces, fold it in half lengthwise, and then unfold it again. Then take this piece and fold each side inward to look like an accordion or fan shape (see image below). Now repeat this same process with the other piece of paper.
4. Connecting The Bag:
Once both sides are folded, hold them together with glue or tape at their ends, leaving a slight gap between them for air circulation (see image below). This will form the base of your bag. If you have a hole punch, it might be useful to make holes in the sides where you’ve connected them together.
5. Adding The Handles:
Cut two 10” pieces of ribbon or string and attach them to the sides of the bag with glue or tape. Make sure that they are firmly attached, as this will be used for carrying it around. Don’t worry if your ribbon is a different color, as this can add to the look of the bag.
6. Secure The Bottom:
Now it is time to secure the bottom by taping both ends together at a 45° angle (see image below). This will help keep everything in place, making sure that nothing slips out from the bottom when you use your small bag! Be careful when taping, as too much tape might cause the paper to become wrinkled.
7. Decorate It:
Decorate your mini bag however you like! You can add ribbons, sequins, buttons – anything goes here, so get creative and have fun with it! You can add some small decorations to the handles as well if you wish. There are so many fun ways to make your bag look unique and special.
8. Adding an Extra Touch:
To add a personal touch, you can write the name of the person receiving the bag on one side. This always adds an extra specialness to any gift – no matter how small or big it is. Ensure that the letters are written legibly and neatly.
9. Finishing Touches:
Once all decorations are in place and everything looks good, fold over the top flaps of your mini bag and secure them into place with glue or tape. Make sure that they are firmly attached so nothing slips out from the sides when carrying them around. If you like, you can add some more decoration to the top as well.
10. Presenting It:
Your mini bag is now ready to go! You can now fill it up with goodies for friends and family or simply use it as a decorative item. Either way, you will have fun making this cute little bag out of wrapping paper – and get the chance to show off your creative skills at their best! Remember to have fun and enjoy the process.
We hope that you enjoyed this tutorial on making a small bag out of wrapping paper. Be sure to experiment with colors and patterns for even more interesting outcomes!
5 Additional Tips and Tricks
1. Use Double-sided Wrapping Paper: This gives you a different design for the inside and outside of your bag.
2. Add a Splash of Color to the Bag’s Handles: This is an easy way to customize your mini bag and make it more interesting.
3. Make Larger Bags Out of Multiple Sheets: You can combine two or more pieces of wrapping paper together in order to create larger versions of this type of bag.
4. Use a Hole Punch to Add Air Holes: This will help keep things inside the bag from getting too hot or humid, depending on what items you are storing inside it.
5. Store the Finished Product Flat: When not in use, store your mini bag flat so that it does not get crushed or wrinkled. This will help keep your bag looking fresh and in good condition for longer.
We hope that this tutorial on making a small bag out of wrapping paper has been helpful and informative. Have fun creating new and unique items with wrapping paper!
5 Things You Should Avoid
1. Don’t Use Too Much Tape: Too much tape will make the bag look lumpy and can ruin the design. Instead, try to use just enough so that the bag stays securely together.
2. Don’t Make Your Handles Too Short: Having short handles will make it difficult to carry the bag, especially if it’s full. Make sure that the handles are long enough for a comfortable fit when you tie the ribbon or elastic.
3. Don’t Underestimate Reinforcing: Reinforcing is essential to ensure that your mini bag stays together and doesn’t come apart easily. Be sure to reinforce all sides of your bag with tape or glue for extra security.
4. Don’t Forget About Air Holes: If you’re storing something inside the bag, be sure to create some air holes so that things don’t get too hot or humid inside.
5. Don’t Skimp on Decorations: Decorations can help liven up any item and they are especially important if you’re making something more special. Be sure to add some decorations to make your mini bag look even more amazing!
With these tips in mind, you can make sure that your small bag out of wrapping paper looks perfect every time. Good luck, and have fun creating!
5 Different Design Ideas
1. Floral Mini Bag: Use floral or patterned wrapping paper to make a mini bag with an eye-catching design.
2. Glittery Mini Bag: Make your mini bag sparkle and shine by using glitter wrapping paper as the main material.
3. Metallic Mini Bag: Add some pizzazz to your mini bag by using metallic wrapping paper. This will give it a unique, shiny look that stands out from the rest.
4. Emoji Mini Bag: Use emoji wrapping paper to create a fun and playful mini bag that is sure to turn heads!
5. Customized Mini Bag: Create your own designs with markers and paints for an extra special touch on your mini bag.
These are just a few ideas to get you started. Feel free to experiment and develop your own unique designs for a mini bag made of wrapping paper.
Conclusion
Crafting with wrapping paper can help you get creative and make useful products right in your own home. With the use of simple materials such as wrapping paper, scissors, a stapler, and ribbon or string, you can have your own personalized bag perfect for carrying small items in no time at all.
Whether you choose to customize it with colorful designs, playful designs, or even just plain paper to make a sleek and stylish bag, the possibilities are endless. With a little patience, creativity, and skill, you can make something that looks professionally done without spending too much money.
Once finished, not only will you be proud of yourself, but you’ll also be prepared with a useful and fashionable item that’s sure to draw some attention. So don’t forget about all the possibilities of working with wrapping paper!Hopefully, the article on how to make a small bag out of wrapping paper was helpful. Thanks for reading!