
Are you looking for an exciting new way to express your creativity? Do you love the idea of learning a new craft that has been around for centuries? If so, then making a paper bonnet could be just the creative outlet you’ve been searching for. Paper bonnets are easy and fun to make, totally customizable according to your individual style preferences, and bring together elements of both art and fashion.
In this blog post guide, we’ll walk through how to make a paper bonnet to help get you started on crafting your own fabulous paper bonnet from start to finish!
You Will Need the Following
- 1 yard of brown felt
- Measuring tape
- Pencil or pen
- Scissors
- White adhesive-backed foam for the buckle (optional)
- Needle and thread in matching color to felt
- Hot glue gun (optional)
7 Methods How to Make a Paper Bonnet
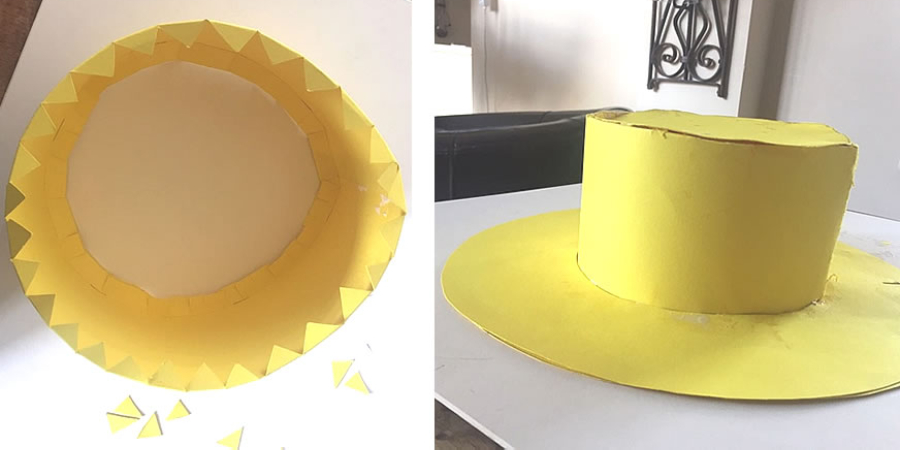
1. Fold the Paper in to Half
First, fold the construction paper in half lengthwise. This will be the center seam of your bonnet. Make sure that the colors of the paper are facing each other. However, you can select two sheets of the same color if desired. Make sure to press firmly along the fold to ensure a sharp crease.

2. Cut the Paper into a Semi-Circle
Next, cut the folded paper along the edge to create a semi-circle. Unfold the paper to reveal your bonnet shape. Make sure that the two sides of the bonnet are even. If the sides are uneven, adjust the paper accordingly. However, if the paper is too small to fit your head, fold it in half and cut it along the edge again. This will increase the size of your bonnet.
3. Cut Slits Along the Edge
Then, cut slits along the edge of the bonnet, about 1 inch apart. These slits will be used to tie the bonnet onto your head. Make sure to cut the slits large enough that you can tie your bonnet with ease. If you’re having trouble cutting the slits, use a razor blade or pair of scissors. Although it may take a bit longer, it will result in neater slits. However, be careful when using tools.
You don’t want to accidentally cut yourself. Make sure to place a cloth underneath the bonnet to protect your work surface.
4. Decorate the Bonnet
Now you can decorate your bonnet however you like! You can use markers or crayons to draw designs on the bonnet or glue on pieces of ribbon or fabric. Although it’s not necessary, you can use a glue gun to attach decorations like sequins or feathers.
If you want to make your bonnet extra special, you can add a piece of elastic to the sides to attach it to your head. Have fun and get creative! Once you’ve decorated your bonnet, you can show it off to all of your friends and family.

5. Fold Down the Slits
Once you’re done decorating, fold down the slits that you cut earlier. This will help keep the bonnet tied to your head. You can also use a string or ribbon to tie the bonnet around your head for extra security. Then, you’re all done and ready to show off your new bonnet.
Although this may seem like a daunting task, it’s actually quite easy once you know the steps. So go ahead and make your own bonnet to serve as both a fashion statement and a protective tool. Enjoy!
6. Tie the Bonnet Onto Your Head
Finally, tie the bonnet onto your head using the slits as ties. Make sure it’s tied snugly so that it doesn’t fall off! Once you’ve secured the bonnet, you can wear it all day long to protect your hair and keep it looking neat. If you’re going to be outside for an extended period of time, you may want to wear a hat or scarf over the bonnet for extra protection from the elements. However, the bonnet should provide enough coverage on its own.
7. Wear Your Bonnet Proudly!
You did it! Now you can wear your paper bonnet with pride, knowing that you made it yourself. Feel free to decorate your bonnet with ribbons, lace, feathers, and whatever else catches your eye. Show off your hard work at the next outdoor event or parade.
Plus, it’s a great way to keep the sun out of your eyes and stay cool in the summer heat. If you like making a paper bonnet, challenge yourself to make other types of hats or accessories. There’s no limit to what you can create! Have fun and be creative.

There you have it, the complete guide on how to make a paper bonnet. With just a few simple materials and some creativity, you can craft a stylish paper bonnet in no time! Have fun expressing your individual style with this timeless craft.
How do you make a quick bonnet?
To make a quick bonnet, you will need the following materials: fabric (1/2 to 3/4 yard depending on the size of the desired bonnet), scissors, measuring tape, thread, and elastic (optional).
Begin by cutting two pieces of fabric that are approximately 16 inches long by 14 inches wide for an average-sized adult. Cut a 2-inch slit in both pieces of fabric, as shown in the illustration below. Fold each piece in half lengthwise with the right sides together and stitch along the outside edges, leaving the top open.

Next, fold the raw edges over 1 inch and press. Turn your project right side out and tuck one end into the other to form a cylinder shape. Stitch across the open edge to create the bonnet.
If desired, you can add elastic or ribbon along the inside raw edges to ensure a secure fit. You’re now ready to wear your new quick bonnet! Enjoy!
You Can Check It Out To Make a Paper Tree for Classroom Wall
How Do You Make a Smurf Hat?
Making a Smurf hat is an easy craft project that kids of all ages can enjoy. Here’s how to make your own:
1. Start with a plain blue baseball cap or beanie. If you don’t have one already, you can find them at most stores that sell apparel and accessories.
2. Measure the circumference of your head and cut out two circles from white felt, each one slightly larger than the measurement you took. Also, cut a 2-inch wide strip of white felt long enough to go around the base of the hat.
3. Attach the felt circles to the front and back of the hat using fabric glue or safety pins. Then attach the felt strip around the base of the hat.
4. Cut out two small white circles for the eyes and a red circle for the nose from felt or fabric markers, and attach them to the front of the hat with fabric glue or safety pins. You can also use a craft foam sheet if you prefer thicker features.
5. Finally, cut out two curved strips from blue felt to make Smurf ears, and attach them atop either side of the hat using fabric glue or safety pins. Voila! You have your very own Smurf hat! Enjoy!
Now you can wear your Smurf hat with pride and show off your craftsmanship to everyone. You could even attach a few accessories, like pom-poms or ribbons, to make it even more special. Have fun!

Is Being a Smurf Bannable?
No, being a Smurf is not bannable. The term “Smurfing” generally refers to using multiple accounts in multiplayer games to gain an unfair advantage over other players. While this can be considered cheating and could potentially lead to a ban from the game, simply playing as a Smurf does not constitute a bannable offense.
In many cases, people play on alternate accounts for reasons other than gaining an advantage—such as trying out new strategies or characters without risking their main account’s progress—so it’s important to understand why someone might be playing on more than one account before taking action against them. Unless multiple players are found to be colluding to obtain an unfair advantage, playing as a Smurf should not result in a ban.
However, it’s important to remember that each game has its own set of rules and regulations and that some developers do consider Smurfing to be a bannable offense. If you are unsure whether or not your behavior constitutes cheating, it is best to review the game’s terms and conditions carefully before engaging in any activities that could potentially lead to disciplinary action.
How to Make a Pilgrim Outfit?
Making a Pilgrim outfit is surprisingly easy. All you need are a few basic supplies and some simple sewing skills to create a timeless costume for Thanksgiving or any other special occasion. Here’s how to make your own:
1. Start by cutting two rectangles of brown fabric, each one twice as wide as the circumference of your head, plus an extra inch for seam allowance.
2. Next, pin the two rectangles of fabric together and sew along the edges to create a cylinder shape. Turn your project right side out and press down flat with an iron.
3. Cut two circles from white fabric large enough to fit over your head and wrists, then sew each one to the end of the cylinder.

4. Attach a white collar around the neckline of your bonnet and sew it in place. Then, cut two strips of fabric (1 inch wide by 15 inches long) and attach them to either side of the bonnet as ties.
5. To finish off the outfit, cut two rectangles of fabric to fit around your waist and attach them with a belt or ribbon. You can also add some braid trim for a more authentic look.
Now you’re ready to show off your Pilgrim costume! Whether it’s for Thanksgiving dinner or just a
You Can Check It Out To Dye Paper Doilies
Things to Consider When Making Paper Bonnet
1. Choose a Pattern
There are many different bonnet patterns to choose from, such as Victorian, Edwardian, and even modern styles. Consider the style of your outfit and what look you want to achieve before selecting a pattern.
2. Select Suitable Fabric
The fabric should be lightweight yet strong enough to keep its shape once cut out and sewn together. Plain cotton fabrics work best for paper bonnets, while prints or patterns can be used to add more flair and interest to the design.
3. Cut Out Pieces Accurately
Making sure that all pieces of fabric are cut accurately is essential for creating a good-looking bonnet. To ensure accuracy, use templates or stencils when cutting out the pieces.
4. Use a Sewing Machine
Using a sewing machine will make the process of assembling the bonnet much easier and quicker. Make sure to use an appropriate thread for your fabric and practice on some scraps first to get used to using the machine.
5. Add Finishing Touches
Once you’ve completed assembling and sewing the bonnet, it’s time to add any finishing touches such as ribbons, lace, or bows. You can also embellish with beads or other materials for an extra special look!
6. Enjoy Your Creation
The satisfaction of creating your own paper bonnet is truly rewarding! Now that you have your beautiful new accessory, why not show it off? Wear it with pride and enjoy your one-of-a-kind creation.
7. Store Properly
To ensure that your paper bonnet lasts for many years, store it in a safe place away from direct sunlight and heat. This will help preserve the shape of your bonnet and keep it looking good for longer.
These are just some things to consider when making a paper bonnet. With patience and practice, anyone can create a beautiful, unique headpiece to wear or display in their home. Don’t be afraid to experiment and try new techniques.
Conclusion
It’s not difficult to make a paper bonnet, and the steps are easy to follow. With a little bit of patience, you can have a beautiful bonnet that will last for many years. You can make an old-fashioned paper bonnet to protect your Easter Sunday best. All you need is some tissue paper, ribbon, and a hot glue gun.
With just a few simple supplies, you can make a beautiful and unique bonnet that will keep you looking good all day long. We hope this guide on how to make a paper bonnet was helpful. Please share it with your friends on social media if you find it useful. And be sure to check back here soon for more informative guides like this one.