
Are you constantly trying to expand your skill set with new hobbies and activities? Have you been looking for an easy but unique project to try out? Crafting the perfect origami crow is a great place to start! Not only is this an enjoyable activity that requires only basic supplies, but it also results in a decorative model that you can proudly display.

With just a few pieces of paper and some folding techniques on how to make a origami crow, you can create stunningly realistic crows that will draw admiration from everyone who sees them. Read on for step-by-step instructions about how to make an origami crow using traditional Japanese art form methods!
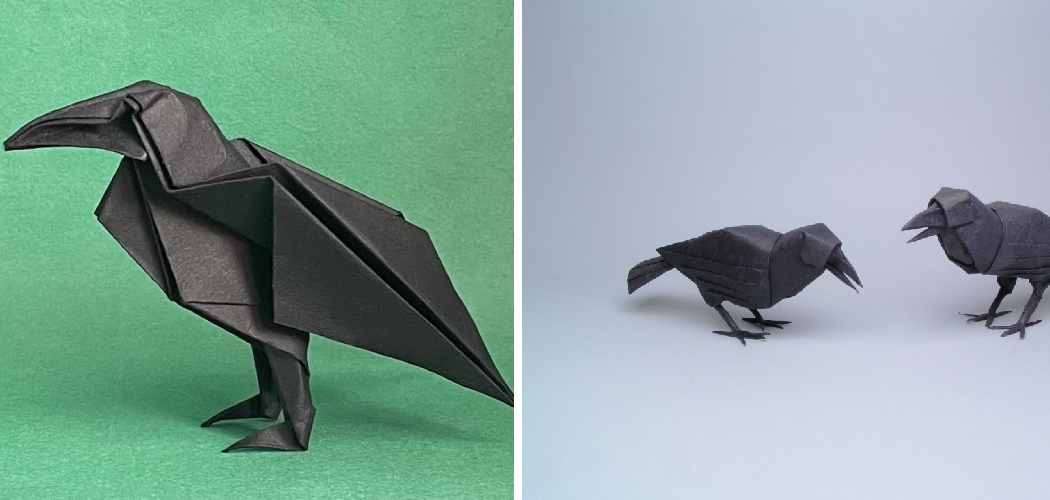
What is Origami Crow?
Origami is the traditional art of paper folding, derived from Japanese culture. It is believed to have originated in China during the sixth century and spread to Japan in the 17th century before being popularized worldwide.
Origami cranes and other birds are one of the most common symbols associated with origami, as they represent peace, luck, and prosperity. Creating a lifelike origami crow is both a challenging and rewarding project that can be completed in fewer than 15 minutes.
Supplies Needed to Make an Origami Crow
To make a perfect origami crow, you will need the following supplies:
- 2 Sheets of Paper (Any Type or Size Will Work)
- Scissors
- Glue
- A Pencil
- A Ruler
- 2 Googly Eyes (Optional)
11 Step-by-step Guides on how to make a origami crow
Step 1: Prepare Your Paper
Fold your paper in half, then unfold it. This will make a crease that you can use as the midpoint for the origami crow. Use scissors to cut along the fold line and create two identical pieces of paper. It is important to make sure that the paper pieces are of equal size, so use a ruler if necessary. But don’t worry if the pieces are not perfectly symmetrical, as long as they are close enough.

Step 2: Trace Your Pattern
Using a ruler and pencil, trace a pattern on each sheet of paper. This pattern should be a triangle with 4 lines coming out from one side and curving downward, resembling a crow’s wing. This pattern will be used to create the origami crow’s wings. But make sure that you trace the pattern on both sheets of paper, as this will ensure that both wings are perfectly symmetrical.
Step 3: Cut Out Your Pattern
Use scissors to carefully cut out your traced pattern. Repeat this process for both pieces of paper. It is important to create clean and precise cuts, as this will make the origami crow look more realistic.
This is why it is essential to use a ruler and pencil when tracing your pattern in step 2. This will make it much easier to cut out the pattern perfectly. But don’t worry if the edges are slightly jagged; as long as they are close enough to symmetrical, the origami crow will still look great!
Step 4: Fold the Wings
Fold the wings of your origami crow. Start with one piece of paper and make 8 folds in total, creating 4 wings for each side. This is where the pattern you traced in step 2 will come in handy, as it allows you to accurately create symmetrical wings.
Repeat this process for the second piece of paper, making sure that both wings look identical. This is the most critical step when creating an origami crow, as it will determine how lifelike your model looks.
Step 5: Form the Head
Take your second piece of paper and fold it in half, then unfold it. This will create a crease that you can use to form the head of the origami crow. Make 4 folds to create a beak and 2 eyes.
But make sure to keep the folds symmetrical, as this will make your origami crow look much more realistic. It is also important to make sure that the beak and eyes are the same size as the wings from step 4, as this will ensure that your origami crow looks realistic.

Step 6: Attach the Head
Attach your head to the body by folding one side of the paper over and gluing it in place. You can also use glue to attach the beak and eyes if you wish. But make sure that all of the folds are held in place, as this will ensure that your origami crow looks lifelike. You can also add extra details like googly eyes if desired.
Step 7: Add Details
Add details to your origami crow such as feathers and eyes. You can also use googly eyes to give your origami crow a more realistic look. It is important to make sure that all of the details are symmetrical, as this will make your origami crow look much more lifelike. It is also important to make sure that the details are held in place with glue, as this will ensure that your origami crow does not lose its shape.
Step 8: Fold the Tail
Fold the tail of your origami crow using 4 folds. Make sure that all of the folds are equal in size and shape, as this will make your origami crow look more realistic. You can also use glue to hold the folds in place if desired.
It is important to make sure that the tail is symmetrical, as this will ensure that your origami crow looks lifelike. However, feel free to add extra details like feathers or googly eyes if desired.
Step 9: Create Legs
Create legs for your origami crow by making two folds that resemble small triangles. It is important to make sure that both legs are the same size and shape, as this will make your origami crow look much more lifelike. You can also add details like feathers or googly eyes if desired.

Step 10: Attach the Legs
Attach the legs to the body of your origami crow by gluing them in place. But make sure that both legs are symmetrical, as this will make your origami crow look much more lifelike.
You can also add extra details like googly eyes if desired. This will give your origami crow a more realistic look. It is important to make sure that the legs are held in place with glue, as this will ensure that your origami crow does not lose its shape.
Step 11: Finish Your Origami Crow
Your origami crow is now complete! Once it has dried, you can proudly display it as a unique and decorative piece of art. Always remember to be creative and experiment with different patterns, shapes, and colors. This will make your origami crow much more unique and interesting.
Making an origami crow is an enjoyable activity that anyone can take part in. With just a few pieces of paper, you can create stunningly realistic crows that will draw admiration from friends and family alike. If you’re looking for a fun but challenging project to work on, why not try making your own origami crow today?
Following these steps on how to make a origami crow should help ensure that your origami crow looks as realistic and lifelike as possible. With a bit of practice, you can create beautiful crows of all shapes and sizes – so why not give it a try?
How Much Will It Cost?
With just a few basic supplies, it is easy to make an origami crow at an affordable cost. All of the items listed above can be found in most local craft stores for between $5 and $10. It is also possible to find these materials online, which can help keep costs down even further.
Creating an origami crow is a great way to practice your folding skills and learn new techniques in origami art. Not only will you end up with a beautiful model of a bird, but it can also be used as decoration or given as a thoughtful gift. So why not get creative and give origami cranes a try today?
Frequently Asked Questions
Q: What Type of Paper is Best for Making an Origami Crow?
A: Any type of paper can be used to make an origami crow – from regular printer paper to decorative scrapbooking paper. However, it’s important to note that thicker papers will bode better for the project, as they can be easier to fold and shape.

Q: How Long Does It Take To Make an Origami Crow?
A: Depending on your skill level, it should take between 10-15 minutes to make one origami crow from start to finish. However, if you are a beginner, it may take longer as you gain more experience with origami folding techniques.
Q: Can I Use Glue To Hold The Pieces Together?
A: Yes, glue can be used to hold the pieces of your origami crow together and make sure they don’t come apart. However, it is not necessary if you are careful when folding and shaping the paper.
Conclusion
Congratulations, you have made your own origami crow! Creating an origami crow is a fun and creative way to get closer to nature. Not only this, but it’s also an interesting way to spend time with the family. Much like any other craft project, when making an origami crow, patience is key. With this skill, you can make more birds, animals, geometric shapes or anything else that you come up with!
Crafting is a great way to express your artistic side and express yourself. So be sure to try out this DIY origami crow if you are looking for something special and unique! Thanks for reading this article on how to make a origami crow.