
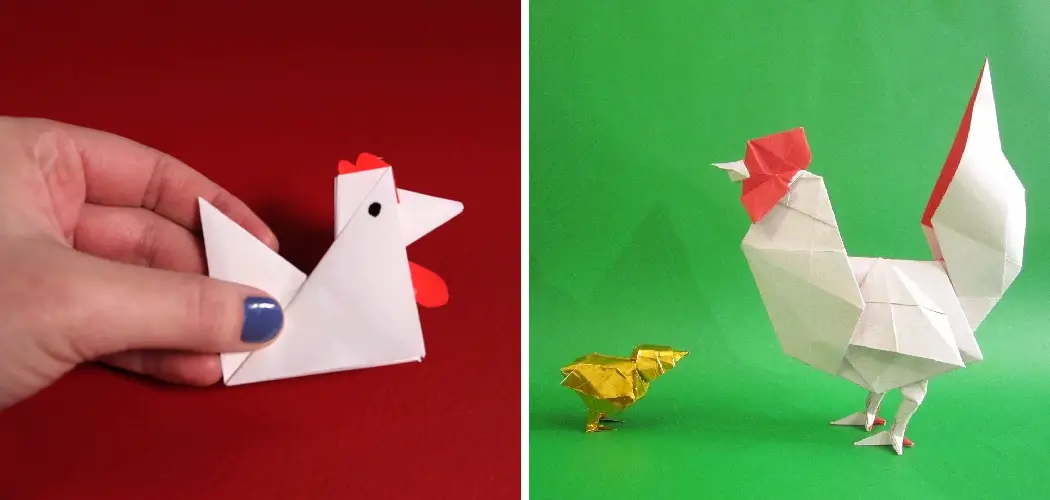
Are you ready to learn something new and crafty? Then why not try your hand at making an origami chicken? Origami is the art of paper folding, allowing us to build stunning shapes out of simple materials.
Whether you’re a beginner or an expert, this guide will help you create a chicken that looks realistic and could easily be mistaken for the real thing. Just follow the steps below, and you’ll be an origami chicken master in no time!

With just a few folds and techniques, you’ll be able to create a perfectly detailed little bird with the help of this tutorial. Get all your paper or cardstock together, and pull up a chair by your crafting table — it’s time for some origami fun! Keep reading to learn more about how to make a origami chicken!
What Will You Need?
Before you begin, it’s important to prepare your supplies. You’ll need:
- A square piece of paper or cardstock
- Pencil
- Scissors
It’s time to begin once you’ve gathered all the necessary supplies.
10 Easy Steps on How to Make a Origami Chicken
Step 1: Prepare the Paper
Start by taking your paper or cardstock and folding it diagonally in half to make a triangle. Then unfold the paper and fold the top left corner to meet with the right side of the triangle. Unfold again and repeat this process on the right side.
Step 2: Make a Flap
Fold the paper in half, horizontally. Unfold it, then fold the top left corner up to meet with the bottom right corner of the triangle. You should now have a small triangle shape sticking out from beneath your original triangle. This is called a flap.
Step 3: Fold the Beak and Head
Take the top right corner of your triangle and fold it down to meet with the bottom left corner. Unfold this again, then fold the top right corner up slightly so that it meets with the center crease of your origami chicken. This will form the beak of your chicken.
Step 4: Create the Wings
Fold the sides of your paper inwards so that they meet with the center crease. This will form your chicken’s wings. Make sure you leave some space between the wings and the head, giving it a more realistic look.

Step 5: Shape the Tail
Flip the origami over. You will see a small triangle at the bottom. Fold this triangle upwards to create the tail of your chicken. Depending on your preference, you can make the tail as long or as short as you like. Remember, the longer the tail, the more dramatic your origami chicken will appear.
Step 6: Make the Feet
Fold the bottom corners of your origami chicken upwards to create the feet. Be sure to leave some space between the feet and the body. You can vary the size of the feet depending on your preferences. Unfold these folds so you can see the crease.
Step 7: Finalizing the Feet
Refold the bottom corners upwards along the crease that you just created. This time, however, fold them a bit more so that the feet stick out from beneath the chicken’s body. This will give your origami chicken a more realistic look.
Step 8: Final Touches
Now that your origami chicken has its feet, it’s time to give it a final look. Flatten out the folds, and make sure everything is in place. Add some eyes to your chicken with a pencil or a marker. And there you have it, your very own origami chicken!
Remember, origami is an art, and practice makes perfect. Don’t worry if your first few attempts need to look more right. Keep trying, and you’ll soon have a flock of origami chickens!
Step 9: Practice and Experiment
Now that you’ve created your first origami chicken, you can practice and experiment to improve your skills. Feel free to play around with different sizes of paper or even different colors to make your chickens unique.
Remember, the more you practice, the better you will get, and soon you’ll be able to fold an origami chicken with speed and precision. Be bold and make mistakes as they are part of the learning process in origami and any form of art. Be patient with yourself, enjoy the process, and have fun creating your origami masterpieces!

Step 10: Display Your Origami Chicken
Now that you have created your origami chicken, it’s time to display it. You can place your chicken on a shelf, desk, or flat surface. Alternatively, you can hang it from the ceiling or a window using a piece of string.
You can also consider giving it as a gift to a loved one, or even use it as a festive decoration during the holiday season. The possibilities are endless, and the joy of sharing your handmade origami chicken is priceless. So go ahead and show off your new origami skills with pride. Congratulations on successfully creating an origami chicken!
Following this guide, you can create a realistic origami chicken in no time. Remember to take some pictures of your masterpiece and share them with us on social media! We’d love to see what you’ve made.
5 Additional Tips and Tricks
- After you have completed your origami chicken, use a bit of glue or tape to secure the pieces together. This will help ensure it keeps its shape and looks great for years.
- To add extra detail, add some craft feathers or other small decorations around the wings and head of your origami chicken.
- If you want to add more of a challenge, try making the origami chicken with just one piece of paper. This will require extra precision and skill but can produce an impressive result.
- Make an origami rooster by adding a crest to your finished chicken. Just glue a small triangle-shaped piece of paper to the top of the head.
- Get creative! You can use a variety of paper to make an origami chicken. Try using colored or patterned paper for fun effects or multiple shades of the same color for a rainbow-inspired design.
Happy folding! And don’t be afraid to get creative with your origami chickens – you never know what kind of masterpiece you can create! Have fun and enjoy the process.

5 Things You Should Avoid
- Don’t rush when making your origami chicken. Take your time and make sure to check all the lines, angles, and folds before proceeding to the next step.
- Over-stretching the paper can cause it to tear, so be careful not to pull it too hard when making your origami chicken.
- Ensure you have a good pair of scissors that is sharp enough to cut through the paper. Dull blades can lead to ragged edges and an uneven finish.
- Don’t be tempted to use pre-cut pieces of paper – this will take away from the traditional origami experience and limit your creativity.
- Try to avoid getting too caught up in the details. Remember, it’s all about having fun and enjoying the process. If you get too stressed, put down your origami chicken for a while and return to it later.
Avoiding these common mistakes will help you make an origami chicken that looks great and stands the test of time. Enjoy!
How Do You Fold a Chick?
Folding a chick is one of the most popular and fun origami models. It involves folding the paper into different shapes and sizes to create a 3D figure resembling a chicken.
The process involves first creating an initial base shape, typically a triangle or square, then adding smaller folds and details to give it more definition. The trick is to work with the paper in small stages rather than trying to make it all at once.
Once you’ve got your base shape down, it’s time to add more folds and details. To do this, try matching up two edges and folding them together until they meet in the middle of the paper – this will give your chicken a beak. You can also use a pencil or pen to draw on some eyes and wings.
From there, the process is all about adding smaller details and tweaking until you get the exact shape and size that you want. Finally, add some color with markers, crayons, or paints to finish your chicken – it will surely be an impressive result!

Conclusion
Crafting a paper origami chicken can be fun and rewarding! Not only is it an enjoyable way to spend an afternoon, but also you gain a sense of satisfaction when the model is complete. Furthermore, creating intricate origami designs can help improve your patience and concentration.
By taking the time to understand and learn the art of origami, practitioners may find themselves gaining new skills while enjoying a calming hobby. If you have the necessary supplies and patience to follow instructions, anyone can make their origami chicken. With practice, you’ll be crafting astounding paper art works in no time!
Hopefully, the article on how to make a origami chicken has helped get you started on this creative and calming craft. Good luck!