
Making mistakes while crocheting is inevitable, but learning how to fix them is an essential part of the craft. Fixing crochet mistakes helps you learn from your errors and improve your technique. It also helps you complete a project with confidence and pride in the finished product. With practice and dedication, even the trickiest crochet mistakes can be corrected.

One of the main advantages of knowing how to fix crochet mistakes is that it helps to increase a crocheter’s confidence. Crocheters can become frustrated when they make a project mistake, as it takes a lot of time and effort to undo what has been done. By identifying and fixing crochet mistakes confidently, crocheters can quickly move on to the next part of their project and continue with confidence. In this blog post, You will learn in detail how to fix crochet mistakes.
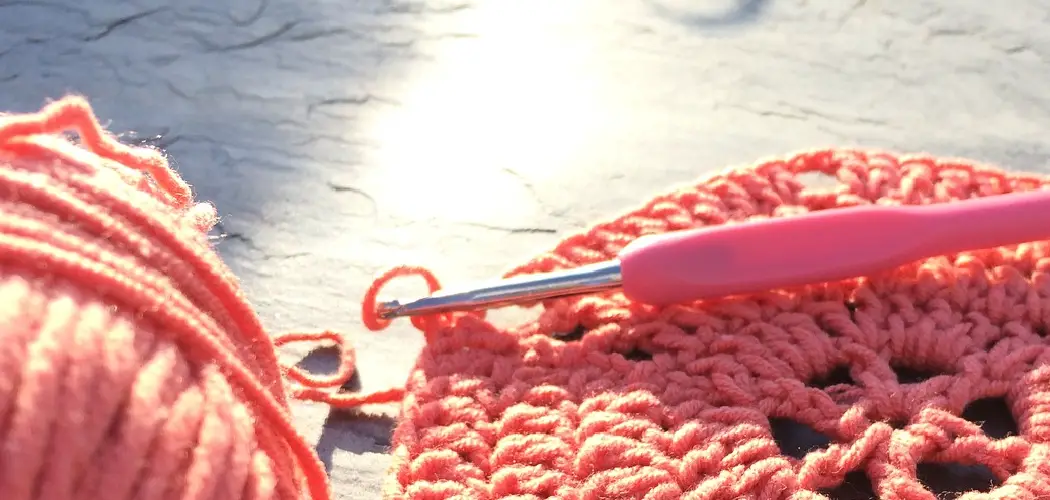
Step-by-Step Processes for How to Fix Crochet Mistakes
Step 1: Inspect the Mistake
Take a close look at the mistake and try to figure out what went wrong. A common mistake is using the wrong type of stitch, so double-check to ensure you are using the right one. If it’s a more complex issue, try to break down the mistake into smaller parts and identify where exactly things went wrong. This can help you determine the best way to fix it. You can also use a stitch marker or different colored yarn to mark the area where the mistake occurred for easier reference.
It’s also essential to check if the mistake has affected any other parts of your work. Sometimes, a small error can cause a ripple effect on the rest of the project, so make sure to inspect the surrounding stitches as well.
Step 2: Gather Your Supplies
Make sure you have all of the tools and supplies necessary to fix a crochet mistake. This includes scissors, extra yarn, a crochet hook, and any other items you may need. Carefully and slowly, undo each stitch until you reach the mistake. Be patient; it will take time and concentration to get this right.
But if you’ve already completed a few more rows of stitching after the mistake, it’s best to start over from the previous row. This may seem like a setback, but it will ensure that your final product is neat and error-free.
Step 3: Remove the Mistake
Once you have identified and undone the mistake, carefully remove it from your work. You may need to use scissors to snip out a single stitch if it is small enough. If not, gently pull out the yarn with a crochet hook or one of your fingers. Be careful not to unravel the entire piece.
There are also times when you may need to undo multiple rows to fix a mistake. In this case, make sure to keep the yarn under tension so that you don’t lose your work.
Step 4: Replace the Stitch
Once the mistake is removed, you can now replace it with the correct stitch. Refer to your pattern and ensure you are using the right stitch type. If you’re unsure which one to use, consult a crochet reference book or online tutorial for help. It’s also helpful to count your stitches to make sure you have the correct number.

The replacement stitch should be inserted into the same spot where the mistake was removed. This will ensure that your work stays even and doesn’t create any holes or gaps. You can use the crochet hook to pull up a loop and then continue stitching as usual.
Step 5: Continue Your Work
Now that you’ve corrected the mistake, keep going! Keep up your stitch count, and don’t forget to double-check for any other mistakes. With patience, practice, and a bit of trial and error, you can fix crochet mistakes when they arise. There’s no need to fear making mistakes while crocheting; instead, embrace them as opportunities to learn and improve your skills. It’s important to remember that making mistakes is a natural part of the learning process, so be patient and have fun!
Step 6: Fixing a Missed Stitch
A common mistake among beginners is to miss a stitch, which can throw off the overall pattern. To fix this, simply insert your hook into the missed stitch and create the necessary stitches around it. If you are unsure how many stitches to add, refer back to your pattern. But don’t worry if you make a mistake and can’t figure out how to fix it. You can always use the missed stitch to create a new design or add an embellishment to your project.
The key to fixing crochet mistakes is to take your time, be patient with yourself, and not let frustration get the best of you. Mistakes can be a learning experience and even lead to new creative ideas in future projects.
Step 7: Fixing a Decrease Mistake
If you accidentally decrease too many stitches, simply increase the same number of stitches in the following row to balance out the pattern. This may require adding extra stitches within the row or increasing at the beginning or end. It’s also helpful to make note of where the decrease mistake occurred in case you need to fix it again in the future.
Although fixing crochet mistakes may seem daunting at first, it’s an essential skill for any crocheter to master. With patience and practice, you can confidently identify and fix mistakes in your projects, leading to a more enjoyable crocheting experience overall.
Step 8: Fixing an Increase Mistake
For an increase mistake where you have added too many stitches, simply decrease the same number in the following row. You may need to remove extra stitches within the row or decrease them at the beginning or end. But just like with any other mistake, don’t let it discourage you. Instead, see it as an opportunity to improve and develop new techniques. With each mistake fixed, you’ll become more confident and skilled in your crocheting abilities.
It’s also essential to take breaks and step back from your work if you feel frustrated or overwhelmed. Crocheting is meant to be a relaxing and enjoyable hobby, so don’t let mistakes take away from that. Remember, practice makes perfect, and with determination, you can become a master at fixing crochet mistakes.
Step 9: Fixing a Tangled Yarn Mistake
If your yarn becomes tangled, take a deep breath and carefully untangle it one loop at a time. It may help to pull gently on each side of the knot to loosen it before attempting to untangle it. If the yarn is too tangled and difficult to untangle, you may need to cut it and reattach a new piece. Don’t worry; this won’t affect the overall look of your project.
You can also prevent yarn tangling by keeping your skeins organized and using a yarn bowl or bag when working on larger projects. Additionally, taking breaks to stretch and move your hands can help reduce the likelihood of tangled yarn.
Step 10: Practice, Practice, Practice
The best way to improve your skills in fixing crochet mistakes is to practice. The more you encounter and fix different types of mistakes, the more confident and skilled you will become. Look for online tutorials or seek guidance from experienced crocheters if you need additional help. It’s also helpful to document your mistakes and how you fixed them in a notebook for future reference.
Following these steps on how to fix crochet mistakes and staying calm and patient will allow you to easily fix any crochet mistakes that may occur. With practice, you’ll become more confident in your abilities as a crocheter and be able to tackle any mistakes with ease. So don’t fear making mistakes; instead, embrace them as opportunities for growth and improvement in your crocheting skills.
Precautions for How to Fix Crochet Mistakes
- Ensure a good light source and an adequate magnifying device to see the stitches that need to be adjusted clearly.
- Take your time and recognize when it’s time for a break. Crochet mistakes often occur because of fatigue or rushing through the project.
- Always use a stitch marker to mark the rounds and rows you are working on. This way, if you have to unravel or rip out stitches, it will be easier to find where you need to begin again.
- Always work with a crochet hook that is appropriate for the size of your yarn so that mistakes can be fixed quickly and easily.
- Be sure to double-check your pattern instructions and review the crochet abbreviations before starting a project.
- Have plenty of stitch counters or markers on hand so mistakes can be easily identified and corrected without having to rip out too much of the work.
- If you are trying to fix a crochet mistake, try to keep the tension of your yarn consistent. This will help you make sure that mistakes are corrected correctly and evenly throughout the entire project.
- Be sure to check for mistakes often as you go along rather than waiting until the end of a project. This way, if there is an issue, it can be fixed quickly and easily.
You can avoid and fix crochet mistakes quickly and efficiently by taking the necessary precautions.
How Do You Fix an Incorrect Stitch in a Row of Crochet?
One of the most common mistakes when it comes to crocheting is an incorrect stitch in a row. Fortunately, fixing this mistake isn’t too hard and can be easily done. The key is to be patient and take your time so that you don’t mess up the rest of your pattern or make a mistake bigger than it already is. The first step to fixing an incorrect stitch in a crochet row is to identify the mistake. Look closely at your work and figure out which stitch isn’t quite right. Once you have identified the error, it’s time to start working on it.
The next step is to take out the stitches that came after the mistake. You want to take out enough stitches so that the mistake is no longer visible. This can be done by undoing the last stitch and pulling your yarn through until you’ve reached your desired length. Once this is done, you must re-crochet the correct stitch instead of the incorrect one. To do this, start by making a slip knot, put your hook through the next stitch, and start crocheting as usual. Check each stitch to ensure it is the right type of stitch; this will help you avoid any further mistakes in the pattern.

How Do You Avoid Common Mistakes While Crocheting?
- Start with a gauge swatch: A gauge swatch will help you determine the amount of yarn and hooks needed for your project and ensure that your finished item is the correct size. It’s also useful for identifying common mistakes like uneven tension or skipped stitches.
- Read the pattern thoroughly before starting: Many crochet patterns will have specific instructions for making a particular stitch or pattern. Take the time to read through these instructions carefully before beginning, and consult with other crocheters if anything is unclear.
- Pay attention to your tension: How you hold your yarn and hook as you work can greatly impact the finished product. Ensure you’re not pulling the yarn too tight, as this can make it difficult to work with and may cause your stitches to be uneven or inconsistent.
- Count your stitches regularly: Keeping track of how many stitches you have made is important to crocheting. Double-check that you’ve made the correct number of stitches at the end of each row and adjust as necessary.
- Take regular breaks while crocheting: Working on a large project can be tiring, so it’s important to take regular breaks to rest your hands and eyes. This will help you stay focused and make fewer mistakes in the long run.
- How to fix mistakes when they happen: If you do make a mistake, don’t be discouraged. With a bit of patience and practice, it is possible to correct most errors in crochet. If you have made a mistake in the pattern itself (like using the wrong stitch or repeating the wrong number of stitches), you may need to start over from the beginning.

Once you’ve learned how to identify and fix crochet mistakes, you’ll be confident in creating beautiful projects. With a bit of practice and patience, anyone can learn the basics of crocheting and create something special.
You Can Check It Out To Crochet a Buttonhole
How Do You Fix a Hole in Your Crochet Work?
If you crochet for any length of time, chances are you’ll end up with a hole in your work. How you fix it depends on what type of hole it is and how large it is. For small holes, an easy solution is to simply stitch the area closed using a tapestry needle and yarn or thread of a similar color. You may need to undo the stitches for larger holes and rework your project. This involves removing the stitches until you reach the hole, then redoing them correctly.
Another option is to use duplicate stitches or embroidery techniques to “patch up” holes in crochet work. To do this, you will use yarn to stitch over the hole in a way that mimics the pattern of stitches around it. This works best for small holes and can be especially effective when using multi-colored yarns or adding decorative touches to your work. No matter what method you choose, fixing crochet mistakes is not always easy, but you can create beautiful, flawless crochet projects with practice and patience.
How Can You Tell if Your Hook Size is Not Correct for the Pattern?
One of the most common mistakes when crocheting is using a hook size that isn’t quite right for the pattern. How can you tell if this is the case? Generally, if your stitches are too tight or too loose compared to what’s called for in the pattern, it may be because of an incorrect hook size. To determine what size hook you should use, check the label on your yarn or refer to the pattern instructions.
It’s also helpful to read reviews of similar patterns and look for notes about what size hook people used. If you find that the hook size recommended doesn’t seem to give you the right results, try using a larger or smaller hook until it produces the desired result. The key is finding the size that helps you produce even, consistent stitches and gives you a stitch gauge close to what’s in the pattern instructions.

Another way to tell if your hook size is incorrect is to look at the finished project. If it looks too dense or too broad compared to what you were expecting, the hook size may be off. Try to analyze the pattern closely and determine which loop or stitch is causing the issue. You may need to adjust your hook size until you get the desired effect.
Conclusion
In conclusion, fixing crochet mistakes can be a tricky and time-consuming process, but it doesn’t have to be daunting. With patience and practice, your crochet skills will soon improve so that making fewer mistakes is the norm. Remember the techniques outlined above and use them as needed to undo errors, change patterns or add texture to your crochet projects.
With a little effort and dedication to learning proper techniques, you can ensure that each project you create is exactly what you envisioned it to be. I hope this article has been beneficial for learning how to fix crochet mistakes. Make Sure the precautionary measures are followed chronologically.
You Can Check It Out to Make a Crochet Pattern Smaller