
Crochet edging is a great way to add decorative touches to any fabric item. Whether you’re making a stylish top, pillowcase, or dress, adding crochet edging gives the piece an extra special touch that will set it apart from other creations. However, for the crochet edging to look its best, you must ensure evenly spaced and properly sized holes in the fabric. This is where learning to make holes in the fabric for crochet edging comes in handy.

There are numerous advantages to making holes in the fabric for crochet edging. First, it allows the user to customize their project to fit exactly the look and feel they want. Additionally, the holes can be made with any type of thread or yarn that is desired so that the design can match any color scheme. Furthermore, creating these small holes helps to ensure a good fit when using larger crochet hook sizes so that the fabric is held securely in place. In this blog post, You will learn in detail how to make holes in fabric for crochet edging.
Tools You Are Required
Ruler:
To get the right spacing for your holes, you will need a ruler. A clear plastic ruler works best as it allows you to see both sides of the fabric. It’s also important to use a ruler that measures in inches and centimeters.
Fabric marking tool:
This is an essential tool when making holes in any type of fabric. You can choose from chalk, washable fabric pens or pencils, or marking wheels. Whichever tool you choose, just make sure it works well with the type of fabric you’re using.
Small scissors:
Small scissors are needed to make small snips in the fabric to make the holes. Make sure they are sharp and pointed for accuracy.
Crochet hook:
A crochet hook is required to make the holes themselves. The size of the hook will depend on the type and weight of yarn you are using. Be sure to choose a crochet hook that creates holes large enough for your chosen yarn.
Cutting mat:
A cutting mat is needed to protect your surface when making the holes using the crochet hook. It also helps for accurate measurements and even spacing.
9 Step-by-step Instructions for How to Make Holes in Fabric for Crochet Edging
Step 1: Inspect the Fabric
Before making any holes, it’s important to examine the type of fabric and its properties. Many fabrics are too delicate and fragile to crochet along the edges without damaging them. Depending on the yarn used for crochet edging, select a heavy-duty needle that will fit through it. This will help to create a neat and even finished look. You also want to make sure the fabric is clean and free of any stains or creases that can affect your markings.
Step 2: Create the Holes
To make holes along the fabric’s edge, use a marking tool such as tailor’s chalk to mark off where you want to create each hole. Then take your needle or awl and poke through the fabric at each marked point, creating a small hole. Be sure not to tear or rip the fabric when making the holes. For larger fabrics, you can use a ruler to help keep the holes evenly spaced. It’s also important to make sure the holes are uniform in size so your crochet edging is even.
Step 3: Determine the Hole Size
The size of the hole will depend on the type and weight of yarn you are using for crochet edging. The general rule is that the hole should be slightly larger than your chosen yarn. After creating a few holes, test them by inserting the crochet hook into the hole to ensure it is an appropriate size. If the hole is too small, gently stretch it with your fingers to achieve the desired size. But if the hole is too big, it can be easily fixed by closing it with a few stitches.
Step 4: Make Snips
Using small scissors, make a small snip at each marked point. These snips will help guide you when inserting your crochet hook and will prevent any fraying of the fabric. Be sure to make clean, small snips so that the edges of the fabric do not unravel. Otherwise, it will affect the final look of your crochet edging. It’s important to make these snips as close to the marked points as possible for accuracy. You can also use a ruler to help guide you when making the snips.
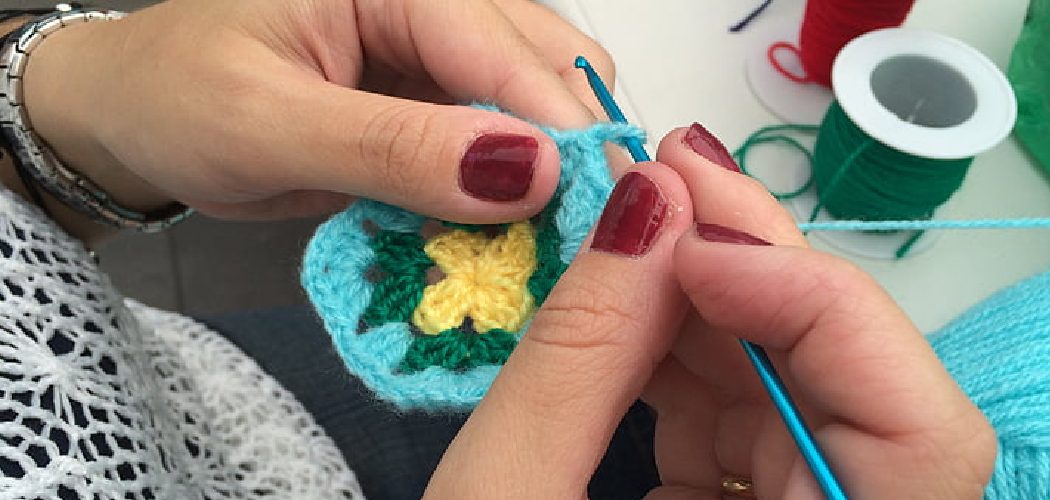
Step 5: Start Crocheting
Once all the holes are created, it’s time to start crocheting the edging. Begin by inserting the crochet hook into one of the holes and pulling a loop of yarn through. Then, work your desired crochet stitch across the fabric edge, inserting the hook into each hole and pulling up a loop until you reach the end. Continue this process until your crochet edging is complete. It’s essential to make sure the fabric is held tightly in place as you crochet.
Step 6: Adjust Hole Spacing
If you find that the holes are too close together, you can use a seam ripper or small scissors to carefully remove some of the stitches around the hole to create more space. Be sure not to cut through the fabric. On the other hand, if the holes are too far apart, you can add additional snips between them to create more space. Always adjust the spacing before starting to crochet each row. However, if you’re satisfied with the spacing, continue crocheting as normal.
Step 7: Add Extra Holes
If you want to add more holes for a different type of crochet stitch or design, simply repeat steps 2-4 in the desired location. Be sure to mark and create each hole carefully, as any mistakes will be difficult to correct once you start crocheting. You can also use a fabric marking tool to create more intricate designs on the edges of your fabric. It’s important to have a clear plan before creating additional holes so that your crochet edging turns out exactly as you envisioned.
Step 8: Secure the Ends
After completing your crochet edging, you will need to secure the ends of the yarn. This can be done by weaving them through a few stitches at the beginning and end of your work. Alternatively, you can tie a small knot on the backside of the fabric and trim any excess yarn. You can also use fabric glue or fusible webbing to secure the ends for a more permanent hold. It’s important to secure the ends so that your crochet edging stays in place.
Step 9: Block the Fabric
To finish off your project, it’s important to block the fabric. This involves wetting the crocheted edge and then pinning it out flat on a towel or blocking the mat to dry. This step helps to even out any irregularities in the spacing and gives the edges a clean, professional look. Once the fabric is completely dry, you can remove the pins and enjoy your beautifully crocheted fabric with a unique edging.
This method is an easy and efficient way to create neat and even edges for any sewing or crafting project that requires crochet edging. By following these simple steps, you’ll be able to make holes in the fabric for crochet edging and get the perfect finish every time.
Safety Tips for How to Make Holes in Fabric for Crochet Edging
- Choose the right needle for the fabric type. Make sure it is a sharp needle to easily pierce through the material without causing too much strain on your hands.
- Measure the size of the holes you need to make and mark them with tailor’s chalk or water-soluble marker; ensure that the holes are the same size and equally spaced.
- Work on a flat, stable surface to ensure that you can make even and precise stitches.
- Wear protective gloves when working with sharp needles, as they help protect your hands from injuries.
- Use scrap fabric underneath the material you are working with to prevent any damage to the material.
- Use a thimble if necessary when making holes in thick fabric; it helps you push the needle through safely and with less strain on your hands.
- Check for any loose edges before starting, as crochet edging can make them more visible, so they should be secured or trimmed before beginning.
- Work slowly and carefully to avoid making mistakes or damaging your fabric.

By following these safety tips, you can make holes in the fabric for crochet edging without any issues. It is important to take the time to practice and perfect this skill before attempting it on a more expensive or detailed project.
How Do You Prevent Fraying When Making Holes in Fabric for Crochet Edging?
- Start by pre-washing your fabric to remove any sizing or dirt that may be present. This will help prevent the edges from fraying and make the holes easier to make.
- If you are using a rotary cutter, use a cutting mat and ruler to measure out where you want the holes to be made. Make sure to use a blade that is sharp and in good condition.
- If you use scissors, ensure the blades are sharp for a clean cut. To prevent fraying of the fabric, try cutting with pinking shears or fray check around the hole edges after cutting them out.
- Use an appropriate stitch length when sewing around the hole edges. This will keep your stitches close enough to provide support and prevent fraying.
- When making holes in thicker fabrics or materials, make sure to use a sharp needle that is thick enough to penetrate the fabric without causing tears.
- If you use an iron-on adhesive, be sure to use one made for the particular fabric or material you are working with.
- Be sure to test a scrap piece of fabric to ensure your iron-on adhesive will adhere properly before moving on to your project.
- When making large holes, use a bias tape binding technique around the edges of the hole and use a fray check to seal the edges.
- When making multiple holes, it is best to use a template and trace out the holes before cutting them out. This will help give you more even spacing between the holes.
- Finally, be sure to use an appropriate thread weight when stitching around the hole edges to prevent unnecessary strain on your fabric or material.

Following these steps will help ensure your fabric and material are not damaged or frayed when making holes for crochet edging. Always take the necessary precautions before beginning any project involving fabrics and materials.
How Do You Securely Attach the Crochet Edging to the Fabric After Making the Holes?
Once the holes have been made in the fabric, it’s important to attach the crochet edging securely. You need a strong thread and needle that can pass through all of the fabric’s layers (including any interfacing) to do this. For example, if using cotton or polyester thread, you can use a regular sewing machine needle. If the fabric is thicker, you may need to use needles of size 16 or 18.
To attach the crochet edging, start at one end of the fabric and thread your needle with a few feet of thread. Starting from the wrong side of the fabric (without knotting the thread), weave it in and out through each hole in the fabric. Pull the thread tight as you work your way along, and keep it taut to ensure a secure attachment. Once you reach the other end of the fabric, tie a knot on the wrong side of the fabric. Finally, clip off any excess threads.
How Long Should You Allow for Hole-making in Fabric for Crochet Edging?
Making holes in the fabric for crochet edging can be time-consuming, depending on the project size you’re working on. How long you should allow for this task depends on several factors, such as how many layers of fabric are involved and what type of stitching technique you plan to use.
For example, if you are working on a project that requires five layers of fabric and you plan to use a running stitch, this could take significantly longer than if you were only working with one layer of fabric. On the other hand, if you decide to use an embroidery hoop and the whipstitch technique, it may be quicker.
To give an accurate estimate of how long your project may take, it’s best to consider the amount of fabric you’re working with, the type of stitch you plan to use, and the complexity of your design. Additionally, be sure to factor in any necessary preparation, such as pressing or cutting, that needs to be done beforehand.
How Can You Easily Clean Up Any Excess Thread or Yarn From Your Hole-making for Crochet Edging?
- Trim away any excess thread or yarn that is visible using a pair of scissors.
- Use tweezers to carefully remove any small pieces of thread or yarn that may have become tangled up in the fabric.
- Use a lint roller to pick up any loose strands of thread or yarn from the fabric’s surface.
- Vacuum up any remaining loose strands of thread or yarn from the fabric’s surface with an upholstery attachment.
- Once all excess thread and yarn have been removed, use a hot iron to press down on the area where the holes were made for crochet edging to smooth out any bumps or folds further. This will help to make the fabric look neat and tidy.
- Finally, use a hand-held steamer to smooth out further any wrinkles or creases in the area that were created by making the holes for crochet edging. This will help achieve a professional finish.

By following these simple steps, you can easily ensure that your fabric looks neat and tidy after making holes for crochet edging. This will help to create a professional-looking finish that you can be proud of.
Frequently Asked Questions:
Q1: Can I Use a Regular Needle to Attach the Crochet Edging After Making Holes in the Fabric?
A1: It is recommended to use a strong needle, such as size 16 or 18, when attaching crochet edging to ensure it can pass through multiple layers of fabric. It is also important to use a thread that is strong enough for the project.
Q2: Can I Use an Iron-On Adhesive Instead of Sewing Around the Holes?
A2: It is possible to use an iron-on adhesive, but it is important to use one specifically made for the type of fabric or material you are working with. It is also recommended to test on a scrap piece of fabric before applying it to your project.
Q3: How Do I Make Sure My Stitches Are Close Enough Together When Sewing Around the Hole Edges?
A3: Use an appropriate stitch length and pull the thread tight as you work along the edges. This will ensure that your stitches provide enough support and prevent fraying. It may also be helpful to use a template to guide your stitches for even spacing.
Conclusion
In conclusion, making holes in the fabric for crochet edging is a great way to add a unique and personalized touch to your handmade projects. With the right materials and tools, you can easily create beautiful and intricate designs in just a few simple steps. Whether it’s using a hole-punch tool, sewing machine or manual methods like hand stitching, you will be able to create the perfect holes for your crochet edging and complete your project with ease.
With a few simple tips, you can make holes in the fabric for crochet edging and create stunning designs on any type of fabric. I hope reading this post has helped you learn how to make holes in fabric for crochet edging. Make sure the safety precautions are carried out in the order listed.
You Can Check It Out to Fasten off Crochet