
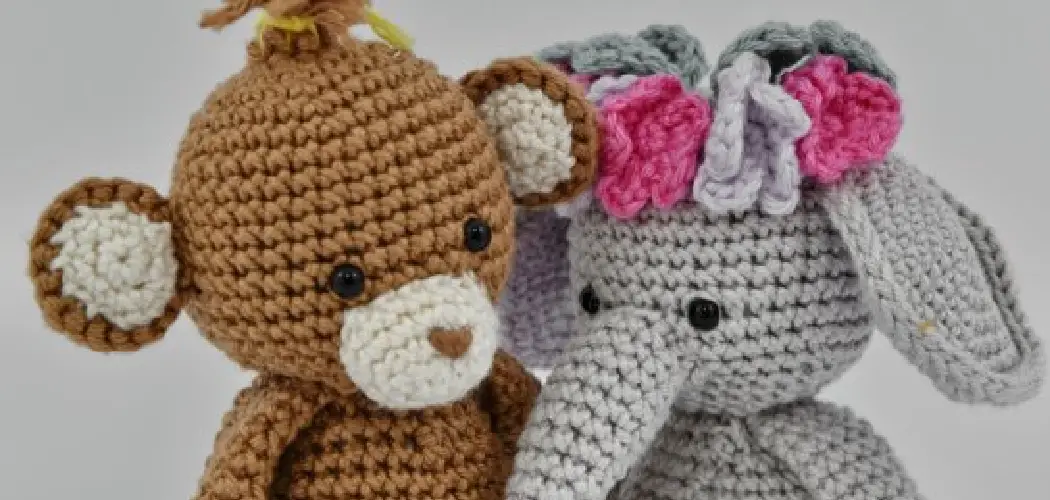
Making your own stitch crochet kit is a great way to customize and create beautiful crocheted items. With the right materials, instructions, and tools, you can make anything from afghans and throws to stuffed animals and garments. Not only does it allow you to express yourself creatively, but it also saves you money by avoiding the cost of buying pre-made kits. Plus, it’s a great way to learn a new skill and make something with your own two hands.

Making your own stitch crochet kit can be a great way to get creative and make something unique. You’ll find many of the same materials used in ready-made kits, but you get the chance to choose your own colors and textures for your project and create a one-of-a-kind item. With a stitch crochet kit, you will receive all the materials you need to do your project, including yarn, a crochet hook, and an instruction booklet. You can find step-by-step instructions on how to make stitch crochet kit in this blog article.
Materials You Will Need
Crochet Hook:
You will need to choose the right crochet hook for your project, depending on the size and type of yarn you are using. Different hook sizes create different sized stitches, so make sure to check your pattern instructions for the recommended hook size. Most patterns suggest a specific brand or size of hook, but ultimately it comes down to personal preference.
Yarn:
The most important part of your stitch crochet kit will be the yarn. You can choose from a wide variety of colors, textures, and materials for your project. Acrylic yarn is often the most affordable and widely available, but there are also many other options such as wool, cotton, or specialty yarns like mohair or bamboo. Make sure to read the label for the recommended hook size and washing instructions.
Instruction Booklet:
Your stitch crochet kit should come with an instruction booklet that includes the pattern, step-by-step instructions, and any necessary diagrams or charts. Make sure to read through the entire booklet before starting your project, as it may contain helpful tips or explanations for certain stitches.
Tools You May Need
Stitch Markers:
These are used to mark your rounds or rows and help you keep track of your progress. You can use traditional stitch markers or simply safety pins, paper clips, or scrap pieces of yarn.
Tape Measure:
A tape measure will come in handy when measuring your stitches and making sure they match the recommended gauge for your project. This is especially important if you are making something that needs to fit a specific size.
Scissors:
You will need scissors to cut your yarn and trim any loose ends. Make sure to have a sharp pair on hand for clean cuts.
Yarn Needle:
A large, blunt-tipped needle is essential for weaving in the ends of your project and creating a seamless finish.
10 Simple Step-by-step Instructions for How to Make Stitch Crochet Kit
Step 1: Inspect the Yarn
When making a stitch crochet kit, you must ensure that the yarn is in good condition before using it. Carefully inspect each strand for any knots or tangles and if found, gently unravel them with your fingers. You should also check for any discoloration or damage to the yarn that might affect the overall look of your project.
The best yarn for beginners is usually worsted weight yarn, as it is easy to work with and comes in a wide variety of colors.
Step 2: Measure the Yarn Length
After inspecting the yarn, measure out the required amount of yarn needed for the project. This will depend on the type of stitch crochet kit being created. Make a slip knot at the end of the yarn strand and loop it over your crochet hook. Pull the yarn tight to secure it in place. Otherwise, you can use a tape measure to measure out the required length and cut it accordingly.

You may want to add a few extra inches in case of any mistakes or changes. It’s better to have too much yarn than not enough.
Step 3: Create the Foundation Chain
Once the yarn length is determined, begin to make a chain stitch. This will be the foundation chain on which all your other stitches are based. To create one, you’ll need to insert your crochet hook into the loop of yarn on your finger and pull it through.
Your stitch should now be on the hook. To make another chain stitch, wrap your yarn around the hook and pull it through everything that’s already on your hook. Continue making chain stitches until you reach the desired length for your project.
Step 4: Start Adding Stitches to Your Foundation Chain
Once you have created the foundation chain, it’s time to start adding stitches. How many stitches you need depends on the type of stitch crochet kit being made.
Common types of stitches used in a stitch crochet kit include single and double crochet, slip stitch, half-double crochet, and treble crochet. You can find detailed instructions for each of these stitches online or in crochet books. Use the same method of creating a chain stitch to start each new row of stitches, as this will give your project continuity.

Step 5: Fasten off and Weave in the Ends
Once your stitch crochet kit is complete, it’s time to fasten off the last stitch. To do this, pull the loop through the last stitch and cut off the yarn, leaving a few inches of tail. Use a crochet needle or yarn needle to weave in any loose ends. This will give your project a more polished and finished look.
You can also use this time to add any additional decorations or finishing touches to your project, such as tassels or pom-poms.
Step 6: Add Finishing Touches
Once all loose ends are woven in, it’s time to add any finishing touches such as sewing on buttons, adding tassels or fringe, or attaching pom-poms. Get creative with how you want to personalize your stitch crochet kit. Also, make sure to follow any additional instructions or details from the crochet pattern or guidebook.
You can also choose to add a border or edging to your project for an extra touch of flair and uniqueness.
Step 7: Follow the Instructions for Assembly
If your stitch crochet kit is for a specific item, such as a stuffed animal or clothing piece, make sure to follow the assembly instructions carefully. This may involve sewing pieces together or attaching additional elements. You can also add any final touches or embellishments during this step.
It’s important to take your time and follow the instructions precisely to ensure a professional-looking finished product.
Step 8: Wash and Block Your Project (optional)
If your stitch crochet kit is made with natural fibers such as wool or cotton, it may benefit from being washed and blocked. This will help to smooth out any uneven stitches and give your project a more professional look.
You can find specific instructions for washing and blocking different types of yarn online or in crochet books.
Step 9: Share Your Creation
Once your stitch crochet kit is complete, don’t forget to share your creation with others! You can post pictures on social media or even gift your finished project to someone special. It’s always rewarding to see your hard work come to life and bring joy to others.
If you’re feeling particularly proud of your project, you can even enter it into local fairs or craft competitions for recognition and potentially win prizes.
Step 10: Keep Practicing and Trying New Patterns
The more you practice, the better you will become at creating stitch crochet kits. Don’t be afraid to try new patterns or techniques and continuously challenge yourself to improve your skills. With time and dedication, you can become a master of stitch crochet kits!
By following these instructions on how to make stitch crochet kit , you can easily make a stitch crochet kit. With some practice, you’ll be able to create intricate and beautiful projects to share with friends and family.
Safety Precautions for How to Make Stitch Crochet Kit
- Read the instructions and check all the pieces in the kit before beginning your project to make sure you are familiar with the tools and materials included.
- Have a designated area for working on your crochet projects where other distractions cannot interfere, such as near a window or away from pets or children.
- Research proper posture and techniques for crocheting to reduce the risk of developing hand or wrist pain.
- Avoid wearing loose clothing around hooks and yarn that could potentially get tangled up in the crochet needles.
- Ensure your hands are dry when handling hook and yarn, as excess moisture can cause slipping, which could lead to injury.
- Pay attention to the hook’s size and tension when selecting yarn for your project, as an incorrect combination could lead to problems in completing the pattern or item.
- Inspect your work regularly and look out for any imperfections that could be corrected before continuing with the project.
- Avoid working on a project if you are feeling tired or distracted, as this could lead to mistakes in the pattern or the creation of a dangerous item.
- Keep all tools and materials out of reach of children and pets to avoid any accidents or ingestion.

Following safety precautions when crocheting is essential for making Stitch Crochet Kit projects successful.
How Do You Join the Pieces of Your Project Together?
- Once you have finished making the individual pieces of your project, it is time to join them together. To do this:
- Begin by threading a yarn needle with some extra yarn or embroidery floss. You can use any type of yarn that matches your project.
- Start on one side of the project and insert the needle through two or three loops at the outer edge of the first piece. Pull the yarn through until it is tight.
- Insert the needle into the corresponding loops on the other piece and pull the yarn through until it is taut.
- Continue repeating steps 2 and 3 all around your project, inserting the needle through two or three loops on each piece until you reach the end.
- When you are done, tie a knot at the end to secure it and cut off any excess yarn.
Your project is now finished and ready to use! Congratulations! You have just learned to make a stitch crochet kit.
How Do You Store and Maintain Your Stitch Crochet Kit Once It is Completed?
- Once you have finished making your Stitch Crochet Kit, it is important to store and maintain it properly to ensure it can be used for a long time.
- After using your kit, ensure all the pieces are wiped down with a damp cloth or paper towel to remove any dust or excess yarn that may have accumulated during the project.
- You should also store your kit in a cool, dry place away from direct sunlight and moisture to prevent any damage or discoloration of the pieces.
- Additionally, it is important to keep all of your tools and notions organized by placing them back in their respective compartments or pouches. This will make finding the pieces you need for future projects easier.
- Lastly, ensure that the hooks and needles are securely fastened when not in use so they do not get lost or misplaced.

Following these tips on storing and maintaining your Stitch Crochet Kit will help ensure that your kit remains in good condition and can be used for years to come.
How Can You Make Sure That Your Project Looks Professional and Neat?
When you are working on a stitch crochet project, it’s important to make sure that your stitches look even and neat. This will help give the finished result a professional appearance. Here are some tips for making sure that your project looks great:
- Use the right hook and yarn: Using the wrong hook or yarn can make it difficult to keep the stitches even and create a neat finish. Make sure you check the pattern instructions for yarn weight and hook size.
- Take your time: Rushing when stitching will often lead to mistakes and an uneven appearance. Take your time as you work, paying close attention to every stitch.
- Count your stitches: As you work, keep track of how many stitches you have on the hook. This will help ensure that you create even rows and that all parts of the project look uniform.
- Work in natural light: Natural light makes it easier to see if your stitches are neat and even. If you can’t work in natural light, use a good-quality lamp that provides the right amount of light for your project.
- Use stitch markers: If you’re working on a complex pattern, it can be helpful to use stitch markers at key points. This will help keep track of all the stitches and ensure you don’t miss any.

By following these tips, you can ensure that your crochet project looks neat and professional. With a little bit of practice, you’ll be able to create beautiful finished products every time.
Frequently Asked Questions:
Q: How Long Does It Take to Complete a Stitch Crochet Project?
A: The time it takes to complete a stitch crochet project can vary depending on the complexity of the pattern and your skill level. It could take anywhere from a few hours to several days. You can also break up the project into smaller sections to work on over time.
Q: Can I Wash My Completed Stitch Crochet Project?
A: Yes, you can wash your completed stitch crochet project. However, it is important to follow the washing instructions provided with the yarn you used for the project. Some types of yarn may shrink or lose their shape if washed incorrectly. It is also recommended to hand wash delicate projects instead of using a washing machine.
Q: How Can I Fix Mistakes in My Project?
A: It is common to make mistakes while working on a stitch crochet project, especially for beginners. To fix mistakes, you can carefully unravel the stitches until you reach the mistake and then redo them correctly. You can also use a crochet hook to pick up individual stitches and fix them without unraveling the entire row. With practice, you will become more confident in fixing mistakes and creating a polished finished product.
Q: Can I Use Stitch Crochet Kits for Left-Handed Crocheters?
A: Yes, there are stitch crochet kits available specifically designed for left-handed crocheters. These kits will include instructions and diagrams that cater to the needs of left-handed individuals. You can also adjust the pattern and stitch direction for your project if using a regular kit.
Conclusion
In conclusion, creating a stitch crochet kit is a great way to learn the basics of crocheting. It can also be an enjoyable, creative activity for experienced crocheters looking for new projects. With just a few supplies, you can create various stitches and patterns that will keep you busy for hours. Whether you’re creating something special to give as a gift or just want to make something unique, making a stitch crochet kit is the perfect way to get started. I hope reading this post has helped you learn how to make stitch crochet kit. Make sure the safety precautions are carried out in the order listed.
You Can Check It Out to How to Fasten off Crochet