
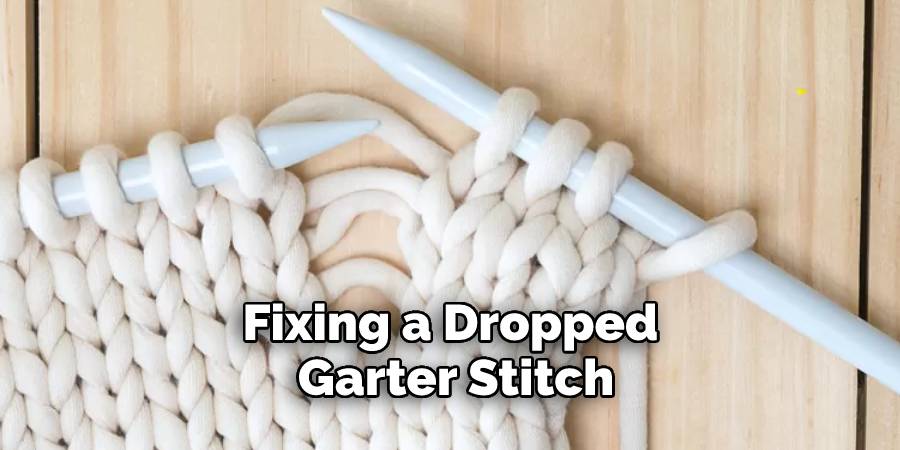
Dropped stitches are one of the most feared knitting mistakes. Whether you’re a beginner or an advanced knitter, it can be incredibly frustrating to discover that you’ve dropped a stitch in your work and must find a way to repair it.

But don’t fret: fixing dropped garter stitch is actually quite easy! In this post, we’ll guide you through step-by-step instructions on how to fix it. So let’s dive right into it – let’s learn how to fix a dropped garter stitch!
Can You Fix a Dropped Garter Stitch?
Dropping a stitch, especially one in the garter stitch pattern, can be incredibly frustrating and stressful. Furthermore, if a dropped stitch is left unfixed, it could unravel the entire project. Fortunately, there are different strategies to fix a dropped garter stitch with utmost ease and confidence.
The most common method is called laddering, which requires working from the bottom up, knitting each of the stitches in line as quickly as possible to prevent further unraveling. Furthermore, simple yet effective techniques such as crocheting or using a crochet hook can also mend a dropped garter stitch without much difficulty.
In any case, fixing a dropped garter stitch is not an impossible feat; with patience and care, anyone can get their project back on track!
Why Should You Fix a Dropped Garter Stitch?
Have you ever tried to knit a garter stitch only to find that one of the stitches has slipped off the needle a few rows later? This can be an annoying problem to encounter, but luckily it is also one that’s easy to fix. Not fixing it, however, could lead to serious problems with your project.
Dropped stitches leave gaps in your knitted fabric which could make it look sloppy or even ruin the finished product completely. By repairing dropped stitches while they are small and close together, you will avoid these issues and be able to keep knitting with no problems.
In short, fixing dropped stitches should not be feared – it should be embraced as a simple way to help keep your projects looking their best!
7 Steps to Follow on How to Fix a Dropped Gart
Step 1: Check Your Work
The first step is to check your work to ensure that you have dropped a stitch. This can be done by looking at the fabric and seeing if there is a hole or a loose strand of yarn. If you are not sure, you can also ask a friend or family member to take a look for you.
Step 2: Find the Dropped Stitch
Once you have confirmed that you have dropped a stitch, the next step is to find it. This can be done by gently pulling on the fabric until the dropped stitch comes into view.

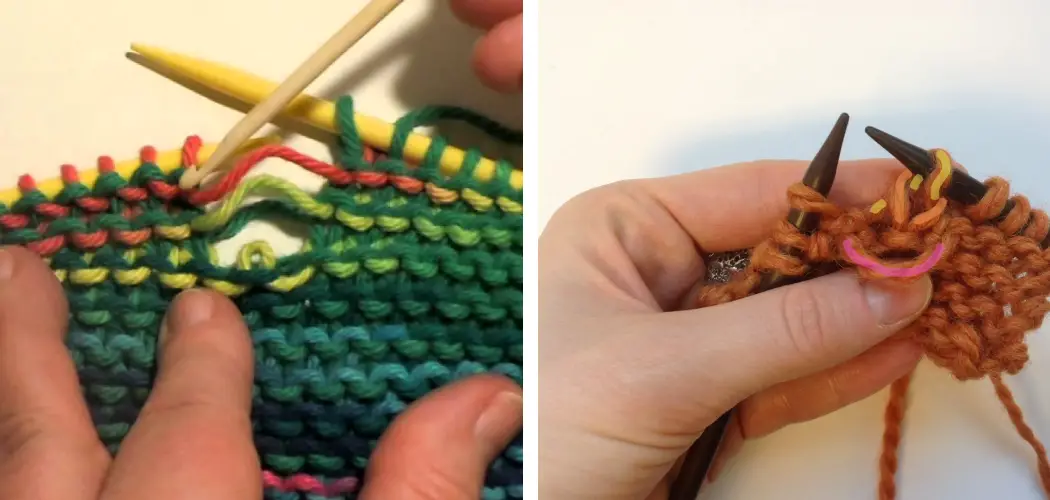
Step 3: Insert a Crochet Hook or Tapestry Needle Into the Dropped Stitch
Once you have found the dropped stitch, the next step is to insert a crochet hook or tapestry needle into it. This will help to secure the stitch so that you can begin repairing it.
Step 4: Use the Crochet Hook or Tapestry Needle to Pull the Yarn Through the Loop
Once you have inserted the crochet hook or tapestry needle into the dropped stitch, use it to pull the yarn through the loop. This will help to close up the hole and secure the stitch in place.
Step 5: Knit or Purl the Stitch as Normal
Once you have secured the dropped stitch, you can then knit or purl it as normal. This will help to blend it in with the rest of the fabric and prevent it from coming undone again.
Step 6: Weave in Any Loose Ends
Once you have finished repairing the dropped stitch, there may be some loose ends of yarn that need to be woven in. This can be done by using a tapestry needle to weave them into the fabric, taking care not to pull too tightly so as not to distort the fabric.
Step 7: Inspect the Fabric for Any Mistakes
Finally, once you have finished repairing the dropped stitch, it is important to inspect the fabric for any mistakes. This will help to ensure that your project looks its best and that there are no further issues with the fabric. If you find any mistakes, make sure to fix them right away.
By following these steps on how to fix a dropped garter stitch, you will be able to quickly and easily mend your project without any problems. Just remember to take your time and practice patience – that way, you will be able to enjoy your finished project with pride!
How Do I Know if A Garter Stitch Has Been Dropped?

It can be difficult to tell if a garter stitch has been dropped, especially when working in rows. One easy way to check is to count the number of stitches per row, as the number will be lower if a stitch is missing. Additionally, a dropped stitch often looks looser than the surrounding stitches and may also have an uneven appearance.
To investigate further, try using a crochet hook to raise the loose strand through the previous rows carefully. If it’s attached, it should be fairly easy to work back up or see that it’s removed from the knitting altogether. Again, knowing how to spot a dropped stitch can help prevent inconvenient problems from occurring down the line.
Things You Need to Know Before Fixing a Dropped Garter Stitch
Fixing a dropped garter stitch is a complicated task and one that often takes some trial and error before it can be deemed successful. Therefore, before taking on the challenge of fixing a dropped garter stitch, it is important to be aware of some key facts.
Knowing how to spot dropped stitches and which loop is part of the previous row are two essential pieces of knowledge for tackling this intermediate knitting-level project.
Additionally, mastering the art of deciphering knitting diagrams and recognizing symbols such as knit and purl will aid considerably in identifying where errors need to be fixed.
Understanding the structure of stitching can make the daunting task of repairing mistakes much easier. With these things in mind, you will be well-equipped to take on any dropped garter stitch!
5 Benefits of Fix a Dropped Garter Stitch
1. Easy to Do
One of the primary benefits of fixing a dropped garter stitch is that it is easy to do. If you can knit and purl, you can fix a dropped garter stitch. All you need to do is insert your needle into the stitch below the dropped one and then knit or purl it as normal.
2. Quick to Fix
Another benefit of fixing a dropped garter stitch is that it is quick to fix. Unlike other types of knitting mistakes, a dropped garter stitch can usually be fixed in just a few minutes. This means that you won’t have to spend hours ripping out your work and starting over again.
3. Prevents Future Mistakes
Fixing a dropped garter stitch can also help to prevent future mistakes. Once you’ve learned how to fix a dropped garter stitch, you’ll be less likely to drop one in the future. This is because you’ll be more careful when working with this type of stitch and will pay closer attention to your work.

4. Can Be Done on Any Type of Garter Stitch
Another benefit of fixing a dropped garter stitch is that it can be done on any type of garter stitch, whether it’s plain, textured, or cabled. This means that you can use this technique on any project, regardless of its complexity.
5. Makes Your Work Look Professional
Finally, fixing a dropped garter stitch can make your work look more professional. If you’re working on a project for someone else, they’re likely to appreciate the extra effort you put into making sure that there are no mistakes.
Additionally, if you’re selling your work, customers will be more likely to buy from someone who takes the time to ensure that their work is perfect.
6 Common Mistakes People Make When Trying to Fix a Dropped Garter Stitch
1. Not Picking Up the Right Number of Stitches
One of the most common mistakes people make when trying to fix a dropped garter stitch is not picking up the right number of stitches. You must pick up the stitch below it and put it back on your needle when you drop it. However, many people accidentally pick up two stitches instead of one, creating an extra stitch in your work.
2. Not Picking Up the Stitch from the Correct Side
Another common mistake is not picking up the stitch from the correct side. When you drop a stitch, you need to pick up the stitch from the side that is facing you. If you pick up the stitch from the wrong side, it will be upside down and will create an extra loop in your work.
3. Not Picking Up the Stitch in the Correct Direction
Another mistake people make is not picking up the stitch in the correct direction. When you drop a stitch, you need to pick up the stitch from underneath the one that is currently on your needle. If you pick up the stitch from above, it will twist it and make it difficult to knit or purl.
4. Not Using a Crochet Hook
Many people try to fix a dropped stitch without using a crochet hook. However, this can be very difficult and often results in further dropping stitches. A crochet hook is designed to pick up dropped stitches and will make the process much easier.

5. Not Knitting or Purling Carefully
When you are knitting or purling with a dropped stitch, you need to be careful not to drop any more stitches. This can be difficult, as it is easy to become distracted or careless when you are fixing a mistake. Pay close attention to your work and take your time to avoid making any more mistakes.
6. Not Weaving in Ends Carefully
Once you have fixed all your dropped stitches, you must carefully weave in all loose ends. If you do not weave in your ends carefully, they may come undone and cause your work to unravel. Take your time and ensure that all ends are securely woven in.
You Can Check it Out to Make a Magic Knot in Crochet
Can I Use Crochet to Fix a Dropped Garter Stitch?
If you’ve ever had the unfortunate experience of dropping a garter stitch in your crochet project, you may wonder whether it can be salvaged. Fortunately, the answer is yes!
Repairing a dropped garter stitch takes some knowledge of how crochet is constructed and what stitches to use to keep the fabric looking uniform, but once you have mastered the methods involved, it becomes quite simple!
Learning how to fix mistakes like this can be incredibly satisfying and save you lots of time by avoiding having to start over on your project. With a little bit of patience and problem-solving, you can take that frustrated feeling you may have had and turn it into success.
Some Ways to Prevent Dropped Garter Stitch
While garter stitch is easy to master, it can be difficult to keep it looking even if there are a lot of stitches. To help prevent dropped stitches, use larger needles or yarn than the pattern suggests. Also, count each row to know if you’ve accidentally made an extra one.
Once you start the project, move your work up between every few rows. This also helps since the garter stitch tends to stretch when worked over many rows.
Additionally, marking stitches or counting them as they pass through markers can help prevent lost ones. Using a lifeline is also a great way to secure your work and ensure the garter stitch won’t unravel!

Conclusion
Mending dropped garter stitches may seem daunting at first, but with these simple tips, you should be able to fix any mistake quickly and efficiently without damaging your work or spending too much time trying to figure out what went wrong.
So don’t worry if you make any mistakes – just take some deep breaths and follow these steps for repairing a dropped garter stitch, and soon enough, you’ll be back on track! Thanks for reading our post about how to fix a dropped garter stitch.
You Can Check it Out to Make Stars Out of Paper Bags