
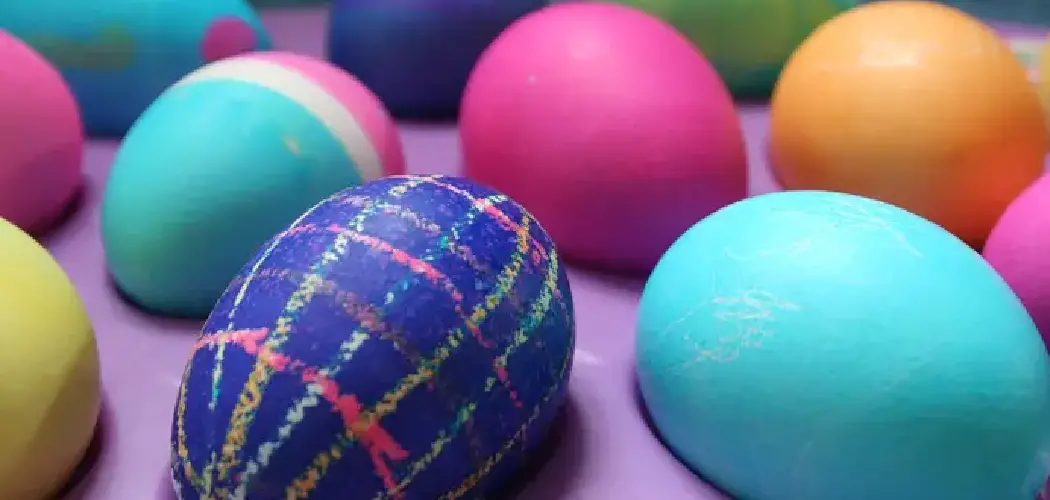
Decorating Easter eggs is a time-honored tradition that has been shared and enjoyed by generations of families. While store-bought dyes are easy to use and make for impressive results, there’s nothing quite like making your own homemade designs with tissue paper.

In this blog post, you’ll learn how to dye easter eggs with tissue paper for your next holiday get-together. Whether you’re looking for sophisticated patterns or something more whimsical, we have the tips and techniques you need to dye spectacular Easter eggs with tissue paper!
Can You Dye Eggs with Regular Tissue Paper?
No, you cannot dye eggs with regular tissue paper. The reason is that regular tissue paper is not designed to hold color and will likely disintegrate when exposed to the dye mixture. Instead, you should use special decorative tissue paper specifically designed for egg dyeing.
This type of tissue paper contains dyes that permanently adhere to the surface of the eggshell and won’t dissolve in water. It also allows you to create intricate designs and patterns on your eggs.
Additionally, this type of paper is available in a wide variety of colors and patterns, so you can choose the perfect look for your Easter eggs.

To use it, simply cut the tissue paper into strips or shapes and attach them to the eggshell with a damp cloth. Once they are firmly attached, submerge the egg in a dye mixture according to instructions, remove it, and let it dry. The result will be a beautiful egg decorated with your own unique design!
10 Methods on How to Dye Easter Eggs with Tissue Paper
1. Cut the Tissue Paper into Small Pieces
Take a piece of tissue paper and cut it into small pieces using scissors. The size of pieces should be small enough to fit around the egg. You can also use a hole punch to make circles of tissue paper. If you are making colorful Easter eggs, use different colors of tissue paper. While cutting the tissue paper, make sure that you are wearing gloves to protect your hands from the color of the dye.
2. Soak the Tissue Paper in Water
Put the tissue paper pieces in a bowl or cup filled with warm water for about 10 minutes until they are saturated and soft. If you are using multiple colors for your Easter eggs, create a separate cup of water for each color. While the paper is soaking, fill another large bowl or dishpan with enough warm water to submerge the eggs. Add a few drops of white vinegar to the water and gently stir. The vinegar helps the dye stick to the eggs.
3. Create a Vibrant Color
Place the tissue paper pieces in a bowl and add food coloring, water, and vinegar. Mix it around until the desired color is achieved. If it is too bright, add more water until it reaches the desired hue. If it’s too light, add more food coloring and mix again. Dip the eggs into the dye, ensuring that all surfaces are covered.
Carefully lift each egg out of the dye and set it aside on a paper towel to dry for about 10 minutes. If you want a deeper, more vibrant color, keep the eggs in the dye bath for longer until you get the right color. Once they’re dry, you can add another layer of tissue paper over the top to create a more interesting design and effect.

4. Cover the Easter Egg with Tissue Paper
Take one of the saturated pieces of tissue paper and cover the egg completely. Make sure to wrap it tightly so that there are no gaps or openings on the surface of the egg. Gently press the tissue paper around the egg with your fingertips. However, be careful not to rip the tissue paper. While you are pressing the tissue paper onto the egg, you can also shape it to form different patterns and designs.
5. Secure Tissue Paper with Rubber Bands
Gently tie rubber bands around the egg to secure the tissue paper in place. This will help keep it from slipping off as you dye your eggs. You may want to apply several bands at different points on the egg. Although it’s important to keep the tissue paper in place, it’s also important not to tie the bands too tight; this can cause the egg to crack. Try to evenly spread out the rubber bands around the egg for even dyeing.
6. Boil Egg in Colored Water
Put the egg in a pan with enough water to cover it. Then, add the colored tissue paper mixture and boil the eggs until they reach your desired color. Make sure to remove the pan from heat and cool off the eggs before handling. If you want to keep the colors of the eggs, you can gently pat them with a paper towel before handling them. Once cooled, your dyed Easter eggs are ready to be used for decorating and egg hunts!
7. Rinse with Cold Water
Once the eggs have been boiled in the colored water, remove them from heat and rinse them under cold running water to stop the cooking process. This will ensure that the eggs do not become overcooked and rubbery. Allow them to cool for a few minutes before handling them. Try to avoid breaking the shells while rinsing, as this may cause the eggs to lose their color.

8. Remove Rubber Bands and Tissue Paper
Carefully take off the rubber bands and remove all of the tissue paper pieces from around the egg. You’ll be left with beautiful, vibrant Easter eggs. If you like, you can add additional details to your eggs by using a black permanent marker or another drawing utensil. When you’re finished, you can display your eggs in a basket or bowl for everyone to admire. Make sure to handle your Easter eggs with care and enjoy the beautiful creations you have created!
9. Dry Eggs before Displaying
After removing all of the tissue paper and rubber bands, let your eggs dry completely before displaying or using them for any Easter egg activities or crafts. If you want your eggs to come out a lot brighter, add a few drops of white vinegar when you first begin the dying process. This will help the colors of the tissue paper to pop more. If you want to further personalize your eggs, try adding craft ribbons or embellishments after they are dry.
10. Enjoy your Beautiful Eggs
Once you have finished the egg dyeing process and allowed them to dry, it’s time to enjoy your beautiful creations. Put your eggs on display for all to admire, or use them for an Easter egg hunt. No matter what you decide to do with your eggs, you will be sure to have a memorable and colorful Easter!
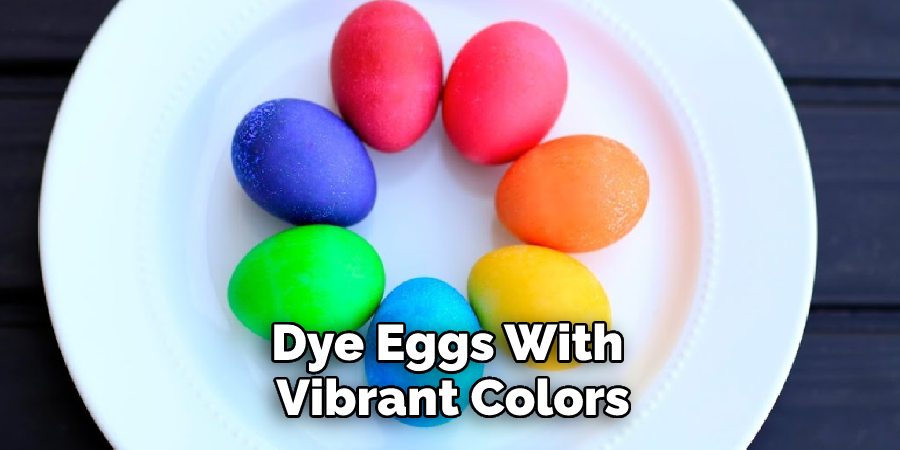
By following these simple steps, you can create beautiful Easter eggs using tissue paper and rubber bands. With a little bit of creativity and patience, you will be able to dye eggs with vibrant colors and unique designs that will last a lifetime. Enjoy your DIY project!
Things to Consider When DIY Easter Eggs With Tisue Paper
1. Choose the Right Tissue Paper
When it comes to dying eggs with tissue paper, not all types of tissue paper are created equal. Look for tissue paper that is either dyed or printed with bright colors. Avoid using standard white tissue paper as the color will not show up well.
2. Prepare Your Eggs
Before you begin to dye your eggs, make sure they are washed and dried thoroughly. If possible, use hard-boiled eggs since they won’t break when handled. You can also use plastic Easter eggs if desired.
3. Gather Supplies
In addition to your choice of tissue paper, you’ll need a bowl or cup big enough to hold your egg, scissors, a rubber band or string, and water. Depending on whether you want to dye the entire egg or just certain parts of it, you may need additional supplies such as craft sticks, rubber gloves, and a kitchen scale.
4. Cut the Tissue Paper
Once you have all of your supplies gathered together, cut the tissue paper into small pieces or strips so that it’s easier to work with. If desired, you can use an egg dyeing kit or make your own color combinations by combining different colors of tissue paper.
5. Start Dying Your Eggs
Place a piece or strip of tissue paper inside the bowl or cup that contains water. Make sure to stir it gently until the color begins to bleed out onto other parts of the egg. Continue adding additional pieces of tissue paper in various colors until you are happy with how your eggs look.
Is It Better to Dye Warm or Cold Eggs?
When it comes to dyeing Easter eggs with tissue paper, it is best to use cold hard-boiled eggs. Cold eggs will help the dye to adhere better and provide more vibrant colors when compared to warm eggs. In addition, the longer you leave the egg in the tissue paper dye, the darker and richer the color will be.
To achieve the best results possible, leave the eggs in the dye for at least 10 minutes. If you are using multiple colors, make sure to rinse off the egg between each color so you don’t get a muddy effect. Once you’ve finished dying your eggs, let them dry completely before handling or displaying them. Enjoy creating beautiful and unique Easter eggs with tissue paper!

Conclusion
Dyeing Easter eggs with tissue paper is a fun and easy activity that the whole family can enjoy. You just need a few supplies and some patience while the colors soak into the eggshells.
With a little bit of practice, you’ll be able to create beautiful and unique designs on your Easter eggs this year. Follow these steps on how to dye easter eggs with tissue paper. Try dying eggs with tissue paper this year and see how your family likes it!
You Can Check it Out to Crochet a Beach Bag