
Crocheting a beach bag is a great way to use your crocheting skills and create something you can enjoy using. Not only will you have the satisfaction of making something with your own hands, but a crochet beach bag is ideal for summer days spent at the beach.

A handmade crochet bag will give you the perfect place to store your beach supplies and will last for years of use. Plus, you can customize the bag with different colors and designs to make it truly unique.
Crocheting a beach bag has many advantages as opposed to purchasing one. For starters, crocheting your beach bag allows you to customize the design and colors based on your preferences. You can choose materials that suit your lifestyle and sense of style, making it truly unique. In this blog post, You will learn in detail how to crochet a beach bag.
Step-by-Step Processes for How to Crochet a Beach Bag
Step 1: Inspect Your Materials
Gather all the necessary materials, such as a crochet hook, yarn in the desired colors and weights, measuring tape, scissors, stitch markers, and a tapestry needle. Chain a desired number of stitches to create the width of the bag base. After that, work in double crochets (dc) for a couple more rows until you reach your desired length. Finish off with a slip stitch and fasten off.
Step 2: Create the Handles
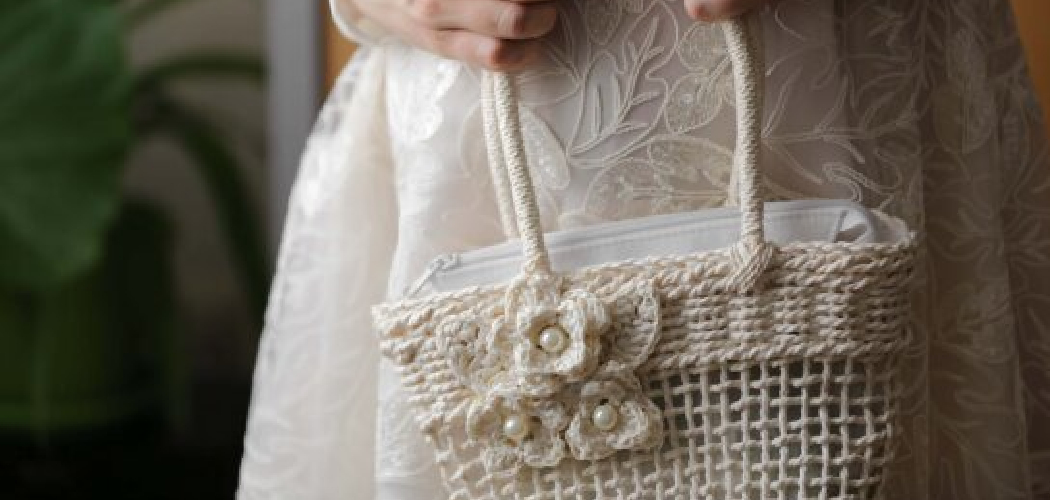
Begin by making a chain of nine stitches. Then, skip the first three chains and make seven double crochets (dc) in the fourth stitch. After that, work one dc into each of the remaining five chains, then turn your work and make seven more dc into each of those same five chains. Slip stitch into the same chain that you started with and fasten off.
Step 3: Attach the Handles
Place each of your handles on either side of the bag and stitch them down to secure them in place using a tapestry needle. Make sure they are evenly spaced so that they look symmetrical when finished.
To give your bag a finished look, work two rounds of single crochet (sc) around the entire edge of the bag. The first round should be worked in the same color as the body of the bag, and the second round can be worked in a contrasting color to make it stand out.

Step 4: Weave in the Yarn Ends
Once you’ve finished working all of your rounds, use a tapestry needle to weave in any remaining yarn ends. Make sure that all of the edges are neat and even before continuing. Blocking is an important step that helps to clean the stitches and give your bag a nice, finished look.
To block your bag, lightly dampen it with a spray bottle of water and then lay it flat on an ironing board or other flat surface. Use pins to secure the edges in place and let dry completely before continuing.
Step 5: Attach the Liner
Cut a piece of fabric that is slightly larger than your finished bag and pin it in place. Make sure to leave enough room for the edges to be folded over. Sew the liner into place using a sewing machine or by hand with a needle and thread.
Measure the length of your finished bag and cut a slightly longer zipper. Pin it in place on the top edge of your bag and sew around all sides using a sewing machine or by hand with a needle and thread.
Step 6: Add Pockets
Cut two pieces of fabric for pockets and pin them in place inside the bag. Sew around the edges using a sewing machine or by hand with a needle and thread.
Once all the pockets, liners, zipper, and handles have been attached and secured, it’s time to give your beach bag its final touches. Embellish the bag with a fabric flower or other decorations to give it a unique look. And don’t forget to add a keychain or strap if you want your beach bag to be more functional.

Following these steps, you can create your own handmade beach bag. Now all that’s left to do is to show off your creative skills and enjoy the summer days ahead with a stylish new accessory.
You Can Check it Out to Crochet a Worry Pet
Safety Tips for How to Crochet a Beach Bag
- Always use the right hook size and yarn weight. The hook size should correspond to the yarn label’s suggested hook size to get the right gauge for your bag.
- Wear comfortable clothes and use a chair with good back support when crocheting your beach bag.
- Check each stitch regularly to make sure it’s correct.
- Make sure to take regular breaks while crocheting your beach bag to avoid fatigue and strain on the wrist and shoulders.
- Pay attention when working with slippery or synthetic yarns, as they can be difficult to handle and work with.
- Always use a tapestry needle to weave in the ends after completing a project.
- Store your beach bag safely and away from moisture and direct sunlight, which can affect its quality over time.
- When transporting your beach bag, use sturdy bags or boxes to help keep the shape of the bag intact.
Following these safety tips can help you have a successful experience learning to Crochet a Beach Bag.
How Do You Care for Your Crochet Beach Bag Over Time?
- Keep your crochet beach bag out of direct sunlight as much as possible. Sunlight can fade the colors and cause the fibers to become brittle and break down faster.
- Avoid getting your crochet beach bag wet if you can help it. Water will also cause the colors to fade, making the fibers brittle over time.
- Once you are done using your crochet beach bag, store it in a cool, dry place away from direct sunlight. If possible, use a sturdy box or container to keep the beach bag protected.
- To clean your crochet beach bag, use a damp cloth and mild detergent to spot and treat any stains or marks. If the bag needs a more thorough cleaning, you can use a machine washable detergent, but ensure to air dry it afterward and take extra care not to get too wet.
- Depending on how often you use your crochet beach bag and how well you take care of them, they could last for years. Follow the steps above, and you should have your crochet beach bag for a long time.

How Can You Add a Waterproof Lining to Your Crochet Beach Bag?
- Prepare your lining material. PVC vinyl, waterproof fabric, or waxed canvas can all be used to line a crochet beach bag and make it more durable and water-resistant.
- Cut two pieces of material that are slightly larger than the size of your bag – one for the inside, one for the outside.
- Sew the two pieces together at the top and sides, leaving a gap of about 1/4 inch for turning.
- Turn the lining inside out so that the seams are hidden.
- Place your crochet bag inside the lining and pin it in place if necessary. You may want to hand-stitch the two together in some places to keep them from shifting.
- Sew the lining to the crochet bag along the top opening and around the sides with a strong thread.
- Turn your beach bag right side out and enjoy its new waterproof lining.
Adding a waterproof lining to your crochet beach bag allows you to enjoy using it for many years to come. Be sure to use the right materials, and take the time to ensure that all seams are sealed securely.
How Do You Store Your Crochet Beach Bag When Not in Use?
After you have finished crocheting your beach bag, it is important to store it properly when not in use. If you plan on using the bag multiple times over the summer, proper storage will help extend its lifespan. Here are a few tips for storing your crochet beach bag.
- Hang or fold the bag and place it in a drawer, closet, or storage chest. This will help keep dust and other debris from settling into the stitches.
- If your bag is wet, leave it in an airy place until it is completely dry before storing it.
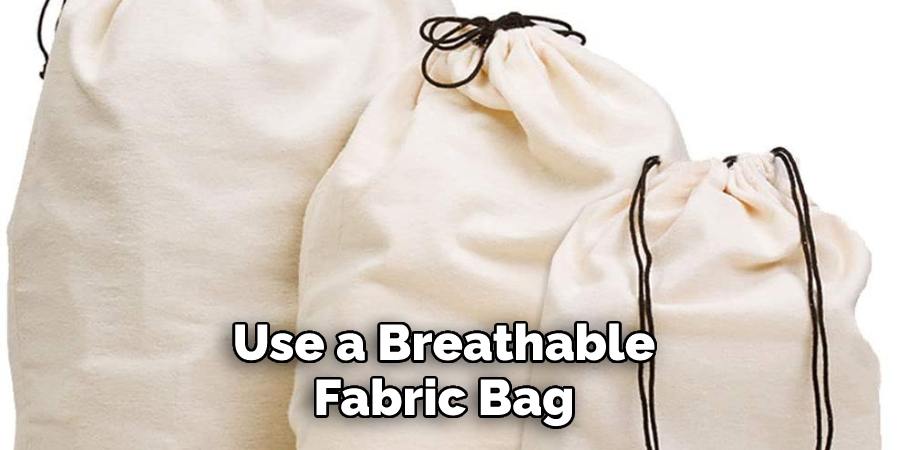
- Use a breathable fabric bag (such as muslin) to store the crochet beach bag when not in use. This will help keep the bag from becoming musty or dusty.
- For extended storage, you can also place a packet of silica gel inside the fabric bag to absorb excess moisture and prevent mold or mildew growth.
By taking these simple steps, you can ensure that your crochet beach bag lasts many years.
Conclusion
In conclusion, crocheting a beach bag is a great way to add some style and flair to any summer wardrobe. It is fun and easy, but it can be done with just about any type of yarn or thread. Once you’ve mastered the basic stitches, the possibilities for customizing your project are endless.
Whether you want something simple and chic or something a little more intricate and eye-catching, crocheting a beach bag allows you to express yourself through your craft. I hope this article has been beneficial for learning how to crochet a beach bag. Make Sure the precautionary measures are followed chronologically.
You Can Check It Out to Fasten off Crochet