
Do you love crafting and making accessories for yourself or others? If so, take a stab at customizing your keychain! With the right supplies, creating this unique DIY piece is relatively easy. Plus, it’s an excellent way to create something sentimental value that can be worn as a token of appreciation and memory.

Wrapping a keychain is one of those small DIY projects that can make a big impact. It’s also easy to give your keys a personalized, custom look! Whether you’re making something unique as a gift or just want to jazz up your existing keyring, this simple tutorial will show you how to wrap a keychain.
With just a few basic supplies—like fabric scraps and embroidery thread—you’ll be able to create something truly unique in no time! Let’s get started!
What Are the Uses of Keychains?
Before diving into the tutorial, let’s talk about why keychains are essential. Keychains serve a practical purpose by holding our keys in one place and preventing them from getting lost. But they’re also used to express personal style, show support for a cause or organization, or even as a souvenir from a memorable trip.
Some people even collect keychains as a hobby, searching for rare or unique ones to add to their collection. No matter the reason, keychains are an everyday item that can be made special with just a few simple steps.
Overall, keychains have a lot of uses and can be an excellent way to showcase your creativity and personality. So, let’s learn how to make one!
What Will You Need?
Before we dive into the steps, let’s ensure you have everything you need to wrap your keychain. Here’s a quick list of supplies:
- Keychain
- Fabric scraps (preferably cotton)
- Embroidery thread
- Scissors
- Glue gun or fabric glue
Once you have all your supplies ready, let’s move on to the steps!
8 Easy Steps on How to Wrap a Keychain
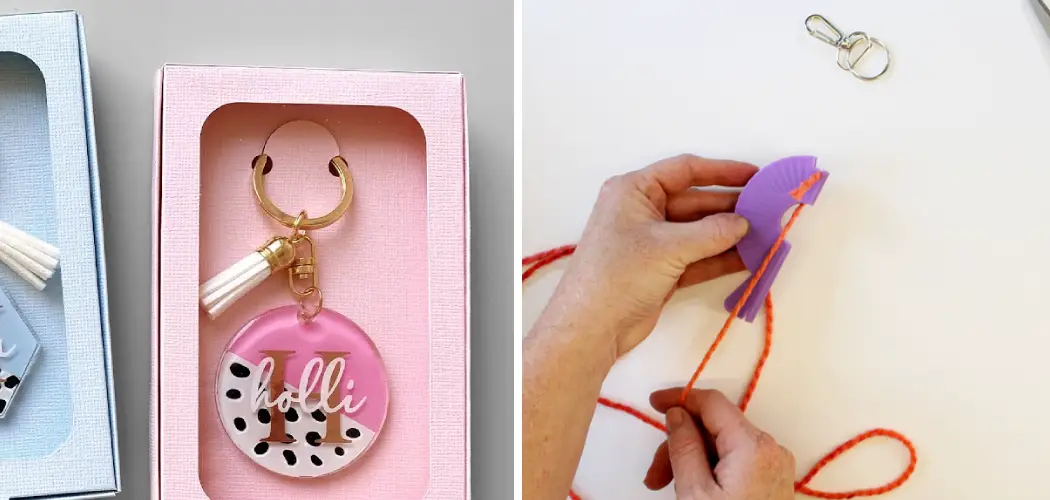
Step 1: Cut Your Fabric
Start by cutting a piece of fabric that is about an inch longer and wider than your keychain. Make sure to choose a lightweight fabric that is not too thick, as it will be easier to wrap around the keychain. If you’re feeling extra creative, you can even use multiple fabrics to add a fun pattern or design to your keychain.
Step 2: Apply Glue to the Keychain

Next, apply a thin layer of fabric glue or hot glue to your keychain. Be careful to spread the glue evenly over the whole keychain surface. This will ensure that the fabric sticks properly and lays flat all the way around. Be sure to leave a small section at the top (where the keyring will go) free of glue to make it easier to attach the ring later on.
Step 3: Start Wrapping the Fabric Around the Keychain
Once the glue is applied, wrap your fabric around the keychain immediately. Begin from one end and make sure the fabric is tightly wrapped and smooth. As you work your way around the keychain, apply additional glue if needed to ensure the fabric adheres properly. Remember to wrap a bit extra at the top to allow for the keyring to be attached. Make sure to press down securely so the fabric sticks well.
Step 4: Trim Excess Fabric
Once the fabric is fully wrapped around the keychain and the glue is dry, use your scissors to trim any excess fabric carefully. Be sure to leave a bit of extra fabric at the top, where the keyring will be attached. This will give your keychain a clean, finished look. Ensure to trim any loose threads as well to prevent fraying.
Step 5: Attaching the Keyring
Now that the fabric is securely wrapped and trimmed, it’s time to attach the keyring. Carefully thread the keyring through the extra bit of fabric you left at the top of the keychain. To secure it further, you can add an extra dab of glue. Make sure to let the glue dry completely before you start using your new, custom-wrapped keychain. Congratulations, you’ve successfully wrapped a keychain!
Step 6: Embellishing Your Keychain
Now that your keychain is wrapped, it’s time to add some personal touches. You can use your embroidery thread to create patterns, initials, or even a little artwork on your wrapped fabric.

Start by threading your needle and decide on the design you want to create. Carefully sew the design onto the fabric, making sure each stitch is secure. Secure the thread and trim any excess once you’re happy with your design. This step is optional but adds a personalized touch to your keychain.
Step 7: Finishing Touches
After you’ve added your desired embellishments, give your keychain a finishing touch. This could include adding small charms, beads, or even a tassel. Attach these to the keyring for an extra pop of personality. Remember, this is your keychain—you can customize it however you like! Once you’re done, let everything set and dry completely. Voila! You have successfully created a custom-wrapped keychain.
Step 8: Testing Your Keychain
Now that you’ve finished creating your custom-wrapped keychain, it’s time to test it out! Attach it to your set of keys or backpack. Ensure that the fabric and embellishments are securely attached and don’t loose with regular use. If you notice any loose threads or fabric, use extra glue or stitches to secure them. And there you have it! Your very own personalized keychain. Enjoy your new accessory, or give it as a thoughtful, handmade gift.
By following these easy steps, you can create a unique and personalized keychain that will stand out. Get creative with your choice of fabric, thread, and embellishments, and have fun customizing your keychain.
5 Additional Tips and Tricks
- Choose the Right Material: Select a durable material for wrapping your keychain. Leather, paracord, or durable fabric can provide longevity and resist daily wear and tear.
- Securely Attach the Chain: Ensure the chain is securely attached to your desired item before wrapping. A loose chain can unravel the wrap and cause the keychain to fall apart.
- Use a Tight Wrap: Ensure the material is wrapped tightly when wrapping the keychain. A loose wrap will not provide the secure, neat appearance that a tight wrap will.
- Use Adhesive for Extra Security: Consider using a small amount of adhesive on the ends of the wrapping material to provide added security. This will prevent the wrap from unraveling over time.
- Add a Personal Touch: Customise your keychain wrap. Use different colors or materials, or add charms or other personal touches. This will make your keychain unique to you and a great gift idea.
With these additional tips and tricks, you can create a beautifully wrapped keychain that is functional and stylish.
5 Things You Should Avoid

- Avoid Using Fragile Materials: Avoid using materials that are too fragile or delicate for your keychain wrap. They can easily tear or fray, reducing your keychain’s lifespan.
- Don’t Rush the Process: Avoid rushing through the process of wrapping. A properly wrapped keychain requires patience and attention to detail. Rushing can lead to mistakes and an untidy appearance.
- Avoid Loose Ends: Be sure to tuck in any loose ends of the wrapping material securely. Loose ends can catch on objects, causing the wrap to unravel.
- Don’t Ignore the Chain Quality: Don’t compromise on the quality of the chain. A weak or faulty chain can break easily, defeating the purpose of the wrap.
- Avoid Overloading Your Keychain: Avoid adding too many keys or extra items to your keychain. Overloading can cause strain on the wrap and chain, potentially leading to damage over time.
Avoiding these common mistakes will help ensure that your keychain wrap is durable, functional, and aesthetically pleasing.
How Do You Style a Keychain?
One of the great things about keychain wraps is that they can be styled in various ways to suit your personal preferences. Some popular styles include:

- Minimalist: A simple wrap using a single color or material without additional decorations or charms.
- Bohemian: Using colorful and eclectic materials like beads, feathers, and tassels to create an unconventional and unique look.
- Sophisticated: Using high-quality materials like leather or metal to create a sleek and elegant wrap.
- Sports-Inspired: Use team colors or themed materials to show off your team spirit on your keychain for sports enthusiasts.
- Whimsical: Using fun and playful materials like pom-poms, ribbons, or cartoon characters to add a touch of whimsy to your keychain.
The style possibilities are endless, and you can mix and match techniques to create a customized look that reflects your personality. Remember to have fun and be creative with your keychain wrap!
Conclusion
To sum up, when it comes to wrapping a keychain or any small item, all you need is patience and attention to detail. There will be some trial and error involved in the process, but with practice, you can create beautiful gift-wrapping in no time. Don’t be afraid to get creative with your materials and design – this is your chance to express your unique style!
Hopefully, these tips and tricks have given you the inspiration and knowledge to wrap your keychain like a pro.
With these tips on how to wrap a keychain in mind, you are now ready to wrap keychains (or any other gifts) like a professional. Have fun experimenting, and good luck turning those tedious gifting tasks into something extraordinary—you’ve got this!