
Wet blocking is a great tool for finishing knitting projects. It helps keep the stitches even and lets you get creative with your designs. Wet blocking also makes it easier to sew seams, which is essential in most knitted garments.
Wet blocking is a great way to maintain the shape and size of your knitting project. It helps even out stitches, relaxes any curling or rippling of edges, and brings out the true beauty of the fabric created with yarn.

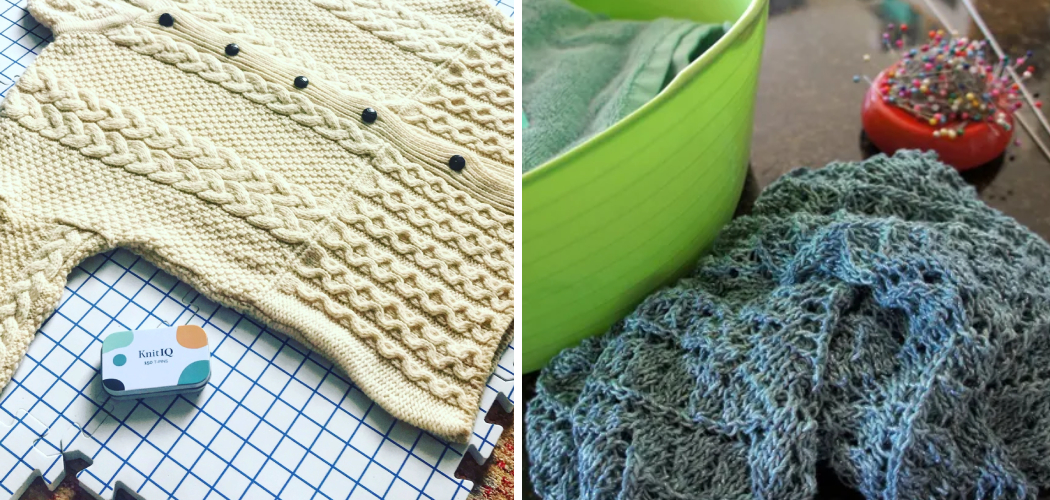
Blocking also sets in any decorative cable patterns or lace work, enhancing the stitch definition if working with variegated yarn. You can find step-by-step instructions on how to wet block knitting in this blog article.
Materials You Will Need
- Yarn
- Blocking wires
- Blocking mats or foam boards
- T-pins, rust-proof pins, or quilting pins
- Measuring tape
- Spray the bottle with warm water
- Optional: steam iron & pressing cloth
- Optional: blocking solution or soapy water
- Optional: dish soap or natural wool wash
- Towels
Blocking is an essential part of the knitting process that helps your finished item look its best and achieve its desired shape. When blocking, you essentially ” set” the fabric by stretching it into place and holding it until dry.
Step-by-step Instructions for How to Wet Block Knitting
Step 1: Inspect the Knitting Fabric
Before you wet block your knitting, look at the knitted fabric. Look for any areas that need special attention, such as places with uneven stitches or stretched-out sections. If needed, make any adjustments to your work before wet blocking it.
Step 2: Gather Your Supplies
Before you begin wet blocking, ensure all the necessary items are on hand. You will need a water-safe surface, such as a thick towel or blocking board, pins, and t-pins. You can also use knitting blockers if you need extra precision when blocking your project.

Fill a sink or bucket with lukewarm water. Use a gentle shampoo or wool wash if the fabric has delicate fibers. Add your knitting to the water and gently swish it for several minutes to ensure all areas are saturated.
Step 3: Remove Excess Water
Gently remove excess water from your knitting by rolling it up in a towel. Place the knitting on a flat surface and press down firmly to extract as much water as possible. Don’t twist or wring the fabric, as this could cause it to stretch out unevenly.
Lay it out on your blocking surface once your fabric is damp but not dripping wet. Make sure to smooth out any creases or folds. Use pins to keep the fabric in place and keep it from shifting.
Step 4: Shape Your Knitting
Use your hands or a ruler to shape your knitting while drying. Make sure that all corners are squared off, edges are straight, and stitch patterns look even throughout. Check for any areas that need more definition and adjust accordingly.
Once your knitting is shaped, allow it to dry completely. Depending on the type of yarn used, this could take several hours to overnight. Take your time with the process by using a hairdryer or placing your work in direct sunlight.
Step 5: Remove Pins Carefully
Once your knitting is dry, carefully remove the pins and let them settle for a few minutes before unpinning. This will help to keep the shape intact. You can use a steamer or spray bottle of water to lightly steam block your knitting if desired. This will add extra definition to lace patterns and give the fabric a polished look.

To keep your knitting looking its best, use gentle detergents when washing and avoid putting it through the dryer. If needed, lightly press pieces with an iron on a low setting.
Remember to take pictures of your hard work for future projects. With proper care, wet blocking can make all the difference in your knitting projects.
Tips for How to Wet Block Knitting
- Safety first! Always wear protective gloves when working with pins or needles to avoid accidents and injuries.
- Read the yarn label carefully before wet blocking to ensure that you use the right water temperature for its fibers.
- Check your knitting often while drying to ensure it only stretches out a little or becomes misshapen.
- Use a non-slip surface, such as a thick towel or blocking board, when blocking your projects.
- Always unplug your steamers and other electrical devices to prevent accidents before using them near water.
- If using t-pins, make sure they are evenly spaced to ensure your fabric does not stretch out unevenly.
Follow these tips, and rest assured that your knitting projects will look their best after wet blocking.
Are There Any Special Techniques That Can Help You With Wet Blocking?
Yes, a few special techniques can make the wet-blocking process easier. The first is to use pins and blocking wires to stretch your project evenly when laid out. Pins are great for securing the edges of a garment while blocking wires helps you define straight lines and shapes in pieces like shawls.
You should also pay attention to the tension of your stitches when blocking. If you knit too tightly, stretching can cause distortions and wrinkles in the fabric. This is why it’s a good idea to swatch before knitting any project to know what kind of tension works best for each yarn.

Finally, using a spray bottle filled with water is always a good idea to lightly dampen the fabric before blocking. This will help the fabric fibers relax and make blocking your project’s desired shape easier.
How Can You Prevent Your Knitting From Shrinking During the Wet Blocking Process?
One of the most effective ways to prevent your knitting from shrinking during the wet blocking is to use a soft, non-abrasive soap and plenty of cold water. It’s important to rinse the soapy water out completely before proceeding with the blocking process. Additionally, it’s best not to agitate or twist the fabric too much while washing, as this can cause the fibers to shrink and distort.
Another way to preserve your knitting during the wet blocking process is to use a fabric conditioner or a lanolin-based wool wash detergent, which will help lock in essential moisture and keep your fabric from becoming overly dry.
Make sure that you rinse out the conditioner/detergent completely before proceeding with blocking. Also, you should resist the urge to stretch your knitting while wet, as this can cause it to become misshapen and lose its original shape quickly.
Are There Any Special Considerations You Should Take When Wet Blocking a Garment?
Yes. Before you wet block a garment, several important considerations must be considered. First, thoroughly wash and dry the garment before starting any wet blocking process. The combination of gentle washing and air drying ensures that any dirt or oils left on the fabric will be eliminated. This helps ensure an even stretch throughout the fabric when blocking.

Next, ensure that the right tools are available for the task. Blocking mats, pins, and water spray bottles are all important tools to have on hand when wet blocking a garment. Additionally, depending on the type of fabric being used, you may need to use steam or cold water instead of regular tap water during the process.
What is the Best Way to Store Knitted Items After They Have Been Wet Blocked?
Once you have finished wet blocking your knitted items, the best way to store them is to lay them flat. This prevents the fabric from stretching or warping when stored in a tight container. If you are sending an item to a recipient, it is best to lightly press it with a hot iron and wrap it in tissue paper before shipping.
It’s also important to ensure the item is dehydrated before storing it. Mildew and other bacteria can grow on the fabric if stored while damp.
Blocking boards or pinning mats are good options if you’re looking for a more permanent solution. These are usually made of foam with embedded pins, allowing items to be held in place and reshaped. Blocking can also be done by pinning the items directly onto a fabric or cardboard.
Regardless of the method used, it’s important to use pins that won’t rust or damage the fibers of your knit fabric. Rustproof stainless steel pins are an excellent choice for this purpose.
What Kind of Care Should You Take When Washing a Knit Fabric That Has Been Wet Blocked?
When wet blocking a knit fabric, you must take special care to ensure that the fabric doesn’t shrink or stretch too much. To prevent this from happening, make sure that you use cool water and gentle detergents when washing your knit fabric before you block it. Ensure your wash cycle is short and sweet–no more than 5 minutes of washing should do the trick.
It’s also important to avoid wringing or scrubbing the fabric when you’re washing it–just submerge it gently and let it soak in the soapy water before rinsing it off with cool water. Once your knit fabric is done being washed, make sure that you lay it out flat on a dry towel and allow it to air dry. This will help ensure that your wet blocked knits retain shape and size.
Conclusion
In conclusion, wet-blocking knitting is an important step to achieving the look and feel of your finished project. It helps you achieve a more uniform shape, even out stitches and gives you the desired size and drape that you’re looking for.
Whether you use blocking mats, pins, or wires, each element will help create a beautiful finished product tailored just for you. I hope reading this post has helped you learn how to wet block knitting. Make sure the safety precautions are carried out in the order listed.