
Are you looking for a fun and creative way to express yourself? Foam clay is a versatile art material that can be used for all kinds of crafts! Whether you’re making figures, jewelry, decorations, or anything else your imagination can think of, foam clay has the potential to add color and texture like no other. With its lightweight and pliable nature, it’s perfect for crafting by both experienced crafters and beginners alike.

Foam clay is a type of sculpting clay that is made from tiny foam beads, glue, and coloring. When mixed, it forms a smooth and pliable material that can be shaped into any form you desire.
In this blog post, we’ll explore how to use foam clay in different ways so that you can unleash your creative ideas with ease! So don’t wait any longer; let’s start discovering the amazing possibilities of foam clay!
What Will You Need?
Before we dive into the different ways to use foam clay, let’s make sure you have all the necessary materials. These are the essential tools that will help you create your masterpieces with foam clay:
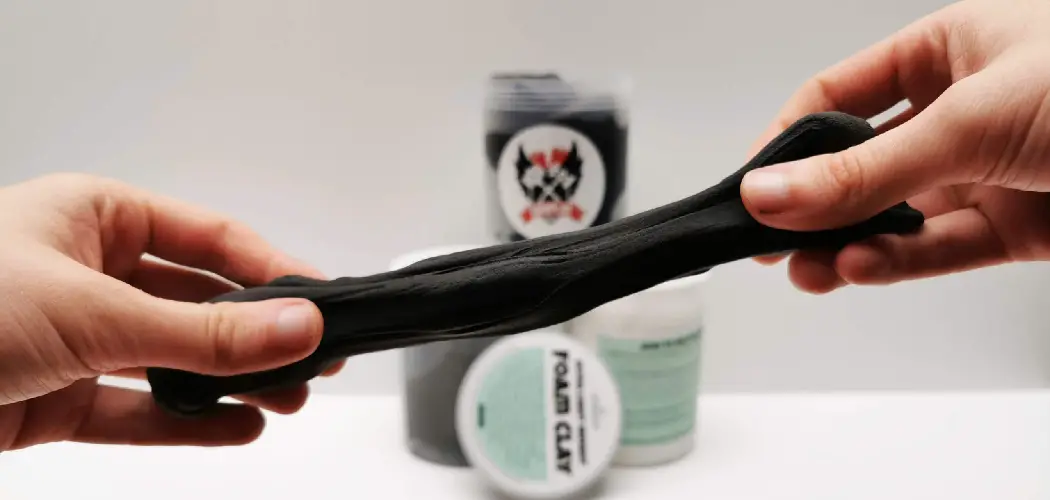
- Foam Clay: Of course, the most essential ingredient is foam clay! You can find it in various colors at a local craft store or online.
- Sculpting Tools: These can be anything from toothpicks, skewers, or small plastic knives. You can also find special sculpting tools made explicitly for foam clay.
- Rolling Pin: A rolling pin is helpful in flattening out the clay and making it easier to work with.
- Cutting Tools: Scissors are essential for cutting foam clay into smaller pieces or shapes. A cookie cutter can also be a handy tool for creating uniform shapes.
- Crafting Surface: Protect your workspace with a plastic sheet or parchment paper to prevent the clay from sticking.
Now that everything is ready let’s explore some fun and creative ways to use foam clay!
10 Easy Steps on How to Use Foam Clay
Step 1. Select Your Clay:
Begin by choosing the color of foam clay you want to work with. It’s often best to start with one color and add more as you become more comfortable with the material. To create a specific design, ensure you have all the colors you need.

Step 2. Prepare Your Clay:
Take a small amount of foam clay from the container. Knead it gently in your hands until it becomes soft and pliable. If you’re using multiple colors, repeat this process for each one. Remember, a little goes a long way, so start with a small amount and add more if needed.
Step 3. Mold Your Clay:
Now comes the fun part – molding your foam clay! Using your hands and sculpting tools, start shaping the clay into your desired form. Whether making a small figurine, a piece of jewelry, or simply experimenting with shapes, this step is where your vision comes to life.
If you’re using multiple colors of foam clay, this is when you incorporate them into your design. Remember to work gently and take your time to ensure your result is exactly as you envision. The foam clay is forgiving and can be reshaped as often as needed, so don’t be afraid to make adjustments as you go along.
Step 4. Smooth Out Your Design:
After shaping your foam clay, smooth out any rough edges or imperfections with your fingers or sculpting tools. Gently rub the surface of your creation until it’s as smooth as you want it to be. This step might seem minor, but it can make a big difference in the overall appearance of your finished piece. Remember, foam clay is forgiving, so take your time and don’t rush this process.
Step 5. Add Details:
At this stage, your main design should be taking form. Now, you can add the small details that will bring your creation to life. Think about the textures, patterns, or accessories you want to include. Use your sculpting tools to create these details on your foam clay piece.

For instance, if you’re crafting an animal, this could be the time to add facial features or fur texture. If you’re making jewelry, you may want to add some decorative patterns. The level of detail is entirely up to you, but remember, it’s the small touches that often make a piece truly unique and special.
Step 6. Let Your Creation Dry:
Once you’ve finished molding and adding details to your foam clay creation, it’s time to let it dry. Place your piece in a safe, dry place where it won’t be disturbed. Depending on the size and thickness of your design, it might take anywhere from a few hours to a couple of days to fully harden.
Be patient; rushing this process can result in your piece cracking or losing its shape. Once your creation is completely dry, it will be solid and ready for the next step.
Step 7. Paint Your Creation:
Once your foam clay craft is completely dry, you can paint it. This step is optional, but it can add another layer of creativity to your project. You can use any paint you like, but acrylic paints usually work best due to their bright colors and quick drying time. Get creative with your color choices and design – this is your chance to make your creation pop! After painting, let your piece dry completely before moving to the next step.
Step 8. Apply Sealant (Optional):
If you want your foam clay creation to have a shiny finish or want to make it more durable, you can apply a sealant. This could be a clear craft varnish or sealant spray, which you can purchase from a craft store. This step is optional if you’re happy with your creation as it is. But if you do choose to seal your piece, ensure you do it in a well-ventilated area and let it dry completely before handling.
Step 9. Admire Your Work:
Now that your foam clay creation is complete and fully dried take a moment to admire your work. Each piece you make is a unique expression of your creativity and imagination. No two projects will be the same, and that’s the beauty of working with foam clay.

Whether you decide to keep your creation for yourself, gift it to someone special, or display it for others to enjoy, remember that the value lies not only in the final product but also in the fun and learning experience you had while creating it.
Step 10. Continue Exploring:
The possibilities with foam clay are endless, so don’t stop here! Keep exploring different shapes, designs, and techniques. You can even look for inspiration online or in craft books to get new ideas for your next foam clay project. The most important thing is to continue nurturing your creativity and having fun with it.
By following these ten easy steps to use foam clay, you’ll soon become a foam clay crafting pro! Remember to have patience and enjoy the process.
5 Additional Tips and Tricks
- Experiment with Different Textures: Foam clay can be molded to create different textures. Try using various shaping tools or household items to imprint unique designs onto your clay.
- Keep Unused Foam Clay Sealed: Always remember to store unused foam clay in an airtight container to prevent drying.
- Allow Adequate Drying Time: Depending on the thickness of your creation, foam clay can take between 24 to 72 hours to fully dry. Allow ample time for drying to ensure the best results.
- Painting Your Creation: Once your foam clay creation is thoroughly dry, it can be painted. Acrylic paint works well, but for a more vibrant finish, consider using paint specifically designed for foam clay.
- Learn from Mistakes: Take your time with initial mistakes. Working with foam clay is a learning process. Each mistake is an opportunity for improvement on your next creation.

With these additional tips and tricks, you can take your foam clay creations to the next level.
5 Things You Should Avoid
- Avoid Rushing the Drying Process: Speeding up the drying process of foam clay with heaters or hairdryers can cause cracking and shrinkage. Always allow your creations to dry naturally.
- Avoid Using Wet Tools: When shaping your foam clay, using wet tools can make the clay stick and create an undesirable texture. Always use dry tools for a smoother finish.
- Avoid Overworking the Clay: Constantly manipulating the foam clay can cause it to lose its flexibility, leading to a more complex, less manageable material. Work the clay only until it’s soft and smooth.
- Avoid Leaving Clay Uncovered: Once opened from its packaging, foam clay can quickly dry out. Ensure you cover unused clay with cling film or store it in a sealed container to retain its moisture.
- Avoid Using Unsuitable Paint: Not all paints adhere well to foam clay. Use paints designed explicitly for foam clay or good-quality acrylic paints for optimal results.
With these tips, you can now confidently use foam clay to create unique and beautiful artwork. Remember to experiment, have fun, and let your creativity flow!
Conclusion
As you can see, foam clay is a versatile craft material that can be used to create fun and unique projects. With these fun ideas and simple guidelines, you can utilize this fantastic activity for yourself or with kids.
What will you create with your foam clay creations? Despite its simple nature, the possibilities are endless when it comes to crafting with foam clay. Get creative and have fun! This is a great activity to bring everyone together to showcase their creativity and imagination.
Hopefully, the article on how to use foam clay has inspired you to give this fun, tactile craft a try! Remember, practice makes perfect, and with each creation, you will learn new techniques and improve your skills. So go ahead, grab some foam clay, and get creating! Have fun!