
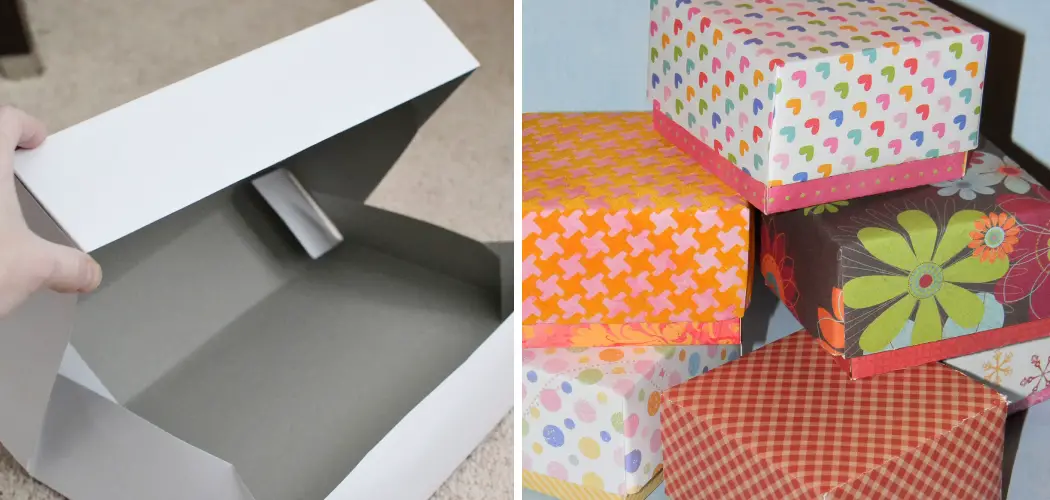
Do you have an old gift box lid lying around your home, but no bottom to create a full box? Don’t despair – with a few tools and supplies on how to turn a gift box lid into a box, you can transform that lid into a functional yet stylish décor item.
Whether you’re looking for something unique to store mementos or add character to your living space, this project is sure to be fun and rewarding!

All it takes is some creative problem-solving in order to repurpose the materials available. In this post, we’ll go over how you can turn a gift box lid into an attractive new storage solution.
Why Do You Need to Turn a Gift Box Lid Into a Box?
If you don’t have the bottom of a gift box, it may seem like your options are limited. But with a few creative strategies and supplies, you can transform a gift box lid into an attractive storage solution. You’ll be able to use the finished product to store mementos, small household items or even toys! Not only that, but you can also add a decorative touch to your living space with the addition of a unique box.
What Materials You’ll Need
To turn a gift box lid into a box, you’ll need the following supplies:
Gift Box Lid (Preferably in Good Condition)
It’s important to make sure the lid is in good condition, as any damage or wear and tear may interfere with the final product.
Measuring Tape
You’ll need a measuring tape to measure out the best size for your box bottom.
Cardboard or Poster Board (Cut To Size)
Once you have your measurements, use cardboard or poster board to cut the size of your box bottom.
Glue or Tape
Choose either glue or tape to secure the lid and bottom together. Make sure it’s strong enough that the box won’t fall apart easily!
Scissors
You’ll need scissors to make any necessary adjustments to the cardboard or poster board when cutting it into the correct size for your project.
Decorative Paper (Optional)
If you want to add a personal touch to your box, use decorative paper to cover the bottom of your box!
10 Step-by-step Guides on How to Turn a Gift Box Lid Into a Box
Step 1: Measure the Lid
Start by measuring the lid with a tape measure and note down the dimensions. This will be the size of your box bottom. It’s important to make sure you get accurate measurements here, as any mistakes could affect the finished product.

But it’s okay to be a bit generous, as you can always trim the cardboard or poster board later. If you want to be extra sure, it may help to mark the dimensions on the lid with a pen.
Step 2: Cut the Cardboard or Poster Board
Using scissors, cut out a cardboard or poster board to the size you measured in Step 1. If you’re using poster board, it’s best to use a straight edge or ruler for an even cut. It may help to draw a line with a pen before cutting.
This will ensure that you get the desired shape and size for your box bottom. But it’s important to keep in mind that the cardboard or poster board should be slightly smaller than the lid, as this will make it easier to attach
Step 3: Glue or Tape The Bottom
Using glue or tape, secure the bottom to the lid ensuring that it is securely attached and won’t come apart easily. But if you’re using glue, make sure it dries completely before moving on to the next step. It may help to add a few extra pieces of tape for added security.
This will make sure the box lid and bottom don’t separate. You can always add decorative paper or fabric to the cardboard or poster board before attaching it to the lid if you want a more finished look!
Step 4: Decorate (Optional)
If desired, decorate your box with decorative paper for a unique touch! Let the glue dry before moving on to the next step. It’s up to you how you’d like to decorate it – go for bright colors, patterns, or even paint! But make sure to cover the entire bottom of the box for a neat and finished look. It may also help to add a few stickers or embellishments.
Step 5: Trim Edges (Optional)
Trim off any excess material on both pieces if necessary. This will ensure that your box lid and bottom fit together perfectly. But make sure to be careful when trimming – you don’t want to accidentally cut too much and ruin the shape or size of your box. This may be done with scissors or a box cutter.

Step 6: Attach the Lid to the Bottom
Securely attach the lid to the bottom of the box using glue or tape. Make sure it is firmly attached so that your box won’t come apart easily! It may help to add a few extra pieces of glue or tape for added security. This will ensure that your box lid and bottom don’t separate. It may also help to press the lid onto the bottom firmly as you glue or tape it.
Step 7: Let it dry
Let everything dry for a few hours before you move on to Step 8. This will ensure that all pieces are securely attached. It may help to add a few extra pieces of tape for added security. It is important to make sure that the box lid and bottom don’t separate. But make sure to be careful when trimming – you don’t want to accidentally cut too much and ruin the shape or size of your box.
Step 8: Add any Finishing Touches (Optional)
If desired, add any finishing touches such as ribbon or stickers to make your box look more attractive. It’s up to you how you’d like to decorate it! This will make the box look more finished and appealing. It may be helpful to use a glue gun for any ribbons or decorations to ensure they stay in place.
Step 9: Fill Your Box
Now that your box is complete, fill it with whatever items you desire! But make sure to be careful when stuffing the box, as you don’t want to damage any of the decorations or lids. It may help to stuff it loosely and avoid adding too much weight in order to prevent the box from breaking. It is also important to make sure that the lid and bottom fit together correctly.
Step 10: Enjoy!
You’re done! Sit back and enjoy the fruits of your labor. Your box is now ready to be used as storage or decoration in your home. Always remember to be careful when moving the box, as you don’t want to damage it. However, if it does become damaged or worn out over time, you can always make a new one!
Following these steps on how to turn a gift box lid into a box, you can easily turn a gift box lid into an attractive storage solution. With just a few supplies and some creative problem-solving, you can make a functional yet stylish décor item that will add character to any living space!

So don’t throw away those old lids – instead, put them to good use and create something unique that you’ll love for years to come. Good luck with your project!
Frequently Asked Questions
Q: What Type of Glue Should I Use?
A: It’s best to use a strong adhesive such as craft glue, hot glue or super glue. This will ensure that the box lid and bottom are securely attached and won’t come apart easily.
Q: Should I Measure Both Pieces of My Box?
A: Yes! It’s important to measure both pieces so you know exactly what size to cut your cardboard or poster board for the bottom. This will help create a snug fit between the lid and bottom, ensuring that your box is secure.
Q: Can I Use Fabric To Decorate The Bottom?
A: Yes! You can use fabric instead of paper to give your box an extra touch of style if desired. Just make sure it’s firmly attached before filling your box with items.
Q: How Long Should I Let the Glue Dry?
A: Most glues will need to dry for a few hours in order for them to be secure. Make sure you give your box enough time before moving on to Step 8 of this project.

Conclusion
To wrap it all up on how to turn a gift box lid into a box, the most important step when turning a gift box lid a box is to ensure that your materials are correctly measured and cut. Taking the extra time to measure properly along with following the steps outlined in this tutorial will help you create an attractive and sturdy box.
Additionally, it’s important to remember to strengthen the corners of your box as this will add durability and style. Hopefully, this tutorial helped you gain an understanding of how to transform an ordinary gift box lid into something special—so be brave and give it a try!
You can also use your newfound skills for various DIY projects or even for creative gift-wrapping ideas. The possibilities are endless! All that’s left to do is grab some cardboard and craft supplies, and unleash your creativity! Good luck!
You Can Also Check This Out to Decorate Paper Pumpkin