
Are you a Cricut craft-lover who’s ready to move on from paper and join the world of fabric crafting? Do you love more intricate designs on your paper crafts? Cricut is a great tool to achieve this, but it can also be tricky to work with. If so, then congratulations – you’ve taken the first step towards unlocking the full potential of your cutting machine!

But before you can start slicing through materials like felt and leather, there’s one small task left: taking out the pen holder. It might seem daunting at first glance, but don’t worry – removing your pen holder is actually quite simple.
In this blog post, we’ll walk you through all of the steps on how to take out cricut pen holder required for successful removal so that you can get started with fabric customization right away! Keep reading for valuable tips and tricks that will allow you to craft like a pro in no time.
What is a Cricut Pen Holder?
The Cricut pen holder is an essential part of the Cricut cutting machine. It holds different tools like pens, markers, and blades in place so that they can precisely cut through materials without slipping or moving around.
Without it, you won’t be able to successfully create intricate designs – and as a result, your projects won’t look professional. That’s why it’s so important to understand how to take out cricut pen holder when needed.
Preparing for Removal
Before you start taking out the Cricut Pen Holder, it is essential that you make sure everything is properly set up first. Start by removing any excess materials or tools from the machine – these will only get in the way during the removal process.
Then, double-check that all of the blades and tools are secured in place – this step is especially important if you’re using a blade with a handle or any other tool that can move around when not locked down properly.
Required Items for Removal
In order to successfully take out the Cricut Pen Holder, you’ll need a few items. These include
- A Phillips head screwdriver
- A ruler or measuring tape
- A soft cloth for wiping down the area
- Safety glasses (if you’re cutting materials)
How to Take Out Cricut Pen Holder in 10 Steps

Now that you have all of the necessary items, it’s time to start taking out the pen holder. Here are the steps you’ll need to follow:
Step 1: Unplug the Machine
Unplug your machine from all power sources before starting. Also, be sure to keep the machine away from any flammable materials as it can become hot while in use.
Step 2: Locate the Pen Holder
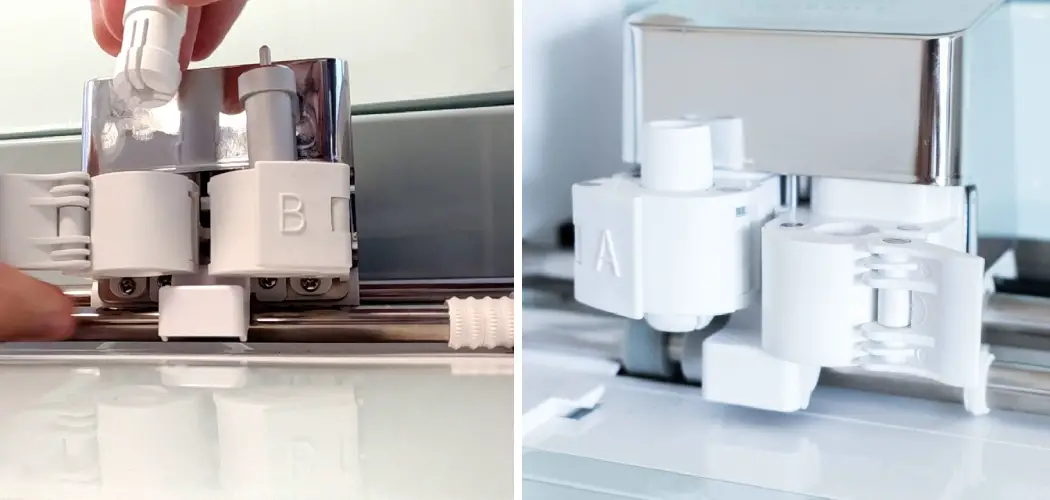
Locate the pen holder on the left-hand side of your Cricut cutting machine. It should resemble a small rectangular box with two Phillips head screws at each end.
Step 3: Use the Screwdriver
Using a Phillips head screwdriver, unscrew both of the screws from the pen holder. You may need to apply some pressure in order to remove them properly.
Step 4: Slide the Pen Holder Out
Once both screws are removed, you can carefully slide out the pen holder. Note that there may be some resistance here – don’t force it, as this can cause damage to the machine.
Step 5: Measure the Area

Using a ruler or measuring tape, measure the area where the pen holder is located. You want to make sure that the new holder will fit snugly in place once it’s installed.
Step 6: Clean the Area
Using a soft cloth, wipe down the area where the pen holder was located to remove any dust or debris. This will help ensure that your machine runs more efficiently when you have the new pen holder installed.
Step 7: Insert the New Holder
Using the measurements you took, carefully insert the new pen holder into its designated area. Make sure that it’s snugly in place before moving on to the next step. Inserting the pen holder incorrectly can cause damage to your machine.
Step 8: Fasten the Holder with Screws
Using a Phillips head screwdriver, fasten the pen holder in place by reinserting both of its screws. Again, make sure that they’re securely fastened before moving on.
Step 9: Test the Holder
Now it’s time to test your new pen holder. Plug in the machine and try cutting through some materials – if everything looks good, then you’re all set! Testing is an important step in the removal process as it ensures that your machine is working correctly and safely.

Step 10: Enjoy Crafting
You’ve done it! Now that you have successfully taken out and inserted a new pen holder, you can start crafting away to your heart’s content without any worries. Enjoy all of the possibilities that Cricut has to offer – the world of fabric customization is yours to explore!
Following these steps will guarantee that you can take out and insert Cricut pen holders with ease. But even if you encounter any difficulties or issues, don’t worry – there’s always help available. Whether it’s through online tutorials or customer support, anyone can master the art of removing a Cricut Pen Holder in no time!
8 Common Mistakes to Avoid When Taking Out the Cricut Pen Holder
- Not paying attention to the pen holder’s positioning. The Cricut pen holder is designed to be inserted horizontally, so make sure it’s correctly placed when you insert it into the machine.
- Do not use a damp cloth or paper towel to clean the penholder of dust and dirt. This will prevent the pen holder from getting stuck and ensure a smooth removal process.
- Not push on the Cricut Pen Adapter firmly before removing it from the machine. Make sure to press down hard enough so that it comes off easily when spinning in either direction.
- Pulling too hard or using excessive force when taking out the pen holder. This can damage the Cricut Pen Adapter, so it’s important to be gentle when removing it.
- Not turning off the machine before attempting to take out the pen holder. Always turn off your Cricut machine before you start taking out any parts, such as the pen holder, as this will help prevent injuries and damage to the device itself.
- Not unplugging the power cord before attempting to take out the pen holder. Unplugging the power cord is key, as this will help avoid unexpected shocks or short circuits, which can be hazardous.
- Trying to remove a stuck pen holder without seeking professional help if needed. If your Cricut Pen Adapter is stuck, it’s best to seek professional help in order to avoid damaging your device further.
- Failing to store the Cricut Pen Adapter properly when not using it. It is important to store the pen holder in a safe place that won’t get too hot or cold, as extreme temperatures can affect its performance over time.
Overall, following these tips will help ensure a smooth and successful process when taking out the Cricut Pen Holder. With that in mind, make sure you have all the right tools and materials to hand before beginning the process.
Additionally, always be sure to securely store your Cricut Pen Adapter away from extreme temperatures when not using it. This way, your pen holder will remain in good condition and will be ready to use when needed.
Additional Tips on Taking Out the Cricut Pen Holder

- To make taking out the pen holder easier, consider using a pair of rubber gloves. This will provide you with extra grip and make it easier to loosen any stuck pieces.
- Check the Cricut Pen Adapter for any signs of damage before attempting to take it out of the machine. If you notice any irregularities or broken parts, contact customer support right away.
- Make sure to wear protective gear, such as safety glasses and ear protectors, when taking out the pen holder. This will help protect your eyes and ears from any potential hazards while working with small parts.
- When removing a stuck Cricut Pen Adapter, use a damp cloth or paper towel to help loosen it up first before attempting to take it out.
- Finally, always be sure to store your Cricut Pen Adapter in a safe place that is away from any direct sunlight or high temperatures. This will help keep it in good condition and ensure that it remains functional for longer periods of time.
Conclusion
Taking out your Cricut pen holder doesn’t have to be a daunting task. With a few simple steps, you can make sure that your pens are fitted securely and securely in the right place and also check to make sure that your projects go according to plan.
You don’t have to worry about spending too much time on this task either, as it will only take a few minutes of your day. Take some time now to ensure that your machine is running smoothly and providing the best results possible.
By following the above-mentioned steps on how to take out cricut pen holder, you will get creative satisfaction knowing all your hard work has paid off and brought something beautiful into existence. Don’t forget to keep exploring new possibilities with Cricut; you never know what incredible things you may be able to make if you put your mind to it!
you can check it out also : Make Wedding Signs With Cricut