
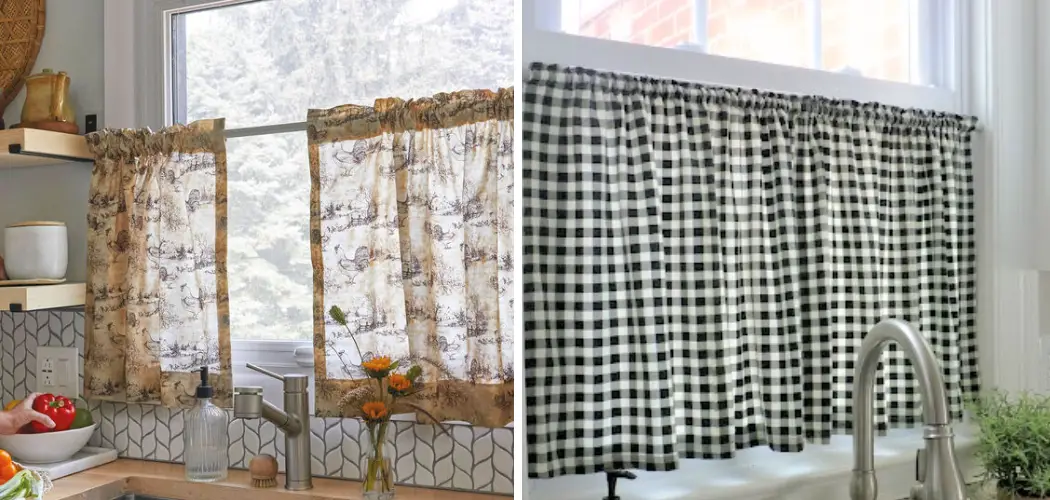
For those of us with a bit of craftiness in our blood, making something by hand can be a truly rewarding experience – and when it comes to giving your home decor an extra sense of style, DIY-ing cafe curtains is one way to do just that!

Whether you’re looking for a functional window covering or just want something more unique than what’s available in stores, handmade curtains make a great and cost-effective addition to any home. Read on for our guide on how to make a cafe curtain – we promise the process will be surprisingly simple and satisfyingly chic.
Necessary Materials
Given below is a basic list of materials you will need to make your cafe curtains:
- Fabric of Choice (Two Panels Per Window), Enough for Four Times the Width and Desired Length.
- Matching Thread and Sewing Machine.
- Iron and Ironing Board.
- Ring Clips or Tabs for Hanging the Curtains.
- Sewing Pins and Scissors.
Step-by-step Guidelines on How to Make a Cafe Curtain
Step 1: Measuring and Cutting the Fabric
The first step to crafting your cafe curtains is measuring and cutting out the fabric. First, measure the bottom of the window you want the curtains to cover, and double that number for your width measurement. For the length, measure from the bottom of the window to where you would like the curtains to end – this will be your desired length.
Once you have the measurements, lay out two panels of your fabric on a flat surface and cut them accordingly. Make sure to fold over each panel’s edges to create a 1/2-inch seam allowance.
Step 2: Ironing the Fabric

Once your panels are cut out, lay them on top of an ironing board and smooth out all of the wrinkles with an iron. Doing this will help give you cleaner, crisper lines when sewing the curtains together – so take your time and be thorough. It’ll make the latter steps much easier!
Step 3: Sewing the Side Seams
Lay one panel flat on your work table, right side facing up. Next, take the other panel and place it over the first one with its right side facing down – you should have two layers of fabric with their wrong sides touching each other. Now pin the side seams together and use your sewing machine to stitch them. Make sure to finish off the seam with a zigzag stitch for added strength and durability.
Step 4: Ironing Again
Once you’re done stitching, it’s time to give the seams another pressing with an iron before proceeding – this should make the edges look sharper and the fabric even smoother. However, make sure to use the right temperature setting for your fabric type in order to avoid any damage.
Step 5: Sewing the Header
Now it’s time to make the header of your cafe curtains – this is what will hold the curtain up on a rod or other hanging system. Lay out one panel flat and pin it to the other, wrong sides together as before. Stitch along the top edge with a 1/2 inch seam allowance, and finish the header off with a zigzag stitch.
Step 6: Ironing the Header
Give your header a last pressing with the iron to make it look as crisp and sharp as possible. You can also use the same ironing technique employed in Step 4 to get a professional-looking finish. But as always, make sure to use the right temperature for your fabric type. It’ll save you from any potential damage!
Step 7: Adding Clips or Tabs for Hanging

Now it’s time to add the hardware for hanging your cafe curtains. Depending on the type of curtain rod you have, choose either ring clips or tab loops that will fit – and then sew them onto the back side of the header at regular intervals. You can use a needle and thread, or just stitch them on with your sewing machine.
Step 8: Sewing Along the Bottom Edge
Now it’s time to sew along the bottom edge of your cafe curtains. Pin the two panels together, right sides facing up, and stitch along the bottom edge with a 1/2 inch seam allowance. Make sure to finish off this seam as before with a zigzag stitch. But before proceeding, re-iron the bottom edge to make sure it’s completely flat.
Step 9: Ironing Again
Give your curtains another pressing with an iron for good measure and to make them look even sharper. This step is especially important for fabrics that are prone to wrinkling or creasing – it’ll give the final product a polished, professional finish. You may also want to consider using fabric-safe starch or spray for added stiffness and durability.
Step 10: Hemming the Sides and Bottom Edges
Now it’s time to hem the sides and bottom edges of your curtains. Fold the fabric 1/4 inch onto itself and press with an iron before stitching – this will give a much more polished look to your finished product. Make sure to finish off these seams with a zigzag stitch as well. It’ll add extra strength and durability to the curtains.
Step 11: Finishing Touches

You’re almost done! All that’s left to do is make sure all of the seams are neat and even and trim any extra fabric for a neater look. And there you have it – your beautiful cafe curtains are finally finished! Always remember that, no matter how intimidating the process may seem, DIY-ing is something that anyone can master with a little patience an effort. So go ahead and give it a try – you won’t regret it!
Making these cafe curtains may seem a bit daunting at first, but with our step-by-step guide, you’ll find it surprisingly easy and satisfyingly chic. Now your windows will be adorned with stylish handmade curtains that will give your home decor an extra personal touch. Enjoy!
Do You Need to Use Professionals?
If you’re not comfortable with the idea of making your own cafe curtains, or just don’t have the time to do so, there are plenty of professionals who specialize in this type of thing – so you can always outsource it if needed. With their experience and expertise in creating beautiful window treatments, these experts will be able to give your windows a perfect finishing touch.
How Much Will It Cost?
The cost of making cafe curtains will vary depending on the materials and techniques used – as well as whether you decide to hire a professional or do it yourself. Generally speaking, however, the price range can start from around $50 for simple curtains up to several hundred dollars for more complex designs.

Making your own cafe curtains is an easy process that can be fun and rewarding. With the right materials and our step-by-step guide, you’ll have your very own cafe curtains in no time – so go ahead and give it a try! If you decide to outsource the task to professionals, make sure to get an estimate beforehand so you know what kind of costs are involved. So go ahead and get creative – you’ll be sure to make your windows look beautiful and unique.
Tips & Tricks for Cafe Curtains
- If You’re Using a Thicker Fabric, It Can Be Helpful to Use Interfacing on the Back Side of Your Panels in Order to Give Them Additional Body and Support.
- For an Extra Pop of Color, Consider Adding Decorative Trim Along the Edges or Top Header of Your Curtains.
- If You Want to Make Your Cafe Curtains Extra Special, Try Sewing in Pockets or Tiebacks for Added Flair.
- For a More Modern Look, Consider Using a Thicker Rod and Bolder Hardware When Hanging the Curtains – This Will Give Them That Contemporary Edge.
Making beautiful cafe curtains doesn’t have to be hard work – follow our guide on how to make a cafe curtain and give your windows a stunning makeover with custom-made curtains that have just the right touch of personal style. We hope you enjoy making these cafe curtains as much as we did!
Frequently Asked Questions
Q1. What Types of Fabric Should I Use to Make Cafe Curtains?
A1. It’s best to choose a lightweight fabric that is easy to work with, such as cotton or linen. You can also opt for heavier fabrics like velvet or twill if your windows are in need of more coverage. Just be sure to choose something that will look nice and fit the style of your home.
Q2. How Long Do Cafe Curtains Last?
A2. With proper care and maintenance, cafe curtains can last for several years – just be sure to regularly check for any tears or wear in the fabric. You should also take down the curtains from time to time and give them a thorough cleaning to keep them looking their best.
Q3. Can Cafe Curtains be Washed in the Machine?

A3. Yes, most cafe curtains can be machine washed – just check the care label for specific instructions on how to do it. Be sure to use a gentle cycle and mild detergent to keep your curtains looking fresh and new for years to come.
Q4. Are There Any Other Ways to Hang Cafe Curtains?
A4. Yes, cafe curtains can also be hung directly on a curtain rod without the need for clips or tabs. This is a great option if you don’t want to deal with the hassle of making any extra hardware – just drape the curtains over the rod and adjust as needed! Alternatively, you can also hang cafe curtains using clips and rings if desired.
Conclusion
Creating a cafe curtain can add personality and an element of sophistication to any room. In this post, we have covered all the steps it takes to make your own custom cafe curtains. While there are many ways to deck out your windows, we have gone through the necessary ingredients and tools and shared some tips on how to make a cafe curtain. With just a little practice, you’ll be able to create easy and affordable cafe curtains that will add instant style to any interior space.
So don’t wait any longer, gather what you need and get creative! Have fun with fabrics, colors, shapes and sizes – who knows what amazing projects you will create! And when you are finished, be sure to take a picture of your beautiful project to show off your hard work.