
Are you looking for a fun and creative craft project to take on? Have you ever wanted to learn how to sew felt animals but feel intimidated by all the tiny details involved? Look no further – in this blog post, we’ll be taking you through each step of the process of sewing your own felt animals.

From gathering supplies and choosing the best fabrics to working with small details like eyes and noses, we’ll discuss everything you need to know so that you can make these cute critters with confidence! So grab some felt, needles and thread and get ready – let’s jump right into making your very own handmade felt animals!
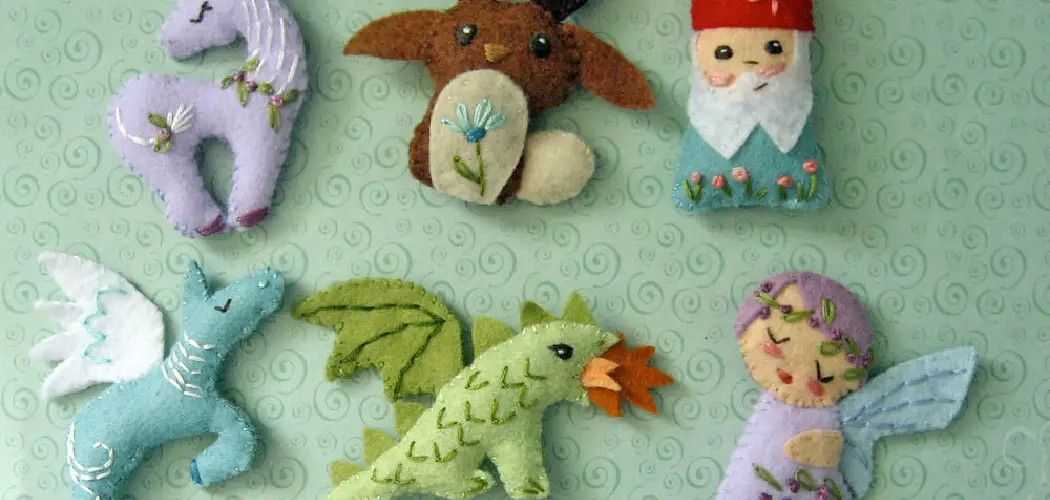
What are Felt Animals?
In case you’re not entirely sure what felt animals are, don’t worry – we’ve got you covered. Felt animals are soft toys typically made from felt fabric that have been sewn together to form different types of animal shapes. These can include anything from traditional household pets like cats and dogs to wild animals such as lions or giraffes.
Why Choose Felt?
Felt is an ideal material for creating soft toys, as it’s durable, flexible and comes in a wide range of colors. It also doesn’t fray like other fabrics, making it perfect for hand sewing. Moreover, felt is easy to work with and doesn’t require much experience or expertise in sewing. You can create a variety of shapes and sizes with felt, making it perfect for creating unique and adorable felt animals.
12 Step-by-step Guidelines on How to Sew Felt Animals
Step 1: Gather Your Supplies
To start off, gather all the necessary supplies to make your felt animals. You will need:
- Pins and Pin Cushion
- Stuffing Material
- Pattern or Template of the Animal You Want to Make
- Scissors
- Needle and Thread (Embroidery Floss is Recommended)
- Fabric Marker
- Tweezers (Optional but Highly Recommended)
Step 2: Choose the Perfect Felt Fabric
When it comes to sewing felt animals, choosing the right fabric is crucial. Look for high-quality felt fabric in colors that match your pattern or desired animal, as well as the appropriate thickness and texture. You can also play with different felt fabrics to add more depth and character to your creations.

It’s also a good idea to have some basic colors like white, black, and brown on hand for small details like eyes and noses. You can find felt fabric at most craft or fabric stores, or online.
Step 3: Trace and Cut Your Pattern
Using a fabric marker of your choice, trace the pattern of your desired animal onto the felt fabric. Once traced, carefully cut out the pattern with sharp scissors so you have a clean and precise shape. For more complex patterns or tiny details, tweezers can come in handy to help you handle small pieces of felt.
You can also use a separate fabric marker or pen to mark any additional details, such as facial features. That way, you’ll know exactly where to sew when it comes time for assembly.
Step 4: Pin the Pieces Together
With all your pieces cut out, you’re now ready to assemble them into the final shape of your felt animal. Using pins, pin together the different parts of your pattern. This will help you visualize how everything fits together and make minor adjustments if needed. You can also use the pins to hold the pieces in place while you sew. It’s essential to pin the pieces correctly and securely since felt is a delicate fabric that can easily shift while sewing.
Step 5: Start Sewing!
It’s time to start sewing! Thread your needle with a piece of embroidery floss and knot one end. Then, using small whip stitches (stitches that go over the edge of the fabric) sew together the pinned pieces of felt. If you’re new to sewing, it’s best to start by sewing straight lines and gradually move on to curves.
Take your time and make sure to keep the stitches small and neat. It’s also essential to secure the threads by tying a knot at the end of each stitch. You can hide these knots inside the toy when finished.
Step 6: Stuff Your Animal
Once you have sewn all the pieces together, it’s time to stuff your felt animal! Carefully push small amounts of stuffing into each part of your animal, using the tip of a pencil or chopstick to help you stuff hard-to-reach areas. You can also use tweezers to place stuffing in small spaces. Stuff your animal until it reaches the desired level of plumpness. You can also add a small amount of fabric glue to help keep the stuffing in place.

Step 7: Sew Up Any Remaining Openings
After stuffing your felt animal, sew up any remaining openings using whip stitches. Take your time with this step and make sure to close any gaps neatly and securely so no stuffing comes out. This step is especially important if your felt animal has tiny details like ears or a tail that needs to be closed off. But don’t worry if it’s not perfect – handmade crafts are meant to have some character and imperfections.
Step 8: Add Details
Now comes the fun part – adding details! Using different colored felts, embroidery floss, or fabric markers, you can add all kinds of adorable features to your felt animal. From eyes and noses to stripes and spots, let your creativity run wild and make each felt animal unique.
It’s essential to take your time with this step and be patient, as small details can be tricky to work with. It’s also a good idea to refer to a picture or drawing of your desired animal for reference.
Step 9: Secure the Details
To ensure that all the details stay in place, secure them with tiny stitches. You can also use fabric glue for an extra hold. If you’re using beads or buttons for eyes, make sure to sew them on securely so they don’t fall off. It’s also a good idea to avoid using sharp or pointy objects as details, especially if the felt animal will be given to children.
Step 10: Finish Up
Once you have finished sewing on all the details, take a step back and admire your work! You can make any final adjustments at this stage, such as trimming any loose threads or fluffing up the stuffing to make your felt animal look more full. It’s also an excellent time to make sure all the stitches are secure and that your felt animal is sturdy.

It’s important to note that felt animals are meant to be handmade and therefore, may not look exactly like the pattern – embrace any imperfections and enjoy the uniqueness of your creation!
Step 11: Display or Gift
Now that your felt animal is complete, you can choose to display it as a cute decoration in your home or give it away as a thoughtful handmade gift. These adorable critters are perfect for any occasion, whether it’s a birthday, holiday, or just to show someone you care. You can even make a whole collection of different felt animals to give as a set. Always remember to take pride in your creation and show it off! It’s a testament to your creativity and skill in sewing.
Step 12: Practice Makes Perfect
Don’t worry if your first few attempts at sewing felt animals don’t turn out exactly how you envisioned. Like any skill, practice makes perfect, and the more you sew, the better you’ll get at it. You can also experiment with different patterns, fabrics, and techniques to create your unique felt animals.
So keep practicing and have fun creating these lovable handmade treasures! This concludes our guide on how to sew felt animals. We hope you’ve enjoyed learning this fun and rewarding craft and have been inspired to create your very own felt animal creations!
Following these steps creates endless possibilities for cute and cuddly creatures. Happy sewing!
Additional Tips

- If You’re New to Sewing, Start by Practicing Simpler Patterns and Gradually Move on to More Complex Ones.
- Don’t Be Afraid to Make Mistakes! They Can Often Lead to Creative Solutions or Unique Designs.
- Use Different Colors and Textures of Felt to Add Character and Variety to Your Felt Animals.
- Take Breaks While Sewing if You Feel Your Hands Getting Tired or Cramped. This Will Help Prevent Any Accidents or Mistakes.
- Always Use Sharp Scissors for Precise Cutting and Avoid Using Dull or Blunt Ones, as They Can Damage the Felt Fabric.
- Don’t Be Afraid to Mix and Match Different Techniques, Such as Embroidery and Fabric Glue, to Achieve Your Desired Look.
- Remember to Have Fun and Enjoy the Process! Sewing is a Great Way to Relax and Unleash Your Creativity. There is No Right or Wrong Way to Create Felt Animals, So Feel Free to Experiment and Make Them Your Own. Happy Sewing!
How Much Time Could It Take?
The time it takes to sew felt animals can vary, depending on the size and complexity of the pattern. Simple patterns can take anywhere from 30 minutes to an hour, while more intricate patterns may take a few hours or even days. It’s essential to give yourself enough time and not rush through the sewing process, as this can lead to mistakes and frustration.

Remember that practice makes perfect, so the more you sew felt animals, the faster and more efficient you’ll become. So take your time and enjoy the process!
Frequently Asked Questions
Q1: What Kind of Felt Should I Use for Sewing Felt Animals?
A1: The best type of felt to use is a wool blend or acrylic felt, as they are sturdy and come in a wide variety of colors. Avoid using craft or low-quality felts, as they can easily tear or fray while sewing. It’s also a good idea to pre-wash your felt before sewing to remove any stiffness or residue.
Q2: Can I Use a Sewing Machine to Sew Felt Animals?
A2: While it is possible to use a sewing machine for some parts of the process, such as sewing straight lines or attaching details with fabric glue, hand sewing is generally preferred for felt animals. The delicate nature of felt can make it difficult to maneuver with a sewing machine, and hand-sewing allows for more precision and control.
Q3: Are Felt Animals Safe for Children?
A3: Felt animals are generally safe for children, but it’s essential to take precautions when using small details like beads or buttons. Make sure to sew them on securely and avoid using sharp or pointy objects as details. It’s also a good idea to supervise younger children while playing with felt animals.
Q4: How Do I Store Felt Animals?
A4: To keep your felt animals in good condition, store them in a dry and cool place away from direct sunlight. You can also wrap them in tissue paper or store them in a container to prevent dust and damage. Avoid storing them in plastic bags, as they can trap moisture and cause the felt to become moldy.

Conclusion
Whether you choose to use clothing pins, tailor’s tape or another method to tailor your sleeves, fixing sleeves that are too big without sewing is a great way to get the look you want without spending money or time. The best part is that by doing it yourself, you’ll learn valuable skills and become more confident in your styling abilities.
So don’t be intimidated — you can nail this project! With just a few supplies and some resourcefulness, you’ll have the perfect fit in no time. Now go forth and start flaunting those fresh sleeves! Thanks for reading this article on how to sew felt animals.