
Are you ready to learn how to sew a shawl? Sewing has been popular for centuries, with different countries and cultures around the world having their own distinct styles of garments and fabrics. Shawls are no exception!
If you’re looking to add some impressive flair to your repertoire of sewing skills, making a shawl is an excellent place to start. With this blog post as your guide, you can create a fashionable accessory that looks gorgeous while keeping warm in any weather!

What is a Shawl?
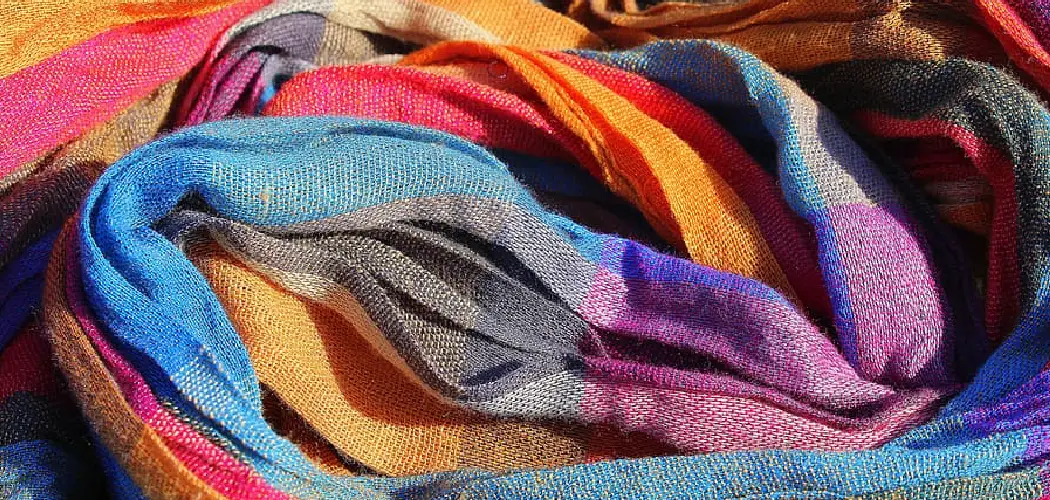
A shawl is a rectangular-shaped cloth worn over the shoulders and upper body. Shawls were traditionally used for warmth and protection against inclement weather, but today they can be seen as stylish fashion accessories.
Fabric Choices: When you’re making a shawl there are many different fabrics to choose from. You can use wool, cashmere, cotton or any other type of fabric you want. Depending on the look you’re going for, you can select light and breathable fabrics or heavier winter materials that will keep you warmer in colder climates.
Necessary Materials
Given below is a list of materials you will need to make your shawl:
Fabric of Your Choice
Choose the fabric you prefer according to the look and warmth you require.
Thread
You will need a thread that matches your fabric’s color to make sure all the stitches are hidden and secure.
Pins
Use pins to keep your fabric in place while you’re sewing.
Scissors
A good pair of scissors is essential for making precise cuts.
Sewing Machine, or Needle and Thread
If you’re just starting out, it’s best to use a sewing machine so you can easily stitch together your fabric. Alternatively, if you’re looking for more of a handmade feel, you can do the entire project with just needle and thread.
Measuring Tape
A measuring tape will help you get accurate measurements when cutting your fabric.

Step-by-step Guides on How to Sew a Shawl
Once you have all the materials ready, follow these steps to make your own shawl.
Step 1: Measure and Cut Fabric
First, measure and cut the fabric according to the size you want. Make sure the measurements are accurate, as this will affect how your shawl looks. It is recommended to use a measuring tape for this step. It is also important to cut a straight line when cutting, or else the fabric won’t look as neat.
But if you’re using a sewing machine, this won’t matter as much. This step can be a bit tricky, so take your time and be sure to double-check the measurements.
Step 2: Pin the Fabric
Place the two pieces of fabric on top of each other with the wrong sides facing out, and pin them together. This will keep them in place while you sew. This is also a good time to check if the fabric pieces are symmetrical. Make sure all the edges are even and that there are no wrinkles in the fabric. It is very important to ensure that the edges are lined up accurately before you start sewing.
Step 3: Sew Along Edges
With your sewing machine or needle and thread, sew along the edges of the fabric. Make sure to backstitch at each end so that your seams are secure. This will also make it easier to remove the pins. As you sew, make sure that the edges line up and that there are no gaps or overlaps in your stitching.
But if you’re using a sewing machine, this won’t be as important. If you’re hand-stitching, make sure to use a strong thread so that it won’t break easily.
Step 4: Remove Pins
Once you’re done sewing, remove all the pins from the fabric. It is important to do this carefully so that you don’t accidentally cut the fabric. If you used a sewing machine, it may be easier to use a seam ripper to remove the pins. You can also use tweezers or a pair of scissors to help you pull out the pins.

Step 5: Turn Fabric Right Side Out
Turn your shawl inside out so the right sides of the fabric are facing out. But if you’re using a sewing machine, this won’t be necessary. This will help your shawl look neat and professional. YOu can also use an iron to press out any wrinkles or creases in the fabric. You can also use an iron to give the edges a crisp finish.
Step 6: Iron
Iron your shawl to make sure all the seams and edges are smooth and flat. It is important to make sure that all the edges are even and that there are no bumps or uneven spots. You can also use an iron to give the edges a crisp finish. You can also use an iron to add some decoration to your shawl, such as pleats or ruffles.
Step 7: Hem Edges
Hem all four edges of your shawl to give it a neat, finished look. If you’re using a sewing machine, set the stitch length to the longest setting and use a zig-zag stitch. It is important to make sure that the hem is even all around. You can also use a serger for this step if you have one. It will help to give your shawl a professional finish.
Step 8: Add Decoration
Now that your shawl is finished, it’s time to add some decorations! You can add embroidery, beads or other embellishments for a truly unique look. But if you’re looking for a simpler design, you can add tassels or fringe to the edges of your shawl. Whatever design you choose, make sure it reflects your personal style!
Step 9: Try It On
Once you’re done decorating your shawl, it’s time to try it on. Make sure it fits comfortably and that all the seams are secure. This is the perfect time to make any adjustments or tweaks that you may need. You can also add a lining to make it even more comfortable and stylish.

Step 10: Wear with Pride!
Now that you have made your own beautiful shawl, it’s time to show it off! Wear your shawl with pride and enjoy the compliments you get from friends and family. It is a perfect piece of clothing that will keep you warm and stylish all year round. However you decide to wear it, know that you have made something special!
Step 11: Store Carefully
When not in use, store your shawl carefully to keep it looking its best. Fold or hang it in a breathable garment bag to avoid wrinkles and damage. It is also important to keep it away from direct sunlight, as this can cause the fabric to fade. With proper care and storage, your shawl will look beautiful for years to come!
Making a shawl is an enjoyable and rewarding process. By following this guide on how to sew a shawl, you can create a fashionable accessory that looks gorgeous and keeps you warm in any weather! With the right materials and patience, you will be able to make your own beautiful shawl in no time. So grab some fabric, get sewing, and enjoy your new shawl!
Additional Tips
- Make sure to measure twice and cut once when cutting the fabric. This will help you avoid mistakes and give you a perfect fit.
- Use pins to secure the edges of your fabric when sewing. This will make sure that all the stitches stay in place.
- Take your time when sewing. If you rush, the stitches may not be secure and your shawl could come apart.
- When adding decorations, make sure to choose materials that won’t damage or tear the fabric.
- After you finish making your shawl, take a few moments to admire it and feel pride in what you have created!
- When storing your shawl, keep it away from strong sunlight or moisture to avoid damage.
Frequently Asked Questions
Q: How Do I Choose the Right Fabric for My Shawl?
A: Choose a fabric that is lightweight and breathable for warm weather, or heavier and more insulating for colder climates. If you’re looking for something more stylish, you can opt for wool, cashmere or other luxurious fabrics.

Q: How Long Does It Take to Make a Shawl?
A: The exact time depends on the size of your shawl and the details you want to add. Generally speaking, you can make a basic shawl in a few hours. If you’re adding embellishments or decorations, it may take longer.
Q: What Are the Benefits of Making Your Shawl?
A: Handmade shawls are unique and personal items that you can be proud of. You can also save money by making your own shawl, as you don’t have to purchase one from a store. Plus, you get the satisfaction of creating something beautiful with your own hands!
Q: What Are Some Creative Ideas for Decorating My Shawl?
A: You can add beads, embroidery, tassels or patches to your shawl to give it a unique look. You can also use different types of fabric for the front and back pieces to create contrast. Get creative with colors and textures and make your own one-of-a-kind shawl!
Conclusion
Altogether, sewing a shawl can be an enjoyable task that offers you a great sense of pride and accomplishment. Not to mention, it’s a creative way to express yourself and design your very own fashion accessory! If you follow each step outlined in this article, you should have success in crafting your own shawl.
To ensure the best results, always double-check accuracy when sewing with fabric, needle and thread size match up properly to avoid complications. Lastly on how to sew a shawl, select materials that will make your shawl functional and long-lasting so that it may remain a keepsake piece for years to come.
With fabrication from the proper supplies, practice patience while sewing – soon enough you will have created a fashionable shawl!