Embrace the festive spirit and create a treasured heirloom with your own handmade advent calendar. Whether you are an adept sewist or a beginner eager to undertake a new project, this detailed guide will provide the essential knowledge and techniques required to construct a distinctive and personalized countdown to Christmas.
As we delve into a variety of styles, materials, and sewing methods, you’ll discover how to tailor your advent calendar to match your skill level and personal taste. Get ready to infuse your holiday season with a touch of handcrafted magic as you learn “how to sew an advent calendar”.
Choosing Your Perfect Advent Calendar
When selecting the style of your advent calendar, consider your sewing expertise, the space you have available, and how you want to incorporate this festive countdown into your holiday decor. Here are four popular styles to inspire your creation:
Classic Pocket Style:
Begin with a durable backing fabric and sew individual pockets to craft 24 compartments that will hold daily treats or small gifts. This simple yet versatile style offers a canvas ripe for personalization and decoration. It appeals to sewists of all skill levels due to its straightforward design.
Advent House or Tree:
Use fabric panels or custom patterns to build a 3D structure resembling a quaint house or a cheerful Christmas tree, complete with numbered pockets for your trinkets. This style serves as an engaging centerpiece with a hint of whimsy and requires moderate sewing skills to assemble the intricate parts.
Stocking Garland:
Construct a series of miniature stockings in varying sizes, decorate them with numbers, and string them together into an enchanting garland. Ready to be hung along staircases or mantles, this option is perfect for decorators working with limited space and for beginners who want to dip their toes into holiday crafts.
Advent Banner:
Craft a beautiful fabric banner divided into 24 segments, each designated for a special ornament, treat, or note leading up to Christmas Day. This style offers great flexibility in design and the opportunity for extensive personalization, accessible to crafters at any level of sewing proficiency.
Gathering Your Supplies
Before you embark on creating your festive countdown, gathering the right supplies is essential. Not only do they ensure a smoother sewing experience, but they also contribute to the final aesthetic of your advent calendar.
Fabric:

Selecting the right fabric is crucial as it sets the tone for your calendar. For a rustic charm, consider natural fibers like cotton, felt, fleece, or linen, and make sure to have enough for the main structure, pockets, and any additional decorative elements.
Thread:
Use a thread that either matches your fabric for a seamless look or goes bold with contrasting colors to make the stitching stand out. The high-quality thread will make your calendar more durable.
Notions:
Essential sewing tools such as pinking shears, a reliable sewing machine, straight pins, and a sturdy ruler will aid your precision. An iron is a must for crisp folds, and safety pins can help with stuffing. Choose ribbons or twine for a calendaring system, and remember any fanciful embellishments that reflect your personal style.
Fillings:
The heart of your advent calendar is what’s inside. Candy, small toys, unique ornaments, handwritten notes, or any other personal treasures will make revealing each day’s surprise a delightful experience.
Combine these supplies with your creativity, and you’re ready to start crafting a memorable advent feature.
How to Sew an Advent Calendar: Sewing Basics and Pocket Construction
Creating a handmade advent calendar is a rewarding endeavor, but it requires a good grasp of some sewing basics, particularly when it comes to constructing the heart of the calendar—the pockets. Here’s a step-by-step guide to ensure your pockets are both beautiful and functional:
1. Cutting Fabric:

Start by accurately measuring and cutting your fabric pieces according to the dimensions required for your chosen style. Remember to include an extra inch on all sides for seam allowances, ensuring your pockets can accommodate treats comfortably without altering the overall design. Use a sharp pair of fabric scissors for a clean cut, and rely on your ruler for straight, precise lines.
2. Ironing Edges:
Before sewing, it’s vital to iron the fabric to neaten the edges. Folding over the edges of the pockets and the calendar backing, press them with a hot iron to create crisp, flat borders. This not only makes sewing more manageable but also contributes to the professional appearance of the final product.
3. Sewing Pockets:
When it comes to attaching your pockets, opt for a suitable stitch. A straight stitch is usually sufficient for most fabrics, but a zigzag stitch can be more suitable for heavier fabrics or for adding a decorative touch.
Align the pockets onto the backing fabric, leaving enough space between each for numbering and potential embellishments. While sewing, maintain a consistent seam allowance and be sure the fabric is taut to prevent puckering.
4. Numbering:
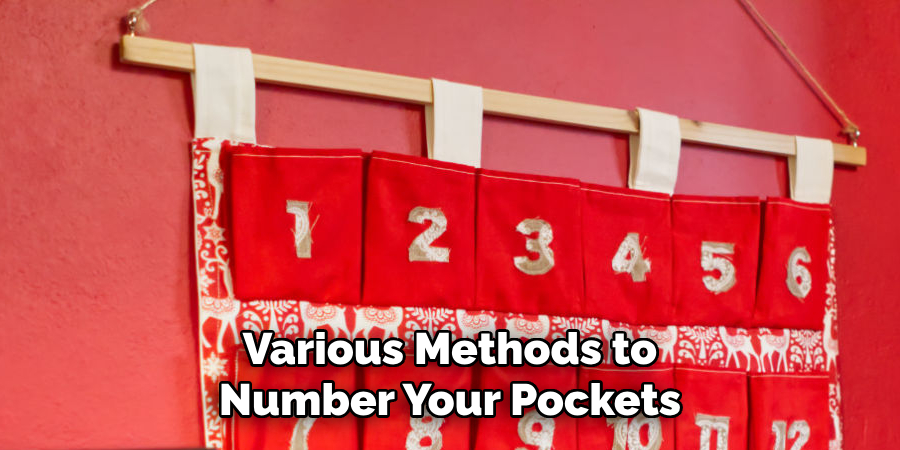
Once you’ve attached the pockets, number each one to count down the days of Advent. You can use various methods to number your pockets, with options like fabric paint, markers, buttons, or even embroidery for a personalized touch. Be sure to position the numbers clearly and artistically to align with the overall aesthetic of your festive calendar.
Follow these basic sewing steps to construct a sturdy and eye-catching advent calendar, and enjoy adding your own creative flair with fabrics, numbers, and embellishments tailored to your holiday theme.
Finishing Touches and Personalization
After the initial construction, adding finishing touches and personalization to your advent calendar ensures it will be cherished for years. Here’s how to elevate your holiday creation:
Embellishments:
Put the final ornamental flourishes on your advent calendar by adding ribbons, buttons, appliques, or trims. These decorative elements not only augment the visual appeal but also offer a tactile experience. Choose embellishments that complement your fabric choice and overall design theme, whether it be festive sparkle or understated elegance. Place them thoughtfully around numbers or along the edges for a cohesive look.
Lining (Optional):
Consider lining the pockets or the entire calendar backing for an upscale finish and extra sturdiness. A lining prevents stretching and makes each pocket more resilient, especially when you’re inserting and removing items. Fabrics like satin or a light canvas can be used, depending on whether you want luxury or robustness.
Hanging Mechanism:
Attach loops or ribbon tabs at the top to display your advent calendar proudly to hang it on a wall, door, or fireplace mantel. Ensure the tabs are secure and can bear the calendar’s weight when filled. You can also incorporate a dowel or a decorative rod for more support and a polished appearance.
Personalization:
Injecting a bit of intimacy makes your advent calendar uniquely yours. Tuck handwritten notes, family traditions, or inside jokes into the pockets. You might also want to include meaningful quotes or tokens that resonate with the season’s spirit. These small personal touches are what transform a beautiful craft into an inimitable heirloom that encapsulates family memories.
Incorporate these personalization tips, and not only will your advent calendar count down the days of December, it will also build anticipation and create heartfelt moments leading up to Christmas Day.
Classic Pocket Style: Step-by-Step Guide
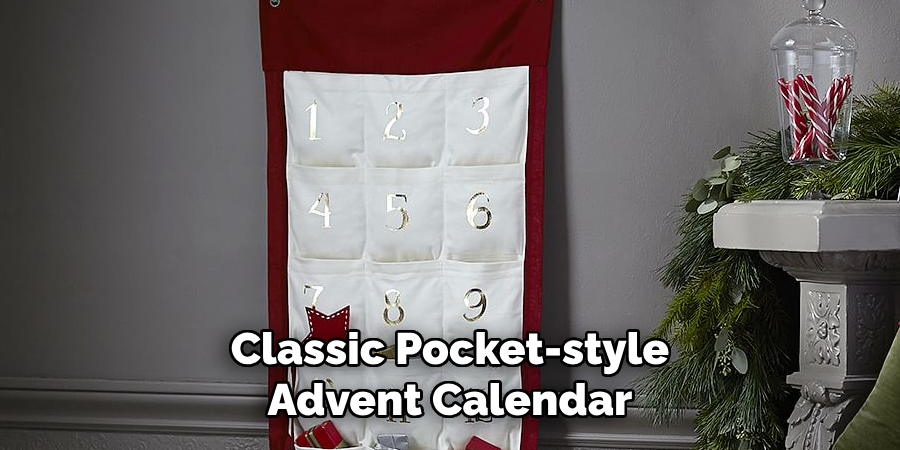
Crafting a classic pocket-style advent calendar is a delightful project that combines utility and decorative appeal. Follow this step-by-step guide to create a timeless piece that enchants during the holiday season:
1. Choose Pocket Size and Layout:
Before you begin, decide on the dimensions for the pockets, ensuring they are suitably sized to hold the treats you intend to use. Lay the pockets out on the backing fabric, planning your design whether it be a traditional grid, staggered placement, or an elegant diagonal arrangement. Carefully mark the pocket placement with fabric markers or pins, which will serve as a guide while sewing.
2. Sewing Pockets:
Cut the individual pocket pieces, remembering to include seam allowances for each side. Sew the sides of two pocket pieces, right sides together, leaving the top open for where the surprises will be tucked in later. Once assembled, align and attach the pockets to the backing fabric using straight stitches for a simple look or a decorative stitch like the blanket stitch for extra flair and durability.
3. Numbering:
The all-important step of numbering can be done through various artistic methods. Apply fabric paint, utilize stencils, embroider with colorful floss, or simply use fabric markers to mark the pockets. Whichever method you choose, aim for clear visibility and consider decorative numbering styles to add to the calendar’s unique charm.
4. Finishing Touches:
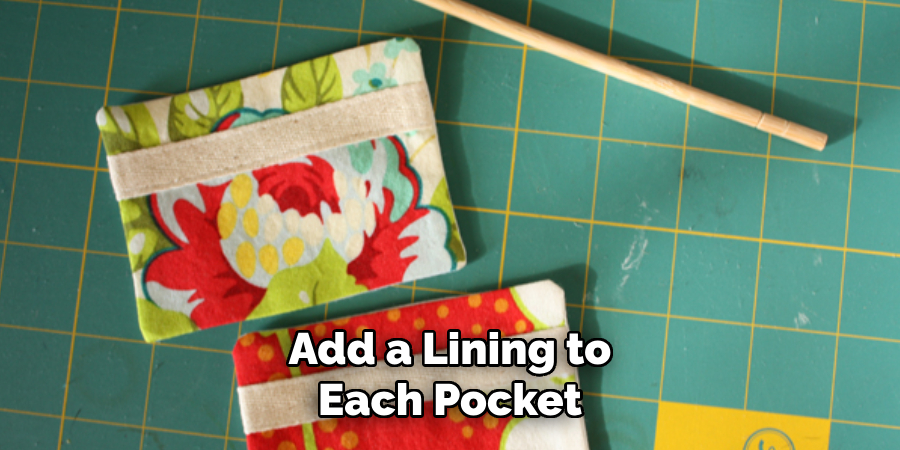
To reinforce your advent calendar, optionally add a lining to each pocket or to the entire backing for added stability. Stitch on binding around the edges for a neat finish, and ensure that hanging loops or ribbon tabs are attached at the top for easy display. As the finishing touch, elegantly embellish with buttons, trims, or appliques matching your festive theme.
By integrating these detailed touches and focusing on quality craftsmanship, you’ll end up with a handcrafted advent calendar that’s functional and full of personal sentiment and festive joy.
That’s it! You’ve now learned how to sew an advent calendar in a classic pocket style that’s sturdy, pretty, and completely customizable for your unique holiday traditions. Get ready to count down the days of December in style with this festive and functional decoration!
Advent House or Tree: Building Your Festive Structure
Embrace the holiday spirit by crafting an enchanting Advent House or Tree that functions as both a decorative piece and a delightful countdown to Christmas. Follow these steps to build your festive structure:
Choose a Pattern:
Begin your project by selecting a pattern. Numerous pre-made patterns for fabric Advent Houses and Trees are available, or you might choose to unleash your creativity by designing your own. Create individual fabric panels for the walls, roof, and, of course, the pockets that will hold the daily surprises. Each panel should capture the festive theme and the spirit of the season.
Sewing Panels:
Once your design is finalized, cut and sew each panel according to the pattern instructions. Ensure you leave openings for pocket insertion and stuffing if a more three-dimensional and stable structure is desired. Select sturdy fabrics that will hold their shape and compliment your holiday decor.
Attaching Pockets:
Pockets should be cut to size separately and, for an easier process, sewn onto the designated areas of the panels before assembling the main structure. Pockets can be plain or decorated, but it is vital to number each clearly and legibly as they will guide the countdown.
Assembly:

With all your panels prepared, follow your pattern guide to stitch them together, thereby creating the destined 3D Advent structure. If stability is a concern, consider stuffing the house’s base or the tree’s lower section to ensure it stands upright without the risk of toppling over once filled with treats.
Finishing Touches:
Now that your structure is assembled, it’s time to add those finishing touches. Decorate the exterior with festive buttons, trims, and perhaps fabric paint to detail windows, doors, and other characteristic elements. For a final practical touch, attach a robust hanging loop or ribbon at the top of the structure, ensuring it is secure enough to hold the weight and facilitate easy display in your home.
Combining function and beauty, your Advent House or Tree will not merely count down the days but also act as a centerpiece, sparking joy and anticipation throughout the festive period.
Stocking Garland: A Cheerful Chain of Surprises
Creating a stocking garland combines the anticipation of an advent calendar with the festive tradition of hanging stockings. Here’s a guide to stitching together this cheerful chain of surprises.
Design Your Stockings:
First, select a design for your stockings. You can either vary the sizes and shapes or keep them uniform for a harmonious visual impact. To add depth, consider using contrasting fabrics or festive patterns. This gives each stocking its own character and makes the garland stand out.
Sewing Stockings:
Implement basic sewing techniques to construct the stockings, ensuring you leave the top open for the daily treats. Reinforce the stocks with lining or interfacing if needed, and don’t forget to attach fabric loops or ribbons, which will be used to connect the stockings to a garland.
Numbering:
Number each stocking to represent the days leading up to Christmas. This can be accomplished using fabric paint, iron-on numbers, appliqués, or even embroidered details for a handcrafted touch. Ensure the numbers are visible and in sequence for easy counting.
Creating the Garland:
Once your stockings are ready, string them together using a sturdy twine, a colorful ribbon, or a decorative braid. Evenly, space the stockings, maintaining numerical order, and secure each by the loops or ribbons you’ve attached.
Personalization:
Adorn each stocking with unique accents—think small bells, felt snowflakes, or glittering stars for that personalized touch. These details bring the stocking garland to life and enhance the festive mood. Inside each stocking, place personal notes, riddles, or miniature gifts tailored to the recipients, making each day’s reveal a special and heartfelt experience.
Advent Banner: A Versatile Canvas for Creativity
Craft an Advent Banner as a creative and festive way to count down to Christmas. This customizable project allows for both artistic expression and holiday cheer.
Plan Your Layout:
Determine the overall dimensions of your banner and then segment it into 24 sections, each representing a day leading up to Christmas. Utilize fabric markers or contrasting fabric strips to delineate these sections clearly. Think creatively about incorporating features such as pockets, loops, or clips that can hold daily treats or messages, adding an interactive element to your banner.
Sewing the Banner:
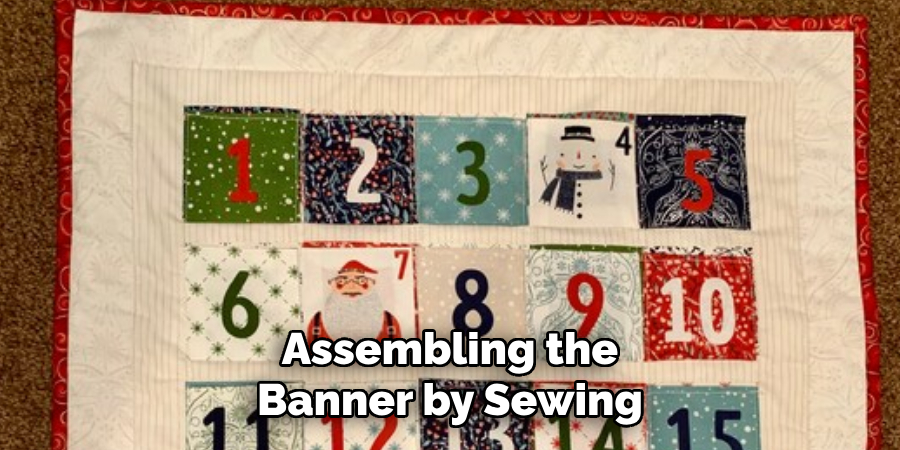
Begin assembling the banner by sewing together individual pieces with the right sides facing each other, ensuring that the edges are neat and even. Remember to include hanging loops at the juncture of each section to facilitate easy display. Choose a durable fabric that will maintain structure even when filled with daily goodies.
Numbering:
The numbering is a focal point and should be both clear and creative. It might be executed with precision using stencils, enhanced through the artistry of embroidery, or applied with a dash of whimsy using fabric paint or decorative buttons. Ensure each number stands out on its respective section for an easy daily countdown.
Filling the Banner:
Decide on a method for filling each section—this could be pockets that cradle tiny gifts, loops that hold festive ornaments, clips for attaching heartfelt messages, or hooks for baubles and trinkets. Tailor the content to stir excitement with a blend of handwritten notes, small crafts, or simple yet charming ornaments.
Finishing Touches:
Accentuate the banner with final flourishes such as decorative stitched borders, applique motifs of winter scenes or holiday icons, or intricate designs applied with fabric paint. These elements add to the aesthetic beauty and encapsulate the season’s joy and spirit, completing your Advent Banner as a backdrop for December’s daily delights.
Conclusion
Ultimately, learning how to sew an advent calendar is much more than following instructions; it’s about making memories and building traditions with your hands. There are no concrete rules to this creative endeavor.
Feel empowered to blend methods, personalize details, and let your imagination lead the way. Revel in the pleasure of sharing your uniquely crafted advent calendar with friends and family, and cherish the joy of contributing a handmade piece to the warmth of the holiday season.

