
Are you looking for a way to make your embroidery projects come alive? Have you ever wished that tracing the intricate patterns onto fabric was easier, faster, and less tedious? Well no need to worry – there is indeed a way! Today’s blog post will walk through how to quickly and correctly trace an embroidery pattern onto fabric so that your next project can be easily completed with beautiful results.
By the end of this article, you will have all the knowledge necessary to select which method suits you best and create gorgeous projects for friends and family alike! So let’s get started!

When you know how to trace embroidery pattern onto fabric, it opens up endless possibilities for beautiful and intricate pieces. Whether you’re looking for inspiration or just getting started in the world of embroidery, this guide will show you all the steps necessary to ensure that tracing a pattern is simple and effortless.
Get ready to unlock new creative heights with our easy-to-follow strategies on tracing an embroidery pattern onto your fabric quickly and accurately!
Why May You Want to Trace Embroidery Pattern Onto Fabric?
1 . To Have a Reference Point
The most common reason to trace embroidery patterns onto fabric is so that you can have a reference point while stitching. Transferring the pattern, it allows for more accuracy in the finished piece as there is no guesswork involved. Additionally, if you are using multiple colors in your stitching, tracing can help keep all of the colors and stitches organized.
2 . To Avoid Slippage
Another reason you may want to trace the pattern onto the fabric is to avoid slippage. If you are stitching on a slippery or loose-knit fabric, tracing your pattern will help secure it in place while you stitch and prevent it from shifting around. This can be especially important for very intricate patterns or when stitching on finer fabrics.
3 . To Create a Template
Finally, tracing the pattern onto the fabric can also provide a template for future use. You can either keep the traced piece as is and reuse it in similar projects, or you can photocopy it before transferring it to the fabric so that you have an exact copy that won’t be damaged while stitching.
This is a great option for those that are making many pieces of the same pattern or if you want to make slight modifications in your future projects.

No matter what type of embroidery project you are contemplating, it can be helpful to trace the pattern onto the fabric first. By doing this, you can ensure accuracy and precision in your stitching, as well as create a template for future use. With a few simple steps and the right supplies, you can have your pattern perfectly transferred to your fabric in no time!
How to Trace Embroidery Pattern Onto Fabric in 6 Easy Steps
Step 1: Gather All The Tools
The very first step is to gather all the necessary materials for tracing an embroidery pattern onto the fabric. You will need: Fabric of your choice, Embroidery pattern or design, Pencil or another marking tool that is safe and doesn’t stain or damage the fabric, Optional: Light box, if available.
Step 2: Position Fabric On the Work Surface
Position your fabric over a flat surface and make sure it is as smooth as possible. If available, you can use a light box to make tracing easier and more accurate. Make sure that the pattern or design is positioned directly beneath the fabric, with all of the details clearly visible.
Step 3: Secure Fabric and Pattern
Use pins or weights to secure the fabric and pattern in place. This will prevent them from shifting while you are tracing the design onto the fabric. If using a light box, make sure that it is securely closed so that the pattern does not move.
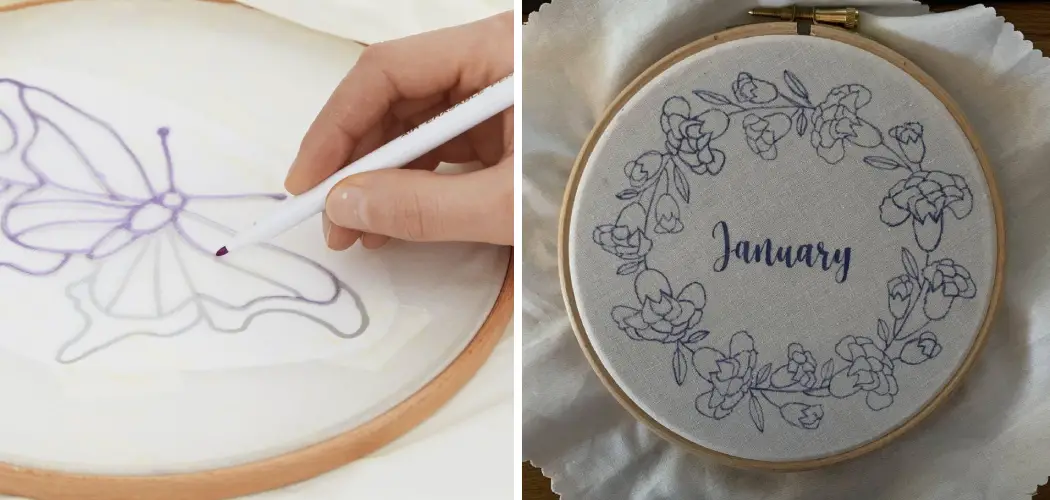
Step 4: Trace Design Onto Fabric
Using your marking tool of choice, carefully trace the embroidery pattern onto the fabric. Make sure to follow all of the details of the pattern as accurately as possible. Try to keep the tracing line as thin and light as possible so that it doesn’t show through on the finished product.

Step 5: Remove the Pattern and Fabric
Once you have finished tracing the pattern, carefully remove the fabric and pattern from the work surface. Be sure to keep them both together in case you need to refer back to the original design at a later point.
Step 6: Begin Embroidery Work
Now that your embroidery pattern has been transferred onto the fabric, it is time to begin working on your project. You can choose any type of stitch and color palette to make your design unique! When you are finished, you’ll have a beautiful piece of embroidery that was created with your own two hands.
Some Extra Tips to Trace Embroidery Pattern Onto Fabric
1 . Use Transfer Paper
Transfer paper is an adhesive-backed paper that will help you trace the design onto your fabric with greater accuracy and precision. In addition to transferring patterns, it can also be used for marking pleats, darts and buttonholes on clothes while making them.
2 . Secure the Pattern with Tape
If you don’t have transfer paper, use tape to secure the pattern onto your fabric. Masking or painters’ tapes are best for this purpose as they will hold the pattern in place without damaging it. Simply stick the tape around the edges of the pattern and then trace its lines onto your fabric.
3 . Use a Water-Soluble Pencil
After securing the pattern onto your fabric, you may want to use a water-soluble pencil to trace its lines. This will help ensure that your embroidery designs are even and accurate. Once you have finished tracing, simply rinse the fabric in cold water or use a damp cloth to remove the lines.

4 . Trace Both Sides of Your Fabric
If you are tracing designs onto both sides of a piece of fabric, be sure to trace each side completely before starting on the other. This will help avoid any confusion or mistakes when stitching the embroidery pattern. Additionally, it is important to make sure that the traced design on each side is identical or you may end up with an uneven stitch.
5 . Use the Right Needles and Threads
It is important to use the right needles and threads for embroidery projects. If you are using a thicker fabric, it is best to opt for a larger needle that can accommodate thicker threads while thinner fabrics will require smaller needles and threads.
Once you have chosen the right needle and thread, make sure to test them on a scrap piece of fabric before starting your project. This will help ensure that you are able to create an even stitch for your final embroidery design.
6 . Practice Patience
Tracing patterns onto fabric can be tricky at first but with patience and practice, you will be able to create beautiful embroidery designs. Take your time when tracing the pattern onto fabric as a single mistake can ruin the entire design. Additionally, it is important to keep in mind that some fabrics may require more time and effort than others to trace accurately.
7 . Check Out Online Tutorials
If you’re still feeling lost while trying to trace an embroidery pattern onto fabric, don’t worry—there are plenty of online tutorials available that can help you get started. Such tutorials often provide step-by-step instructions that can help you understand the basics of tracing patterns onto fabric and creating beautiful embroidery designs.
By following these simple tips, you will be able to trace any design onto your fabric with great ease and accuracy. With a little bit of patience and practice, you will be able to create beautiful embroidery designs that you can show off with pride. So go ahead and get started on your next project—you’re going to love the results!
Frequently Asked Questions
What Precautions Should Be Taken When Tracing Embroidery Patterns?
When tracing embroidery patterns, there are some important precautions to take. Take care not to stretch or tear the fabric when transferring the pattern from one surface to another. It is also important to use a light-colored pencil that does not bleed through to the back of the fabric. Lastly, make sure you use a light-weight tracing paper that is easy to remove after the pattern has been transferred.

What Is the Best Way to Transfer an Embroidery Pattern Onto Fabric?
The best way to transfer an embroidery pattern onto fabric is by using tracing paper and a light-colored pencil. First, trace the design onto the tracing paper with the pencil. Then, place the tracing paper onto the fabric and trace over it again using the same pencil.
This will ensure that all of the details of your pattern are transferred onto the fabric. Once you have finished tracing, gently peel away the tracing paper from the fabric to reveal your embroidery pattern.
Conclusion
Congratulation! You have now mastered the basic skill of thow to trace embroidery pattern onto fabric. With practice, you should be able to draw any pattern you like with accuracy and ease.
Remember that taking the time to plan out your project is essential for success in any kind of craft. So take your time, consider your choices, and choose the right fabrics and threads for your embroidery project.
Start small and expand as you hone your skills – before long you’ll be able to craft gorgeous pieces that bring joy to yourself and everyone around you! Embroidery is a wonderful art form that has been enjoyed by generations and will continue to bring joy into our lives for many years to come.