
Do you have snaps on fabric that you need to remove? This can be a tricky process if you need help figuring out where to begin, but don’t worry – we’ll show you step by step how to get those troublesome snaps out.
Before beginning, ensure you have the tools and supplies to properly and safely remove any snaps from the fabric without damaging the material. Whether you’re taking off plastic or metal snaps, the process is similar. Just be sure to use the correct tools for each type of snap.

We will provide tips for both single-snap and multi-snap removal so that no matter what kind of fabrics or fasteners are in play, your project is taken care of promptly and efficiently. Ready? Let’s dive into some snap-removing know-how to remove snaps from fabric!
What Are Fabric Snaps?
Before we jump into how to remove snaps from fabric, let’s quickly cover what kind of fasteners they are. Fabric snaps are small metal or plastic buttons used for various applications, such as clothing and other sewing projects. They typically have two parts: the socket (female) and the stud (male). The socket portion is usually placed on the outside of the fabric while the stud is inside.
What Will You Need?
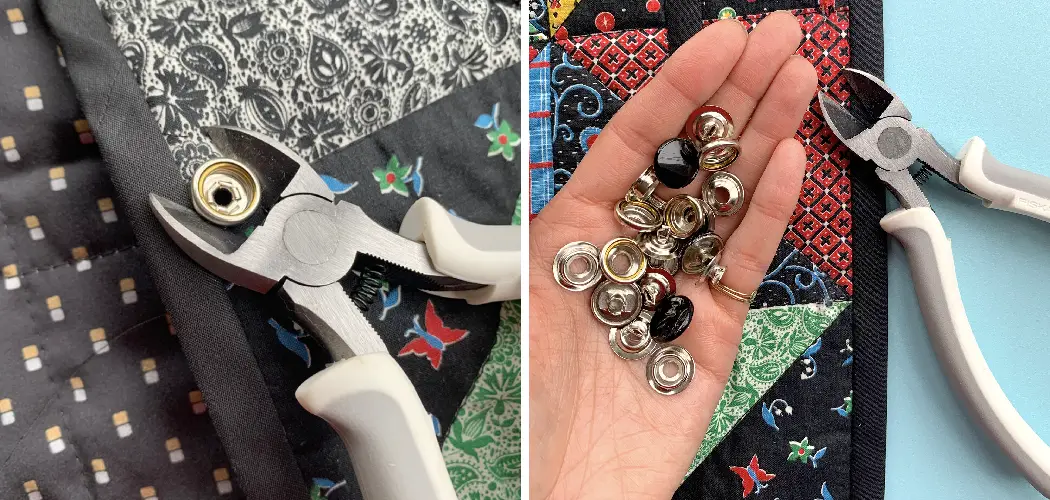
Before you start removing snaps from fabric, make sure to gather the following items:
- A pair of scissors
- Pliers of some sort
- A seam-ripper (for plastic snaps)
- Tweezers (for metal snaps)
- Magnifying glass (optional, but it can be helpful to inspect the snap before removal)
- Patience and caution!
Once you have all of the above items ready, you’ll be able to begin the process.
10 Easy Steps on How to Remove Snaps From Fabric
Step 1. Inspect the Snap:
Carefully examine the snap before beginning removal. Check for any signs of wear and tear, such as cracking or splitting in the plastic or rust on the metal. If the snap looks damaged, then proceed with caution.

Step 2. Cut off Threads Around the Snap:
Using scissors, carefully cut away any threads around the snap that are attaching it to the fabric. As you do this, be sure that the fabric isn’t snipped. Try to be as precise as possible.
Step 3. Remove the Outer Layer of Plastic or Metal Snap:
Using pliers (for plastic) or tweezers (for metal), grip onto the outside layer of the snap and gently pull it away from the fabric until it comes free from its fastener base. Make sure not to tug too hard! If the snap doesn’t budge, try using a seam ripper (for plastic) or needle-nose pliers (for metal) to help coax it off.
Step 4. Unscrew Screws on the Base of the Snap:
For snaps secured by screws, you’ll need to use a screwdriver or small wrench in order to unscrew the screws and remove them from the base of the snap. Don’t try to force it if the screws don’t want to come out. Another option is to use pliers or tweezers to grip around the base of the screw and twist it off.
Step 5. Peel off Backing on Snap:
Gently peel away any backing or material covering the back of the snap until it is completely exposed. You can use a magnifying glass to help you with this process if needed. It will help you to make sure all of the material is included.
Step 6. Cut Away Threads Around Interior of Snap:
Using scissors, cut away any additional thread that may be keeping the interior of the snap attached to the fabric. Take your time while doing this, as you want to avoid accidentally snip too far into the fabric itself! If there are any stubborn threads, use a seam-ripper or tweezers to help you.
Step 7. Pull Out Internal Parts:
Now, use pliers (for plastic snaps) or tweezers (for metal snaps) to gently pull out all internal parts, such as washers, nuts, posts, or pins, from the snap. Be careful not to tug too hard, as you don’t want to damage the fabric. Instead, pull gently until the parts come loose.
Step 8. Remove Remaining Threads:
Finally, use tweezers to grab any remaining threads and pull them out completely. If there are any stubborn threads, use a seam-ripper to help you. It will make the process easier and quicker.

Step 9. Check for Any Residue:
Carefully inspect the area around where the snap was once affixed to make sure there’s no residue left behind from debris or adhesive that may have been used in the installation. Wipe away any such material, if necessary, with a damp cloth. Remember that certain fabrics may require special cleaning instructions, so research beforehand.
Step 10. Reattach Snap (Optional):
If desired, you can reattach the same or a new snap to the fabric using thread and adhesive according to the instructions on the corresponding product package. Remember to take your time and use the right tools – you want to make a good decision in this step!
By following these steps, you can safely and efficiently remove any snaps from the fabric. Now that you know how to do it, you can easily tackle any snap-removing project!
5 Additional Tips and Tricks
- If the snap is still stuck, try using a pair of pliers to remove it carefully.
- Use rubbing alcohol or nail polish remover to help loosen the snap.
- If you have access to a soldering iron, it can also melt and remove snaps from the fabric.
- Use a seam ripper or small knife to carefully cut around the snap and pull it out with tweezers.
- When all else fails, try using a heat gun on a low setting (to prevent burning the fabric) to soften and melt away the plastic material of the snap. With patience and care, this will eventually lead to its removal.

Once you’ve removed the stubborn snap, make sure that you replace it with one of higher quality to avoid future difficulties when removing it again!
5 Things You Should Avoid
- Avoid force pulling or yanking on the snap, as this can damage the fabric.
- Don’t use sharp objects such as knives, scissors, or other cutting tools, as they can easily tear and damage the material surrounding the snap.
- Refrain from using excessive heat when removing a snap, as it can cause burn marks or discoloration on the fabric.
- Do not attempt to reuse a snap that has been removed – instead, purchase a new one to ensure its quality and durability.
- Never try to apply too much pressure when removing snaps – be gentle with them for them to come off without any harm done to your fabric!
By following these tips and tricks, you’ll be able to quickly and easily remove any snaps from fabric without causing any damage. As with most tasks involving fabric or textiles, the key is patience and care – take your time and always work carefully! Good luck!
Can You Remove and Reuse Snaps?
The short answer is yes – snaps can be removed and reused if they are good quality and in proper working order. However, it is important to ensure that the fabric around the snap has not been damaged or weakened before reusing it. Using a fresh snap for every application is also a good idea, as reused snaps may need to be revised.
If you are still determining whether or not a particular snap should be reused, purchasing a new one and discarding the old one is best.
Ultimately, reusing snaps depends on their condition and your judgment – take care when deciding how best to proceed!

Removing and reusing snaps can be done with care and attention to detail. If you have the right tools and a quality snap, it should be possible to remove, reuse and replace them without causing any damage to your fabric! With patience and practice, you will soon become a pro at handling snaps!
Conclusion
Working with snaps can be a lot of fun and a great way to add something special to any fabric project. From removing an existing snap to adding new ones, you now have the information you need to tackle this job head-on.
Remember that tools like pliers can help provide extra grip so that the snaps come loose more easily. You may also find pins helpful in keeping the fabric together when working with multiple snaps close together.
Most importantly, ensure your work surface is well-lit and steady while you work – it makes all the difference! With a little bit of effort and patience, removing or adding snaps can take your project to the next level.
Hopefully, the article on how to remove snaps from fabric has provided you with the tips and tricks you need to start tackling this project like a pro. Whether for repairs or something special, snaps are an easy way to add sparkle to your fabric project! Good luck!
You Can Also Check This Out to Keep Button Pins From Falling Off