
Paper crafting is a fun and creative way to make unique pieces of art. Embark on a creative journey with this tutorial on how to put paper in resin and explore the endless possibilities of crafting you can do! Resin casting takes paper crafting to the next level by allowing you to cast any design or image in durable clear resin for either decorative purposes or as long-lasting keepsakes.

If you’ve ever wanted to learn how to use resin with paper, then this tutorial is for you! Here, we’ll explain the basics of working with paper and resin so that you can create beautiful works of art that will last a lifetime. With this guide as your companion, tap into your own inner creativity and unleash it through one-of-a-kind designs!
Why Putting a Paper in Resin is a Good Idea?
1. Lasting Protection
Paper casting is a great way to give any design or image lasting protection and durability. Because resin can be hard and clear, it’ll encapsulate the paper, protecting it from water damage and other environmental factors that can cause it to fade or tear over time. Plus, the resin can be tinted with color and pigments depending on what type of look you want to achieve.
2. Creative Possibilities
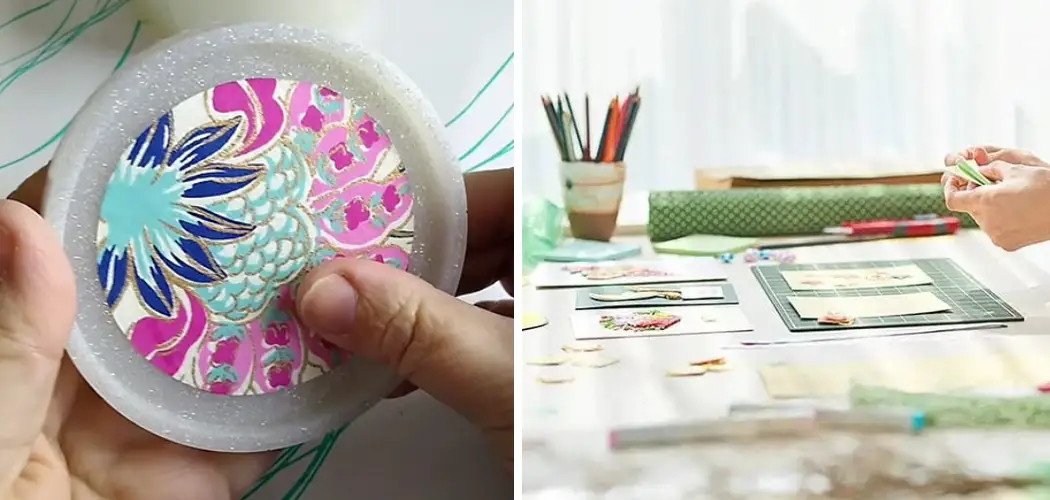
Resin casting opens up a world of possibilities when it comes to crafting with paper. From making intricate jewelry pieces to creating beautiful home decor, the sky is truly the limit when it comes to the types of projects you can make with resin and paper.
You can even get creative and use different types of paper such as tissue paper, vellum, or decorative cardstock, to add unique textures and designs to your pieces.
Required Items to Put Paper in Resin
Before you can start crafting with paper and resin, there are certain items you’ll need to have on hand. Here’s a list of the materials and tools you need to get started:

- Resin (make sure it’s suitable for use with paper)
- Paper of your choice
- Measuring cups and spoons for measuring resin components
- Mixing containers/bowls
- Stirring sticks or pipettes for stirring resin and adding colorants or embellishments
- Gloves (recommended but not required)
- Molds (optional, depending on the type of project you’re making)
10 steps on How to Put Paper in Resin
Now that you know the endless possibilities that come with mixing paper and resin, let’s get to the fun part—actually creating something! Here’s a step-by-step guide on how to put paper in resin.
Step 1: Gather Supplies
Put on gloves and make sure you have all the required items listed above within reach. Gathering all the materials you need ahead of time will save you precious time and prevent any potential accidents.
Step 2: Prepare Resin
Measure out each component of your resin according to the manufacturer’s instructions, then combine it in a separate container or bowl. Stir thoroughly with a stirring stick or pipette until fully mixed, as this will ensure that the resin will cure properly.
Step 3: Add Colorants and Embellishments (optional)
If desired, add colorants or embellishments to the resin before pouring it into your mold. This is where you can get creative and customize your project with different hues and textures!
Step 4: Cut Paper to Fit Mold
Cut the paper into small pieces that will fit into your desired mold. The size and shape of the pieces should be such that they’ll lay flat in the bottom of the mold without overlapping.

Step 5: Place Pieces in the Mold
Once you have all your pieces cut, place them inside the mold one by one until it is filled. Make sure they’re laid out evenly and with enough space between them so that the resin can fully encase each piece.
Step 6: Pour Resin
Once you’ve placed all the paper pieces in the mold, pour the prepared resin inside until it covers the paper completely. You may need to use something like a popsicle stick to push the paper down and ensure it stays in place.
Step 7: Check for Air Bubbles
Once you’ve poured all the resin into the mold, use a stirring stick or pipette to break any large air bubbles that may have formed. This will help to ensure that your project cures properly without any imperfections.
Step 8: Wait for Resin to Cure
Leave your project to cure for the amount of time specified in the resin manufacturer’s instructions. Depending on the type of resin used, this could take anywhere from a few hours to multiple days. Make sure that you don’t disturb or move the piece during this time, as it can disrupt the curing process.
Step 9: Remove from Mold and Enjoy Your Creation!
Once the resin has finished curing, carefully remove your creation from the mold. When you’re satisfied with how it looks, enjoy your beautiful work of art and show it off to your friends and family!
Step 10: Clean Up Resin Supplies
After you’ve finished your project, don’t forget to clean up your resin supplies. Make sure that all containers and tools are washed thoroughly with soap and water before being put away for next time.

And there you have it! Now you know the basics of how to put paper in resin so that you can start crafting with confidence. With a little bit of practice, you’ll soon be creating stunning pieces that will last for years to come. So get creative and have fun!
8 Common Mistakes to Avoid When Working with Resin and Paper
Even experienced crafters can make mistakes when working with resin and paper. Here are 8 common errors to avoid:
- Not measuring out the components of the resin accurately. Make sure you measure each component of your resin according to the manufacturer’s instructions for accurate results.
- Failing to mix the resin thoroughly. Stirring the resin is essential to ensure that it cures properly. Mixing for too short or too long can cause it to cure unevenly.
- Not allowing the resin to cure for the correct amount of time. Different types and brands of resin cure at different speeds, so make sure you follow the manufacturer’s instructions carefully when it comes to curing time.
- Cutting the paper too small or not evenly. Make sure that the pieces of paper are cut to fit your mold and that they’re evenly spaced so that the resin can completely encase each piece.
- Not checking for air bubbles. Air bubbles can cause imperfections in your finished pieces, so use a stirring tool to break any large ones that may have formed after pouring the resin.
- Moving or disturbing the piece while it’s curing. Once you’ve poured the resin into your mold, leave it alone until it has cured. Moving or disturbing the piece during this time can cause it to cure unevenly.
- Not cleaning up thoroughly after use. Make sure that all containers and tools are washed thoroughly with soap and water before being put away for next time.
- Skipping safety precautions such as wearing gloves or using a respirator mask (if working with large amounts of resin). Protect yourself and your surroundings by wearing the appropriate safety gear when working with resin.

Now that you’ve read this guide on how to put paper in resin, you are well on your way to crafting beautiful works of art with paper and resin! Have fun, be creative, and don’t forget to share photos of your creations online—we’d love to see them!
5 Safety Precautions to Take When Using Resin
When using resin, there are certain safety precautions that should be taken in order to avoid any potential harm or damage. Here is a list of seven safety tips to keep in mind when working with resin:
- Wear safety goggles to protect your eyes from any particles or fumes generated by the resin. Safety wear should also include gloves and a face mask.
- Make sure to work in a well-ventilated area; the fumes from the resin can be harmful if breathed in for too long. Well, ventilation also ensures that the resin cures properly.
- Read all instructions prior to starting any project with resin and follow them carefully. Be sure to follow specific directions for preparation and curing times, as these can vary depending on the type of resin being used.
- Avoid contact with skin or eyes, as the resin may cause irritation and other reactions. If any contact is made, wash off the area with soap and water immediately.
- Wear protective clothing such as a long-sleeve shirt, long pants, closed-toe shoes, and an apron to protect your skin from any potential spills or splashes.
By following these safety precautions, you will ensure that your project is a success and that you stay safe while using resin. It is important to remember that resin can be dangerous if not handled correctly, so always take the necessary steps to protect yourself.

Tips on Working with Paper and Resin
- When working with resin, it’s important to remember to protect your work area from any potential spills or messes. Spread newspaper or plastic sheets and wear gloves to protect your skin from any potential reactions.
- Invest in good-quality supplies like measuring cups, mixing bowls, stirring sticks, and molds that are designed specifically for use with resin. You’ll be glad you did!
- Always read the manufacturer’s instructions carefully before starting your project and follow them step by step for the best results. Also, make sure that you have all the supplies on hand before starting.
- Start slow and practice with smaller projects until you get comfortable working with resin. Once you’re confident enough, then you can move on to bigger projects such as large sculptures or jewelry pieces.
By following these simple tips and tricks, you will be able to craft beautiful works of art with paper and resin in no time at all. So get creative and have fun!
Frequently Asked Questions
How Long Will It Take to Finish the Project?
It will depend on the complexity of the project. Generally, it takes about 1-3 hours to put a sheet of paper in resin and let it dry. However, if you are using multiple layers or textured paper, this process could take longer as each layer needs time to be applied and set correctly.
Additionally, if you choose to add other elements like dyes, glitter, or gems to your project, then this will also add time to the process. Some projects may take up to 6 hours to complete. Remember that each piece is unique, and you can create a timeline for yourself to ensure that everything is done correctly and on schedule!
Can I Put Fabric in Resin?
Yes, the fabric can be put in resin, but it needs to be treated differently than paper. Fabric should be sealed with fabric glue, such as Mod Podge before it is placed in the resin so that it does not bleed into the resin mix and create unsightly blemishes or air bubbles.

Additionally, because the fabric has a more absorbent nature than paper, you will need to apply multiple layers of resin to ensure that the fabric is completely sealed.
Conclusion
Crafting with resin is a terrific way to artfully present your thoughts and ideas, and using paper in the resin is a great way to display your favorite photographs or memories. Adding papers into resin makes it possible to achieve an entirely unique aesthetic for whatever you’re creating.
With the right materials, methods, and proper care, everyone can learn how to make beautiful creations with paper in resin. Whether you’re crafting jewelry or larger objects, getting creative with paper designs can produce truly breathtaking results!
From choosing which paper to work with, prepping it appropriately, and ensuring optimal adhesion between layers of resin, this activity has so much potential for memorable artwork and stunning pieces that will become beautiful mementos! Follow the steps on how to put paper in resin for a better outcome.
Don’t be afraid to experiment and truly explore what creativity you can find when using parchment paper in resin-crafted works.