
Vinyl letters have become an essential element in various crafting and design projects, adding a personal touch to home decor, gifts, and more. While vinyl cutting machines offer convenience and precision, not everyone has access to such equipment. Fear not, as you can still create stunning vinyl letters without a machine.
This article on how to make vinyl letters without a machine will guide you through the step-by-step process of making vinyl letters by hand, allowing you to unleash your creativity without any expensive tools. Let’s embark on this crafting journey and discover how to create beautiful vinyl letters without a machine!

12 Step-by-step Guidelines on How to Make Vinyl Letters Without a Machine
Step 1: Gather the Necessary Supplies
Before diving into the creative process, you’ll need to gather the required materials. Here’s a list of essential supplies to get you started:
Adhesive Vinyl Sheets
Choose high-quality adhesive vinyl sheets in various colors to suit your design preferences.
Cutting Mat
A self-healing cutting mat will protect your work surface and ensure precise cuts.
Craft Knife or Utility Knife
A sharp knife is essential for cutting the vinyl accurately.
Cutting Ruler:
A metal or acrylic cutting ruler with a non-slip backing will help you achieve straight lines and clean edges.
Pencil and Paper
Use these to sketch out your design and create templates for your vinyl letters.
Transfer Tape or Contact Paper
This will be used to transfer your vinyl letters onto the final surface.

Weeding Tool or Pin
A weeding tool or a simple sewing pin will aid in removing excess vinyl from your design.
Step 2: Plan and Design Your Vinyl Letters
Before you start cutting your vinyl, take some time to plan and design your project. Decide on your design. Determine the words, phrases, or shapes you want to create with your vinyl letters. Consider the size and positioning of your design.
Create a template: Using a pencil and paper, sketch your design. Alternatively, use design software on your computer or mobile device to create digital templates. Transfer the design to the vinyl: Place the vinyl sheet on your cutting mat with the adhesive side up. Carefully trace your design onto the back (non-adhesive side) of the vinyl sheet using a pencil.
Step 3: Cut Out Your Vinyl Letters
With your design transferred to the vinyl, it’s time to cut out the letters or shapes. Secure the vinyl. Use tape to secure the vinyl sheet to the cutting mat, preventing it from shifting while you cut. Use the craft knife Following the traced lines on the vinyl, use a sharp craft knife or utility knife to cut out the shapes of your letters or designs.
Take your time to achieve clean, precise cuts.Be patient with intricate details: If your design includes small or intricate parts, work slowly and carefully to preserve those delicate elements.
Step 4: Weed the Vinyl Letters
Weeding is the process of removing the excess vinyl around your letters or designs. Identify the negative space. The areas you want to use as your final design are the positive space, while the surrounding vinyl that needs to be removed is the negative space.
Start weeding: Use a weeding tool or a pin to carefully lift the excess vinyl from the backing sheet. Take your time to avoid damaging your design. Pay attention to details: Be extra careful when weeding intricate parts of your design to ensure precision.

Step 5: Apply Transfer Tape to Your Vinyl Letters
To transfer your vinyl letters onto the desired surface, use transfer tape or contact paper: Cut a piece of transfer tape or contact paper slightly larger than your vinyl design. Peel off the backing of the transfer tape to expose the sticky side. Align the sticky side of the transfer tape with your vinyl design, making sure it covers the entire design.
Use a credit card or scraper tool to firmly press the transfer tape onto the vinyl, ensuring good adhesion. Slowly peel off the backing of the vinyl, leaving the design adhered to the transfer tape.
Step 6: Prepare the Surface for Vinyl Application
Before applying the vinyl letters, make sure the surface is clean and dry to ensure better adhesion.
Clean the surface: Use a mild soap and water solution to clean the surface where you want to apply the vinyl letters. Dry it thoroughly before proceeding.
Mark the position: If you want to apply the vinyl letters in a straight line, use a pencil and a ruler to mark guide lines on the surface.
Step 7: Apply Your Vinyl Letters to the Surface
With your vinyl letters on the transfer tape, it’s time to apply them to the desired surface:
Position the design: Carefully place the transfer tape with the vinyl letters onto the surface, aligning it with your guide lines (if applicable).

Press and smooth: Use a credit card or scraper tool to press and smooth the vinyl letters onto the surface, starting from the center and working your way outward. This will eliminate air bubbles and ensure a seamless application.
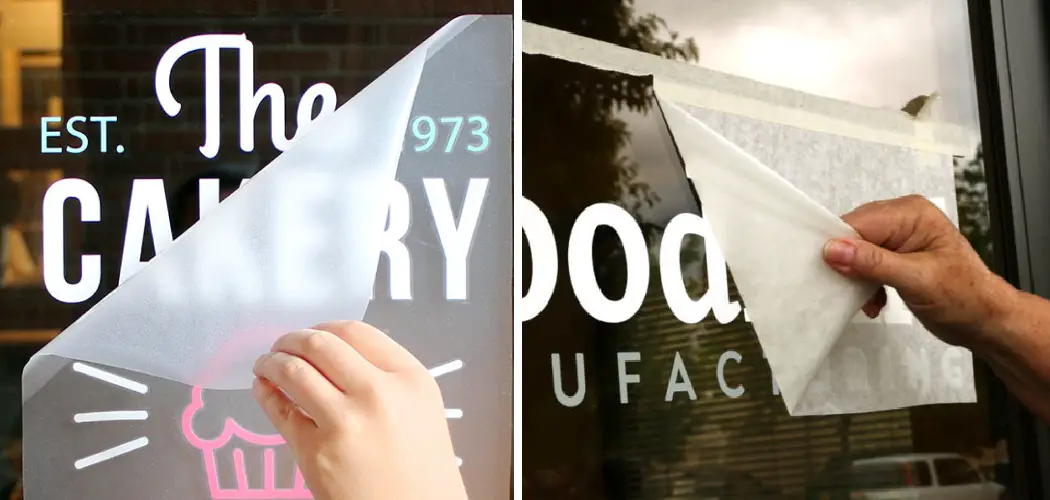
Remove the transfer tape: Gently peel off the transfer tape, leaving your vinyl letters adhered to the surface.
Step 8: Seal and Protect Your Vinyl Letters (Optional)
To ensure longevity and protect your vinyl letters, consider applying a sealant over them. This step is optional but recommended, especially for outdoor projects or items subject to wear and tear.
Choose a sealant: Select an appropriate sealant that is compatible with your surface and vinyl material. A clear polyurethane or acrylic sealer is a popular choice.
Apply the sealant: Following the manufacturer’s instructions, apply the sealant over your vinyl letters. Make sure to cover the entire design evenly.
Allow to dry: Give the sealant enough time to dry completely before handling or displaying your project.
Step 9: Inspect and Make Final Adjustments
Once you have applied your vinyl letters and, if applicable, sealed them, take a moment to inspect your project:
Check for air bubbles: If you notice any air bubbles trapped under the vinyl, use a pin or the tip of your craft knife to carefully puncture them and press the vinyl back down.
Trim any excess: If there are any parts of the vinyl extending beyond the surface, carefully trim them with a craft knife.
Step 10: Customize Your Vinyl Letters with Additional Elements
To enhance your vinyl letter project, consider adding extra touches such as:
Layering: Cut out additional shapes or letters in different colors of vinyl and layer them on top of your main design for a multi-dimensional effect.

Embellishments: Add small decals, rhinestones, or other decorative elements to complement your vinyl letters.
Paint or stain: If your surface allows it, consider painting or staining it before applying the vinyl letters to create a unique background.
Step 11: Experiment and Learn
Vinyl letter crafting is a skill that improves with practice. Don’t be afraid to experiment with different designs, vinyl colors, and surfaces. Each project will teach you something new, helping you refine your techniques and artistic vision.
Step 12: Care and Maintenance
With your vinyl letter project completed, proper care and maintenance will ensure its longevity: Hand wash only: If your project involves items like drinkware or dishware, hand wash them gently to preserve the vinyl.
Avoid direct heat: Keep your vinyl letter project away from direct heat sources, such as stovetops or heaters, to prevent damage to the vinyl. Following these 12 simple steps on how to make vinyl letters without a machine, you can complete your project in no time.
Frequently Asked Questions
Q1: Is It Difficult to Make Vinyl Letters Without a Machine?
A: While it may require some practice and patience, making vinyl letters without a machine is not overly difficult. With the right tools, materials, and following the step-by-step guide, you can achieve clean and professional-looking vinyl letter designs.
Q2: What Type of Vinyl Should I Use for Handcrafting Vinyl Letters?
A: For handcrafting vinyl letters, it’s essential to use adhesive vinyl sheets. These sheets have a sticky backing that allows you to adhere the letters to various surfaces easily. Look for high-quality vinyl sheets available in different colors to suit your design needs.
Q3: Can I Create Intricate Designs With Hand-cut Vinyl Letters?
A: Yes, you can create intricate designs with hand-cut vinyl letters. However, it requires precision and attention to detail during the cutting and weeding process. Small or delicate elements may be more challenging to handle, but with practice, you can achieve impressive results.
Q4: How Can I Ensure My Vinyl Letters Adhere Properly to the Surface?
A: To ensure proper adhesion, it’s essential to prepare the surface before applying the vinyl letters. Clean the surface thoroughly with a mild soap and water solution, ensuring it is dry before proceeding. Additionally, use transfer tape or contact paper to transfer the vinyl letters to the surface carefully, and use a credit card or scraper tool to press and smooth them down firmly to eliminate air bubbles.
Conclusion
Crafting vinyl letters without a machine is an enjoyable and rewarding process that lets you express your creativity and add personalized touches to your projects. By following the comprehensive step-by-step guide above, you can create beautiful vinyl letter designs without the need for expensive equipment.
From planning and cutting to weeding and applying, each step contributes to the creation of a unique and stunning end product. So, roll up your sleeves, gather your supplies, and embark on the journey of handcrafting custom vinyl letters to elevate your crafts, decor, and gifting endeavors. Thanks for reading this article on how to make vinyl letters without a machine.