
Are you seeking a creative and unique way to showcase your artistic side? If so, why not try making some beautiful turkey origami? Not only is origami charmingly delicate and intricate, it adds an extra layer of sophistication to whatever space it’s displayed in.

With a little practice and patience, you can turn any boring paper into a work of art. Plus, this Thanksgiving season you can have your stylistic masterpiece that’ll stand out from the rest!
Whether you’re a novice or an origami virtuoso, we’ve got you covered! Here are the steps on how to make turkey origami. Just remember to take your time and be mindful as you go.
So put on your crafting cape and come along as we explore how to make some incredible Turkey Origami!
What Will You Need?
You’ll need the following materials to make your turkey origami:
- Origami paper (or regular printer/copy paper)
- Scissors
- Glue stick
- Markers or colored pens for decoration.
Note: If you’re using regular copy paper, you can fold it in half first, then cut it into two rectangles.
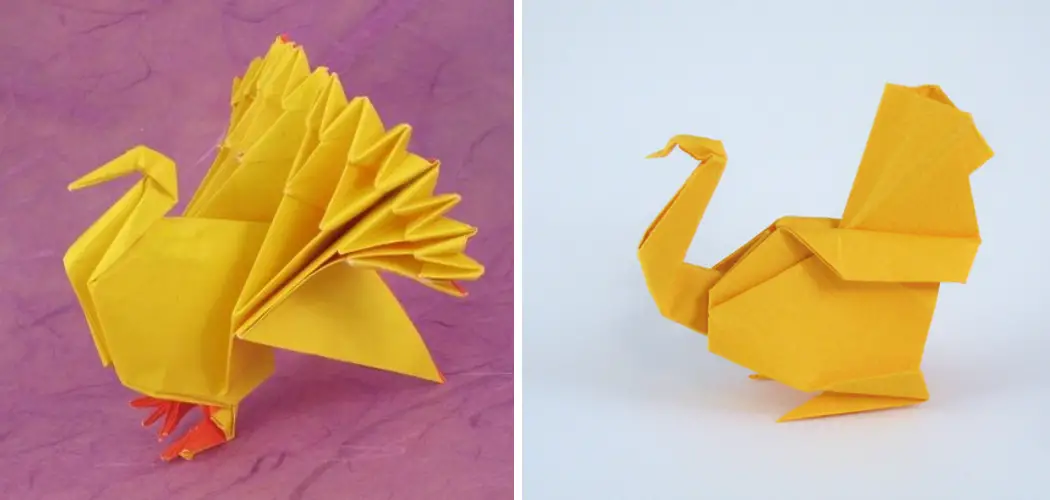
8 Easy Steps on How to Make Turkey Origami
Step 1. Creating the Body:
Start by taking a square piece of origami paper. If one side is colored, place that side facing down. Fold the square in half diagonally, creating a triangle. Unfold it and fold it diagonally in the other direction.
Unfold it again to reveal an X crease. Now, fold the paper in half horizontally, unfold, and fold it in half vertically. Unfold the paper again, and push the sides towards the center, collapsing it into a smaller, diamond-shaped piece known as a “waterbomb base.” This forms the body of your turkey origami.

Step 2. Creating the Head:
Once you have the body, it’s time to craft the turkey’s head. For this, take a smaller square piece of paper, and repeat the process as in Step 1 to create a waterbomb base. However, this time, fold the top corner of the diamond down to create a triangle. This gives the appearance of the turkey’s head and beak.
Step 3. Making the Feathers:
To make the feathers of your turkey origami, take another square piece of paper. Fold it in half vertically, horizontally, and diagonally, just like you did in the previous steps. This time, fold it back into a square instead of collapsing it into a diamond. Fold the top layer of the bottom edge up to meet the top edge.
Repeat this step on the backside. You should now have a smaller square. Fold this square diagonally to form a triangle. Unfold it. This will create creases that will serve as your guide. Fold the left and right corners of the triangle to meet the center crease. This forms the feather shape. Repeat this process to create as many feathers as you want for your turkey.
Step 4. Assembling the Origami Turkey:
Now that you have all the parts, it’s time to assemble your turkey origami. Start by gluing the head to the body. Make sure to position it in a way that the beak points outward. Then, glue the feathers at the back of the body.
Try to fan them out to give your turkey a more lifelike appearance. You can add as many feathers as you want, depending on how full you want your turkey’s tail to be. And there you have it – your very own origami turkey!
Step 5. Finishing Touches:
Once the glue is dry and your turkey origami is fully assembled, it’s time to add the finishing touches. Use your markers or colored pens to draw on the eyes, a beak, and other details to make your turkey come alive.

Be creative and add any additional embellishments you’d like – sequins, glitter, stickers, or even feathers! After all, this is your creation, and there’s no limit to what you can do. When you’re done decorating, let everything dry. Congratulations, you have just created your very own turkey origami!
Step 6. Taking Care of Your Origami Turkey:
To ensure that your origami turkey lasts, you should handle it gently and keep it in a dry, safe place away from heat and moisture. Remember, origami is a delicate art form, and these creatures, though made of paper, almost seem to take on a life of their own!
If you want to preserve your turkey long-term, consider placing it in a display case or framing it. This way, you can appreciate your handiwork for years to come and show it off to friends and family, who are sure to be impressed by your creativity and skill!
Step 7. Sharing Your Origami Turkey:
After making your beautiful origami turkey, why not share your creation with the world? You can take a photo of your turkey and post it on social media. Use hashtags like #OrigamiTurkey or #OrigamiArt to connect with a community of other origami enthusiasts.
Consider giving your origami turkey as a gift to a friend or loved one, or use it as a decoration at your next Thanksgiving gathering. This is a great way to demonstrate your creative abilities and spread the joy of origami artistry to others.
Step 8. Experimenting with Different Designs:
Now that you’ve mastered basic turkey origami, why not experiment and try out different designs? You can adjust the size of the body, head, and feathers to create turkeys of different shapes and sizes.
Try using different colors or patterns of paper to make your turkey even more eye-catching. You could also add more intricate details, such as carving out patterns on the feathers or adding a wattle and spurs.
By following these eight easy steps, you can make your own turkey origami! Have fun and happy folding!

5 Additional Tips and Tricks
- Use clear and concise instructions when folding your origami turkey.
- Take extra care when cutting the paper for the wings, tail feathers, legs, and head. It can be difficult to shape them properly if they are too narrow or too wide.
- Make sure the glue is evenly distributed around the edges of each piece before attaching them with tape or glue.
- Use a ruler to measure the size of your origami turkey and make any necessary adjustments as you go along.
- If working with smaller pieces, such as legs or wings, use tweezers for more precise folding and gluing. This will help achieve a more accurate result.
You can make a beautiful origami turkey perfect for any Thanksgiving table with the right instruction and materials. So get out your paper, scissors, glue, and ruler, and let’s start folding!
5 Things You Should Avoid
- Don’t rush through the construction of your origami turkey. Take your time and make sure all pieces are properly secured before moving on to the next step.
- Don’t forget to use a ruler or measuring tape to ensure that each piece is cut in proportion with the rest of your paper bird.
- Don’t skip steps when it comes to creasing and folding. Make sure your pleats are neatly folded before taping or gluing them together.
- Don’t use too much glue, as this can create a mess and affect the shape of your origami bird.
- Avoid using colors other than white or brown unless you are an experienced paper folder. Colored paper may create an unappealing outcome.
With the right materials and patience, you can make a beautiful origami turkey that all your friends and family will admire. So get out your tools, and let’s get started!
How to Make a 3d With Origami?
Making a 3D origami turkey can be tricky, but with the right instructions, creating an impressive centerpiece for your Thanksgiving table is possible.
- Start by cutting out two identical pieces of paper in the shape of a triangle and fold each one in half lengthwise.
- Make sure to crease and unfold both pieces before repeating this step with a third piece of paper.
- Use glue to attach the three triangles and then press firmly along the edges.
- Next, fold each triangle in half again to form an isosceles triangle shape, and secure the sides using tape or glue.
- Now you can start adding details such as wings, tail feathers, and head. For wings, take two separate pieces of paper and fold them into a triangle shape. Glue or tape these onto the back of your origami turkey.
- To make the tail feathers, cut out several small triangles from colored paper and attach them to the back of your origami bird using glue or tape.
- Finally, shape a small round piece of paper into a beak and glue it onto the front of your origami turkey.

Your 3D origami turkey is now complete! You can create an impressive centerpiece for your Thanksgiving table with just a few simple steps. So get out your materials, and let’s get started!
Conclusion
How to make turkey origami is a great activity for the fall season. It’s an easy way to get creative and challenge yourself while creating something beautiful. Whether you’re a beginner trying something new, or an experienced paper folder looking for something fun, turkeys are a great choice!
Use the step-by-step instructions in this post to make your unique model of this classic holiday figure. With patience and practice, you may find that folding turkey origami is more enjoyable than carving its real life counterpart!
So don’t wait any longer—grab a few sheets of paper and create your turkey origami masterpiece today!