
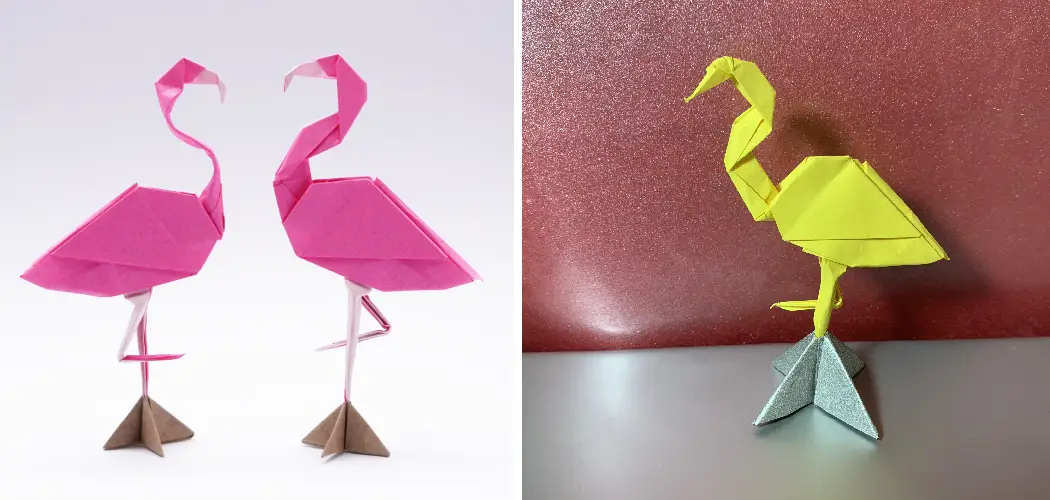
Have you ever wanted to learn something new and crafty, but don’t want to spend too much time or money doing it? We have the perfect solution for you – Origami! Origami is the traditional Japanese art of paper folding that can transform a flat sheet of paper into a beautiful figure. Today, we’re going to be showing everyone how easy it is with our step-by-step tutorial on how to make origami flamingo.

All you need are some red and pink square pieces of origami paper, scissors, and glue plus maybe about 15 minutes worth of your spare time! It’s fun for both kids and adults alike – so let’s get started by making an adorable origami flamingo!
10 Step-by-step Guidelines on How to Make Origami Flamingo
Step 1: Prepare the Paper
Start by taking two square pieces of your red and pink origami paper. Then, fold each piece in half twice to create four equal-sized rectangles. It’s best to use the same color paper for both pieces, but if you want a mix of colors that’s fine too! It’s all up to you. However, make sure that the fold lines are in the same direction.
Step 2: Make the Body of the Flamingo
Fold both pieces of paper in half again to form two small rectangles and then unfold them. You should now have a total of four rectangular pieces – two red and two pink. Take one of the pink rectangles and fold it in half lengthwise. Then, take the other pink rectangle and fold it in half widthwise.
Step 3: Create the Head of the Flamingo
Take one of your red rectangles and fold it in half lengthwise to make a triangle shape. Unfold the triangle so it is flat again and then fold each side in toward the center. This will give you a diamond shape with four points at the corners.
Take your other red rectangle and fold it in half widthwise, so you have a square-shaped piece of paper. Unfold this as well and then fold each side into the center to create an even smaller diamond shape with four corner points.

Step 4: Attach the Body and Head
Take your diamond-shaped head and align it on top of your pink rectangle body. Make sure to place the pointed edge of the head at the top, near the fold line. Then, glue them together keeping in mind that one side should be attached to the bottom of your body and the other to the top.
Once that’s done, take your other pink rectangle and fold it in half lengthwise to make a triangle shape again. Put this triangle on top of your diamond-shaped head and glue them together at the three points – making sure to leave one side unattached. This will form the beak of your flamingo!
Step 5: Create the Legs
Now, take your other diamond-shaped piece of paper and fold it in half lengthwise to create a triangle. Unfold this again and then fold each side into the center so you have four corner points. Place this on top of your flamingo’s body near the bottom edge and glue it together – making sure to leave one side unattached.
Take the other red triangle and fold it in half lengthwise again to make another triangle shape. Unfold this triangle and then fold each side into the center so you have four corner points. Place this on top of your flamingo’s body near the bottom edge and glue it together – leaving one side unattached once more. This will form the legs of your flamingo!
Step 6: Making the Wings
Take each side of your diamond-shaped piece of paper and fold them into the center so they meet in the middle. This should create a small triangle shape with four corner points. Place this on top of your flamingo’s body near the top edge and glue it together – leaving one side unattached.
Take the other red triangle and fold it in half lengthwise again to make another triangle shape. Unfold this triangle and then fold each side into the center so you have four corner points. Place this on top of your flamingo’s body near the top edge and glue it together – leaving one side unattached once more. This will form the wings of your flamingo!
Step 7: Attach the Tail Feathers
Take each side of your small diamond-shaped piece of paper and fold them into the center so they meet in the middle. This should create a small triangle shape with four corner points. Place this on top of your flamingo’s body near the back edge and glue it together – leaving one side unattached.

Take the other red triangle and fold it in half lengthwise again to make another triangle shape. Unfold this triangle and then fold each side into the center so you have four corner points. Place this on top of your flamingo’s body near the back edge and glue it together – leaving one side unattached once more. This will form the tail feathers of your flamingo!
Step 8: Make the Eyes
Start by taking two small pieces of black paper and folding them in half to make a triangle shape. Unfold this triangle and then fold each side into the center so you have four corner points. Place these on top of your flamingo’s head and glue them together – making sure to leave one side unattached.
Once that’s done, take a small piece of white paper and fold it in half lengthwise to make another triangle shape. Unfold this triangle and then fold each side into the center so you have four corner points. Place this on top of your black triangles and glue them together – making sure to leave one side unattached. This will form the eyes of your flamingo!
Step 9: Make the Feet
To make the feet of your flamingo, start by taking two small pieces of black paper and folding them in half to make a triangle shape. Unfold this triangle and then fold each side into the center so you have four corner points. Place these on top of your flamingo’s legs and glue them together – making sure to leave one side unattached.
Once that’s done, take a small piece of white paper and fold it in half lengthwise to make another triangle shape. Unfold this triangle and then fold each side into the center so you have four corner points. Place this on top of your black triangles and glue them together – making sure to leave one side unattached. This will form the feet of your flamingo!

Step 10: Add the Finishing Touches
To complete your origami flamingo, take two small pieces of yellow paper and fold them in half to make a triangle shape. Unfold this triangle and then fold each side into the center so you have four corner points. Place these on top of your flamingo’s head and glue them together – making sure to leave one side unattached. This will form the crest feathers of your flamingo!
Now, take two small pieces of orange paper and fold them in half to make a triangle shape. Unfold this triangle and then fold each side into the center so you have four corner points. Place these on top of your flamingo’s body and glue them together – making sure to leave one side unattached. This will form the chest feathers of your flamingo!
Following these steps, you’ll be able to easily make your own origami flamingo! It’s a fun and easy project that requires minimal supplies. So grab some paper and get folding – you just might surprise yourself with the results! Happy crafting!
Frequently Asked Questions
Q: What Kind of Paper Should I Use?
A: Regular copy paper is the best type of paper to use for origami projects! You can also use patterned or colored paper if you’d like to make your flamingo more vibrant. Just make sure that whatever type of paper you use is thin enough to fold easily and won’t tear when you’re shaping it into your design!
Q: What Glue Should I Use?
A: We recommend using a glue stick for attaching the pieces together as it is easy to use and won’t leave any residue. However, you can also use white craft glue or a hot glue gun if desired. Just make sure to be extra careful when using the glue gun so that you don’t burn yourself!

Q: How Long Will It Take to Make My Origami Flamingo?
A: The entire process should take no more than 30 minutes. It all depends on how quickly you are able to fold the paper and glue the pieces together! So take your time, relax, and have fun with it. You’ll be amazed at what you can create in just one afternoon!
Q: Do I Need Any Special Tools?
A: No, all you need is a pair of scissors and some glue! However, if you want to add extra details or make your flamingo look more realistic, you can also use colored pencils or markers for added detail. Have fun with it and get creative – the possibilities are endless!
Conclusion
Through origami, you can find an endless world of possibilities right in your own home! By exploring the art of paper folding, you’ve now learned how to make a beautiful Origami Flamingo. Whether you’re looking for a unique decoration or just want to get creative, origami is certainly the way to go. It only takes a few simple steps and doesn’t require any real craftsmanship skills!
So don’t put off learning this fun new hobby – the next time you’re feeling bored or unmotivated, why not pull out some colorful pieces of paper and fold yourself a unique Origami Flamingo? Once perfected, these adorable creations are sure to bring joy and smiles into your life.
We hope this blog post inspires you to roll up your sleeves and try making something different – after all, what could be more fulfilling than turning plain paper into a work of art?! Thanks for reading this article on how to make origami flamingo.