
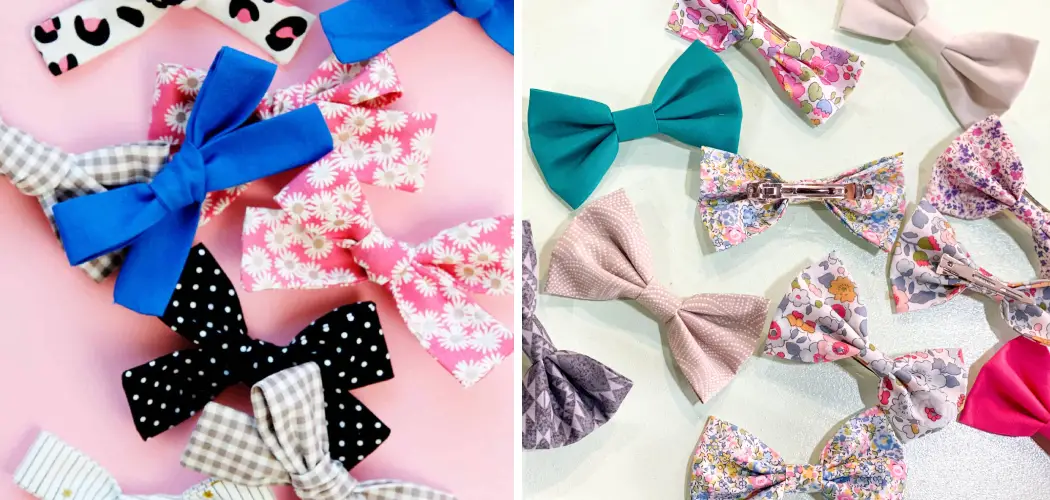
Are you looking for a fun and creative way to jazz up your hairstyles, fashion accessories, or home decor? Look no further than bows! They are easy to make and can make a huge statement with minimal effort.

Whether you’re looking to make a classic bow, an intricate knot, or something with a whim, knowing how to sew bows is an essential skill. Here are a few tips and tricks to help you get started
In this blog post, we’ll share our top tips for learning it. From the materials you need, basic stitch basics, techniques on how to tie classic bow knots better, plus some exciting ideas that will help get your creative juices flowing — everything you need is included here. So let’s get started on creating beautiful bows together!
What Wil You Need?
It’s easy to get started sewing bows. You’ll need just a few essential supplies:
- Thread
- Needle
- The fabric of your choice (cotton or polyester work best for creating bows)
- Scissors
- Measuring tape (for measuring the fabric pieces you will be working with)
And depending on your desired design, you may also need a few other items, such as ribbons, hot glue guns, buttons, etc.
10 Easy Steps on How to Sew Bows
Step 1: Measure and Cut the Fabric
The first step in sewing bows involves measuring and cutting the fabric. Determine the size you want for your bow, then double the width and add 1 inch. This measurement will be for the length of your fabric.
For the width, decide how wide you want the bow to be, then multiply it by three and add 1 inch. Once you have your measurements, use the scissors to cut a rectangle from your fabric. Make sure the edges are neat and straight, as this will contribute to the final look of your bow.

Step 2: Sew the Fabric
Once your fabric is cut to the desired size, fold it in half lengthwise, with the right sides facing together. This means you’ll sew on the “wrong” side of the fabric. Thread your needle and start to sew a straight line down the long side of the fabric and one of the short sides.
Leave an opening on one side to turn the fabric right-side out later. Be sure that your stitches are consistent and tight for the best results. Remember to secure both ends of your stitching by backstitching or tying off the thread.
Step 3: Turn the Fabric Right-Side Out
After sewing the fabric, the next step in creating your bow is to turn the fabric right-side out. Carefully reach into the opening you left in your stitching and gradually flip the fabric out. This step might take a bit of time and patience, but achieving a smooth and polished look for your bow is worth it.
Once it’s right-side out, iron your fabric to eliminate wrinkles and create a crisp, clean shape. Remember to fold in and iron the unstitched portion to align with the sewn edges.
Step 4: Create the Bow Shape
Creating the bow shape is the next step in our “How to sew bows” guide. Lay your fabric flat with the sewn and ironed side facing down. Fold both ends of the fabric rectangle to meet in the middle. You can now see the basic shape of your bow starting to form. To secure the folds in place, stitch them together at the center.
Ensure the stitches are neat and hidden as much as possible, as they will be visible on the front of your bow. This stitching also creates natural creases that give your bow a more realistic and professional look. Sew a few stitches in the middle of the bow, going through all layers of fabric, to ensure the bow maintains its shape.

Step 5: Prepare the Center Piece
Now that your main bow shape is created, it’s time to prepare the centerpiece that will hold everything together. For this, cut a small strip of fabric, approximately 2 inches long and as wide as you desire. Just like with the bigger piece, fold this small strip in half lengthwise, right sides together, and sew along the long side.
Turn the fabric right-side out, iron it flat, and then wrap it around the center of your bow. Sew the ends together once it’s wrapped tightly at the back of your bow. This will create the classic bow look by cinching the fabric in the center.
Step 6: Attach the Bow
Your sewn bow can be attached to whatever you’d like, be it a hair clip, headband, dress, or bag. Attach the bow using a needle and thread to secure it. Make sure your stitches are tight and neat for a professional finish.
Step 7: Finishing Touches
Your bow is now almost complete and ready for the final touch. Depending on the purpose of your bow, you can add any extra embellishments like sequins, beads, buttons, or even small pompoms to make it look more attractive.
You can use a hot glue gun or sew them on for a more permanent effect. Remember, balancing the design elements to achieve a chic and classy appearance is key. With these final touches, your handmade bow is ready to turn heads!
Step 8: Celebrate Your Craftsmanship
Congratulations! You’ve just created a beautiful hand-sewn bow, a testament to your creativity and craftsmanship. Feel free to experiment with different fabrics, sizes, and colors to create a variety of bows.
With practice, the process will become second nature, and before you know it, you’ll have an impressive collection of unique bows to complement any outfit or decor. Whether crafting for yourself, for gifts, or even for sale, mastering sew bows opens up a world of creative possibilities. Happy sewing!

Step 9: Care and Maintenance
Maintaining the quality of your handmade bow is as important. For fabric bows, it is advisable to gently hand wash them in cool water with a mild detergent. Avoid wringing or twisting the bows as it may distort their shape.
Instead, gently squeeze out excess water, reshape the bow, and lay it flat to dry. Keep your bows dry and clean, away from direct sunlight, to prevent color fading. A quick spot-clean method is best for bows with embellishments to avoid damaging the decorative elements.
Step 10: Share and Inspire
Now that you’ve mastered the art of sewing bows, it’s time to share your work and inspire others. Whether through social media, craft fairs, or simply showing off your creations to friends and family, spreading the joy of your handmade bows can inspire others to explore their creative side.
If you’re particularly proud of a bow, consider creating a step-by-step guide or video tutorial to help others learn to sew bows. Creativity is contagious – by sharing your skills and passion, you contribute to a community of crafters and makers, each adding their unique touch to the world.
Following these steps, you can make beautiful bows to add a unique touch to your style, home decor, and gifts. Whether you’re just starting or have been crafting for years, the possibilities are endless for sewing bows. So go ahead and get creative! Let your imagination run wild, and see what beautiful creations you can make.
5 Additional Tips and Tricks
- Try using a piece of ribbon or twine to make it easier to attach the two ends of the bow. This will give you better control and a smoother finish.
- You can also use needlepoint thread instead of regular thread when sewing your bows, making it less likely that the threads will unravel during wear and tear.
- Try stitching the bow with two pieces of thread instead of one for a thicker and more formal look. This will give your bow a fuller appearance and make it look more professional.
- If your bows are not staying put after being sewn together, try using hot glue or craft glue to keep them in place. This is an easy way to make sure your bows look perfect!
- When attaching the two ends of the bow, it helps to use a lot of pins so that nothing moves while you’re sewing. This will keep your stitches neat and help ensure that your bows stay put.
These tips and tricks allow you to sew flawless bows that look good on any outfit. Have fun experimenting with different looks and materials to create your unique style.

5 Things You Should Avoid
- Avoid using too heavy of a thread when sewing bows, as this can make the bow look bulky and sloppy.
- Don’t use regular or fabric glue when creating your bows, as this will not give them enough hold and could cause them to fall over time.
- Overusing pins while sewing may lead to uneven stitches and a lumpy look.
- Avoid tugging or pulling the thread too hard when sewing the bows together, as this could lead to uneven stitches and material fraying.
- Always ensure that both ends of the bow face in the same direction so that your bow looks symmetrical and professional when finished.
Creating perfect bows takes practice and patience, but with these tips and tricks, you can make stunning bows for any occasion. So get out your sewing kit and let your creativity shine!
Conclusion
Congratulations on having finished your bow! With patience and practice, you can easily create sewing bows quickly. Not only is sewing bows an amazing way to customize your apparel, but it’s also a great creative outlet and hobby.
You can go wild with the color and size of your bows, showing off your personality and originality when you wear them out. Take this newfound skill with you wherever you go—it’ll surely come in handy!
At the same time, sew bows for a special someone and show them how much they mean to you by gifting them something handmade with love. So now that you know how to sew bows – get started creating your stunning masterpieces!