
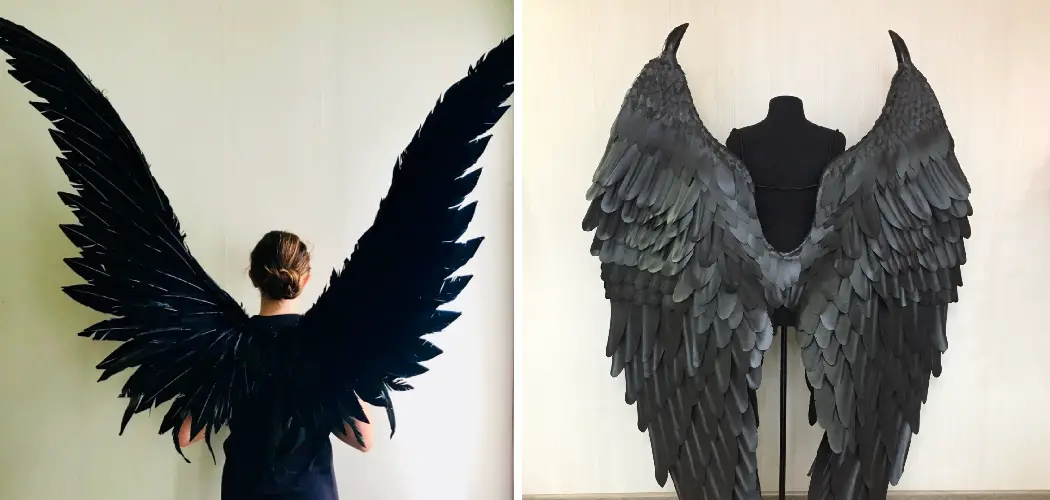
Do you have a special event coming up that requires a unique costume? Have you ever dreamed of looking like the menacing Maleficent from Sleeping Beauty? Make your desirous transformation come to life by crafting and wearing your very own set of wings! Crafting these authentic-looking Maleficent wings may seem like an impossible feat. However, it’s quite simple with the right materials and supplies.
If you’re ready to become a powerful fairy with your own set of mesmerizing wings, then follow the instructions below, and let’s get started on how to make maleficent wings.

Following our comprehensive step-by-step guide, you can easily make detailed and realistic Maleficent wings that will take any costume to the next level. So, let’s get started – gather your supplies for this exciting project!
What Will You Need?
Before we dive into the instructions, here are the materials and supplies that you will need to make your Maleficent wings:
- Black foam board or cardboard
- Scissors
- Ruler
- Pen or pencil
- Black paint and paintbrushes
- Hot glue gun and glue sticks
- Elastic band or ribbon for straps (optional)
Now that you have everything you need let’s begin the crafting process!
10 Easy Steps on How to Make Maleficent Wings
Step 1: Design Your Wings
Start by drawing out the shape of your wings on a piece of black foam board or cardboard. You can use a ruler to ensure your lines are straight and symmetrical. Remember that Maleficent’s wings are quite large, so make sure to leave enough room for them to be about 3 feet tall and 4 feet wide.
Step 2: Cut Out Your Wings
Once you’ve drawn your wings, it’s time to cut them out. Using your scissors, carefully follow the outlines you’ve drawn and cut out the wings. Be sure to cut cleanly and avoid tearing the foam board or cardboard.
After cutting, you should have two identical wings. If imperfections or asymmetry exist, you can trim and adjust them accordingly at this stage.
Step 3: Paint Your Wings
Now that your wings are cut out, it’s time to give them some color. Using black paint, completely cover both sides of each wing. This will give your wings the dark, imposing look characteristic of Maleficent. Let the paint dry completely before moving on to the next step.

Step 4: Add Texture to Your Wings
Adding texture to the wings will give them a realistic, feathered look. Start by cutting out smaller feather shapes from your foam board or cardboard. They should be varying sizes to simulate the natural variation in a bird’s wing. Paint these small feathers black and let them dry.
Once dry, use the hot glue gun to attach these smaller feathers onto your wing cutouts in an overlapped manner, starting from the bottom and working your way up. This step may take some time, but it’s worth it for the stunning result!
Step 5: Secure Your Wings
After you’ve attached all the small feathers, it’s time to secure your wings. You’ll need to create a harness to wear them. Cut two lengths of elastic band or ribbon long enough to reach from the center of one wing, over your shoulders, and to the center of the other wing.
Attach these straps to the back of your wings using the hot glue gun. Ensure they are strong and secure enough to hold the wings. Remember to adjust the straps to fit comfortably over your shoulders. Now, your magnificent Maleficent wings are ready to wear!
Step 6: Test Your Wings
After you have securely attached the straps, it’s time to test your wings. Carefully put them on and adjust the straps as needed for comfort. Walk around and do mild movements to ensure the wings stay in place and not overly restrict your mobility.
This step is crucial before wearing them to an event or party, as it ensures you’re comfortable and your wings are durable. Once satisfied with the fit and feel, you’ve completed your Maleficent wings! Take to the skies, even if it’s just in your imagination, and enjoy your fantastic creation.
Step 7: Store Your Wings Safely
Once the event is over, remember to store your wings in a safe place. To ensure they last and maintain their stunning appearance for future use, place them flat where they will not be crushed or damaged.

Avoid exposing them to excessive heat or moisture. With the right care, your handcrafted Maleficent wings can be a standout feature in many events and costume parties!
Step 8: Maintenance and Repair
Over time, your Maleficent wings may require minor maintenance or repair, particularly if used frequently. Inspect your wings periodically for any damage or wear and tear.
Should you spot any loose feathers or weakening of the straps, use your hot glue gun to secure the loose parts. If the black paint starts to chip or wear off, touch it with more paint. Proper maintenance ensures your Maleficent wings look as magnificent as the day you made them!
Step 9: Add Finishing Touches
Consider adding some finishing touches to your Maleficent wings for a truly show-stopping look. This could be anything from sprinkling some black glitter over the dried paint for a sparkly look to attaching faux jewels around the edges for a bit of glamour.
Remember, this is your project, so feel free to get creative and add personal touches that reflect your style. Once your finishing touches are added, your Maleficent wings are ready to wear. You are now transformed into the powerful and enchanting fairy. Enjoy your new look!
Step 10: Show Off Your Creation
Finally, it’s time to show off your beautiful Maleficent wings! Whether wearing them to a costume party, a themed event, or just for fun, you will surely be the center of attention. Feel the power and majesty of Maleficent as you move and interact with others.
Remember, the creation process is as important as the final product, so take pride in your hard work and creativity. Enjoy the compliments and curious questions about how you made your stunning wings, and remember to have fun!

By following these ten easy steps, you can create your very own Maleficent wings. With some time and creativity, you can make a unique and captivating costume piece that is sure to impress.
5 Additional Tips and Tricks
- Choose the Right Material: For a lightweight and flexible framework, consider using wire or thin, strong plastic rods for the backbone of your Maleficent wings. Cover them with black fabric or feathers to achieve the iconic look.
- Ensure Comfort and Mobility: Attach your wings to a comfortable harness that you can wear on your back. Securely fasten it with straps to ensure the wings stay in place but allow enough movement.
- Add Some Drama: Consider incorporating some ‘articulated’ sections into your wings. This will allow them to open and close, adding an element of surprise and realism to your costume.
- Safety First: Remember to round off sharp edges While crafting your wings and tightly secure all elements. The last thing you want is a costume mishap.
- Keep it Light: Remember, you’ll wear these wings for some time. Keep the materials as lightweight as possible to avoid discomfort or fatigue.
Remember, making Maleficent’s wings should be a fun and creative process. Use these tips as a guide, but feel free to add your own creative touches.
5 Things You Should Avoid
- Avoid Using Heavy Materials: It might be tempting to use certain materials for their aesthetic appeal, but remember, comfort is key. Heavy materials tire you out quickly and make it hard to move freely.
- Remember Balance: The wings should be balanced, not only in design but also in weight. Unbalanced wings can cause discomfort and negatively impact your posture.
- Don’t Rush the Process: Crafting Maleficent wings takes time. Do not rush the process to avoid mistakes that could ruin your wings or lead to safety hazards.
- Avoid Rigid Designs: While you want your wings to maintain their shape, flexibility is necessary. Completely rigid designs may break more easily and won’t allow for the ‘articulation’ that gives the wings their dramatic flair.
- Don’t Ignore Fit: Make sure the harness fits you well. An ill-fitting harness can be uncomfortable and cause issues with the wings’ position and stability. Make adjustments as necessary to ensure a good fit.
With these tips and tricks in mind, you’ll be well on your way to creating a stunning pair of Maleficent wings that will steal the show.

Conclusion
Finally, use your newly crafted maleficent wings for whatever spooky-themed event you have coming up! Whether it is Halloween, a masquerade ball, or any other costumed show, these wings will surely turn some heads. Take courage as courageous Maleficent, and let your creativity soar to new heights!
With these wings, you can be sure that no one will doubt the intimidating power of your ensemble. Now go forth and dazzle them with your costume! Plus, you can rest easy — after busting out this project, those supposedly complicated difficulty ratings for other crafting activities now seem much less daunting.
Hopefully, the article on how to make maleficent wings has sparked your imagination and given you the confidence to take on other DIY projects. Remember, instructions or tips do not limit you; let your creativity and individuality shine through in all your creations. Good luck, and embrace your dark side with confidence!
You Can Check It Out to Crochet Bat Wings