
Do you want to spruce up your home without breaking the bank? Have you ever considered making DIY decorations from recycled materials around your house? If so, consider making a DIY Tree Collar out of cardboard! This eco-friendly tree collar is economical and a great way to add extra flair and personality to your Christmas decor.
Tree collars are a great way to prevent planter soil messes, adding decoration and protection. The good news is that you can make your tree collar with just some cardboard and essential tools! In this blog post, we will show you how to create an effective tree collar quickly and easily.

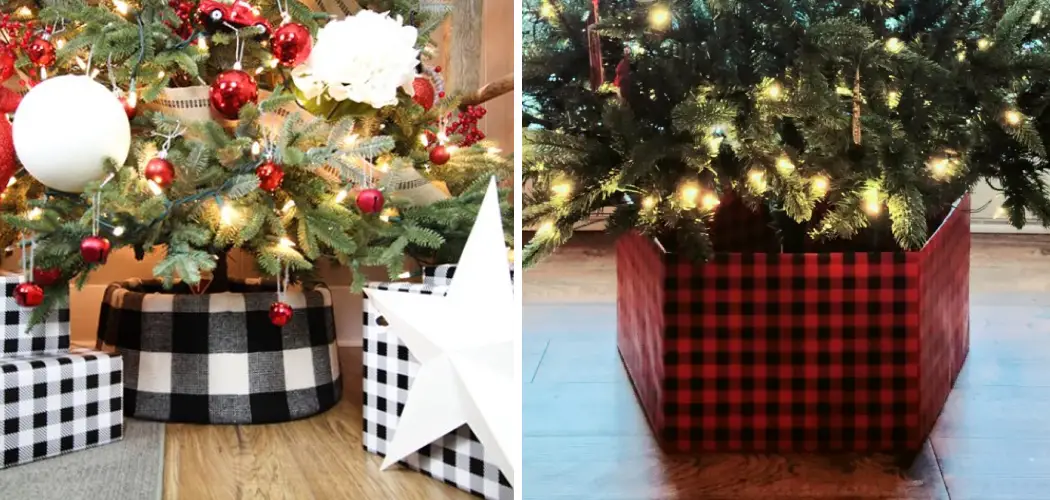
Follow along as we walk through how to make a tree collar out of cardboard as we transform ordinary cardboard into stylish decorative accents for indoor plants.
Necessary Items
Before diving into making a tree collar, let’s gather all the necessary items to get started. You will need:
- Cardboard sheets or boxes
- Measuring tape
- Pencil
- Ruler
- Scissors or utility knife
- Hot glue gun and glue sticks
10 Steps on How to Make a Tree Collar Out of Cardboard
Step 1: Measure your Christmas tree base
The first step is to measure the base of your Christmas tree. Use a measuring tape to determine the circumference of the base, as well as its height.
Step 2: Cut out cardboard strips
Next, mark and cut out several long strips from your cardboard sheets or boxes using a ruler and pencil. The strips should be about 6 inches wide and as tall as the height of your tree base.
Step 3: Create a circular base
Mark and cut out a circle using your measuring tape from one of the cardboard strips. The circle’s diameter should equal the circumference of your tree base.

Step 4: Make cuts on the circular base
Make small incisions on one side of the circle every 1 inch or so, leaving about an inch of space from the edge. These cuts will help to fold and shape the base when assembling.
Step 5: Create a cone
Wrap one of the long strips around the circular base, using hot glue to secure it in place. This will create a cone-like shape.
Step 6: Repeat for additional layers
Repeat step 5 with the remaining strips, creating multiple layers until you reach the desired height of your tree collar.
Step 7: Secure with hot glue
Once all the layers are in place, use hot glue to secure each. This will ensure that your tree collar is sturdy and can withstand bumps or movement.
Step 8: Decorate (optional)
Now comes the fun part – decorating your tree collar! You can paint it, add glitter, or even wrap it in fabric to match your Christmas decor theme.
Step 9: Add a hole for the tree trunk
Using scissors or a utility knife, carefully cut out a small hole in the center of the cone-shaped tree collar for the tree trunk to fit through.
Step 10: Place around your Christmas tree
Lastly, simply place your DIY tree collar around the base of your Christmas tree and adjust it as needed. And voila! You now have a beautiful and budget-friendly tree collar for your holiday decorations.
Making your own Christmas tree collar out of cardboard is a great way to save money and have fun. If you’re feeling creative, you can even decorate it with ribbon, beads, or glitter for extra pizzazz!
It can be a great bonding experience that every family can participate in — from the smaller children’s hand-painted designs to the older children’s detailed engraving creations. This is an activity that all ages will enjoy.
8 Safety Measures to Keep in Mind
As with any DIY project, it is important to keep safety in mind. Here are some tips to help ensure a safe and successful tree collar-making experience:
1. Sharp Tools
Be careful when using sharp tools such as scissors or a utility knife. Use them on a flat surface and away from your body.

2. Hot Glue Gun
The hot glue gun can get very hot, so be cautious when handling it and avoid touching the nozzle while it is in use.
3. Paper Cuts
Cardboard can be sharp, so be careful when handling and cutting it to avoid any paper cuts.
4. Proper Ventilation
Work in a well-ventilated area if using spray paint or other strong-smelling materials for decoration.
5. Protective Gear
Wear protective gear such as gloves or safety glasses while working with tools or hot glue.
6. Keep Children and Pets Away
To avoid any accidents, make sure to keep children and pets away from your work area.
7. Clean Up Properly
After completing your tree collar, properly clean up any tools or materials to avoid potential hazards.
8. Have Fun!
Most importantly, have fun with this project and enjoy the process of creating something unique and eco-friendly for your home.
Making your tree collar out of cardboard is an affordable option and a creative way to add a personal touch to your Christmas decor. You can create a stylish and functional tree collar with some basic tools and simple steps to make your holiday decorations stand out.

This tree collar will last long after the holiday season ends and become part of your annual traditions. So check off this creative project from your list of holiday preparations today — it’s an easy and affordable way to bring home Christmas cheer!
Frequently Asked Questions
Can I Use Other Materials Besides Cardboard?
Absolutely! You can use any sturdy and versatile material, such as wood or metal, to create a tree collar. Just make sure to adjust your tools and techniques accordingly.
How Do I Adjust the Size of My Tree Collar?
To adjust the size, cut your cardboard strips to the desired length and adjust the diameter of your circular base accordingly. You can also add or remove layers to change the height of your tree collar.
How Do I Store My Tree Collar?
If you plan on reusing your tree collar, store it in a dry and cool place to prevent any damage. You can also disassemble it for easier storage.
Can I Use This Method for Different Shaped Trees?
Absolutely! You can adjust the size and shape of your tree collar to fit any type of tree, whether a traditional cone-shaped Christmas tree or something more unique. Just make sure to measure carefully and adjust accordingly. Remember always to have fun with your DIY projects and make them your own.
Will This Tree Collar Work for All Types of Trees?
Yes! Whether you have a real or artificial tree, this DIY tree collar will work for all types and sizes. Just make sure to measure and adjust accordingly.
How Can I Make My Tree Collar Even More Eco-Friendly?
To make your tree collar even more eco-friendly, consider using recycled materials such as old cardboard boxes or fabric scraps for decoration. You can upcycle the tree collar after the holiday by repurposing it as a storage box or home decor piece.
Is There a Limit to the Number of Layers I Can Add?
Not really! You can add as many layers as you’d like to achieve your desired look and height for your tree collar. Just make sure to secure each layer with hot glue for stability.

Thus, creating a tree collar out of cardboard is an extraordinary way to add beauty and stand apart from the traditional tree skirts. It requires only a few supplies and introduces a more creative approach to tree skirt ideas. We can all try our hands at this DIY project this year. Imagine the appreciation around your house as your creativity inspires your family!
Conclusion
DIY projects are a great way to showcase your creativity and add a personal touch to your home decor. Making your own tree collar is budget-friendly and allows you to customize the design and size to fit your Christmas tree perfectly. So why not give it a try this holiday season?
With the right materials, tools, and knowledge on how to make a tree collar out of cardboard, creating a stylish and eco-friendly tree collar is easier than you think. Making your tree collar out of cardboard is a creative and functional way to give your tree an extra layer of protection.
Plus, it’s easy to make in under an hour! It’s a simple DIY project that can be easily customized for your desired size and color. If you need extra help or instructions, plenty of websites offer step-by-step advice.
You can also check out online videos that even include tips on how to decorate the collar. After making your tree collar, watch as your tree overflows with character and adds life to any room in your house.
So don’t wait any longer – grab some cardboard today and start crafting! Spend quality time getting creative with the family – in no time. You’ll have a unique home décor perfect for any holiday season.