
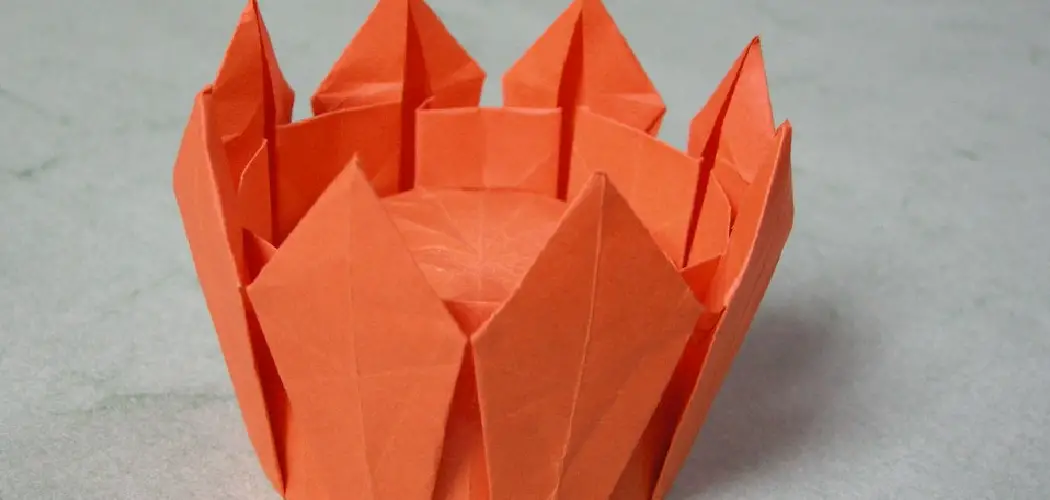
Are you ready to craft something unique and fun? Look no further than this origami crown design! It’s a simple yet creative project that will challenge your skills as an artist. Follow along with this guide on how to make an origami crown, and soon, you’ll have a colorful paper crown fit for royalty of any age. This is the perfect crafting activity for kids or adults looking to exercise their imaginations and make something out-of-the-ordinary. So grab your paper and supplies, and let’s get creative!

What is Origami?
Origami is the traditional Japanese art of folding paper into decorative shapes and figures. The word “origami” comes from two Japanese words, “ori,” meaning fold and “kami,” meaning paper. Although it originated in Japan, origami has become a popular craft all over the world.
Not only is origami a fun hobby, but it also has many benefits. It can improve hand-eye coordination, boost concentration and patience, and even reduce stress. Plus, it’s a sustainable craft as it only requires paper and minimal tools.
What Is the Easiest Way to Make an Origami Crown?
The easiest way to make an origami crown is to start with a pre-made paper strip or “crown template.” This will give you the basic shape of your crown and help keep it in place as you work. You can find these templates online or in craft stores. Once you have your strip, follow the instructions below to turn it into an origami masterpiece!
Additionally, some people like to use craft sticks instead of paper strips. This can give your crown a more sturdy structure and is great for doing larger-scale projects.
Supplies Needed:
Paper Strip or Crown Template
- This can be pre-made or cut from paper.
Scissors (optional if cutting your own strip)
- Use this to help manipulate the paper and create details.
Glue (Optional)
- Some people like to use glue as an extra step to secure their crown in place, but it’s not necessary.
9 Ways How to Make an Origami Crown
1. What You’ll Need
To make an origami crown, you’ll need a sheet of square paper, a pencil, and a pair of scissors. If you don’t have square paper, you can easily make your own by folding and cutting a regular sheet of paper. If you want to add color or decorations to your crown, you can use markers, crayons, glitter glue, gemstones, or any other craft supplies.
Although the steps for making an origami crown are fairly straightforward, they can be tricky to figure out at first. It’s best to practice a few times before tackling the real thing. You can also find video tutorials online to help guide you through the process.
2. Fold the Paper in Half
Fold the paper in half to create a crease down the middle. Then, unfold the paper and fold it in half the other way to create a second crease. You should now have four sections in the paper. If you are using a ruler, you can use it to make sure the folds are straight. However, it is not necessary to have perfectly straight folds. Make sure to crease the paper firmly so that the folds will stay in place.
The first four steps of this tutorial involve folding the paper in half multiple times to create creases that will serve as guidelines for the rest of the process. These creases will help you make precise folds and ensure that you don’t get lost along the way.
3. Fold the Corners In
Next, take each corner of the paper and fold it in towards the center so that it meets at the creases you created in step 2. Once all four corners are folded in, your paper should look like a diamond shape. Then, take the two opposite sides of the diamond shape and fold them in towards each other, creating a triangle.
Although it will not be perfect, it should look like the top of a box. If you find that the sides are not even, simply adjust them until you are satisfied with the shape. At this point, your box should be mostly complete.
4. Fold the Diamond in Half
Fold the diamond shape in half so that the two sides meet in the middle. Then, unfold it and fold it in half the other way to create a second crease down the middle. This should divide the diamond shape into four equal parts. If desired, use a ruler to make sure the creases are even. However, the shape does not need to be perfect for successful origami folding.
If you find that your shape is not symmetrical, gently unfold it and adjust the folds until it looks more even. It may take a few tries to get it just right, but don’t worry, practice makes perfect!
5. Fold Each Side In
Take each side of the diamond and fold it in towards the center so that it meets at the creases you created in step 4. Once all four sides are folded in, your paper should look like a small square. Then, unfold and flip your paper over. Although it may look slightly different, you should be able to see the same diamond pattern.

The next few steps will involve more precise folding and shaping to create the intricate design of the crown. Make sure to take your time and fold each crease firmly. Otherwise, your crown may not hold its shape.
6. Cut Along the Creases
Use your scissors to cut along all of the creases you’ve created up to this point. Be careful not to cut off any of the corners of your square. However, if you do make a mistake, don’t worry! You can always use some tape to fix it. Make sure to cut all of the edges and corners until you have a fully folded square. Otherwise, your crown won’t have the correct shape.
Cutting along the creases will help create flaps that you’ll use to fold and shape the crown. This is an important step in creating a sturdy and symmetrical crown.
7. Fold Up Two Corners
Fold up two adjacent corners of your square so that they meet in the middle and form a triangle shape. Repeat this step with the remaining two corners so that you have two triangles side-by-side. You should now have a total of four corners folded in half. Of your four corners, two should be facing up, while the other two should be facing down. If you need help with this step, you can refer to the pictures below for guidance. Make sure that the edges of your triangle are lined up perfectly.
Otherwise, your crown will not have the desired shape. It may take a few tries to get it right, but with practice, you’ll be able to create perfect triangles every time.
8. Cut Off the Tip of One Triangle
Use your scissors to cut off the tip of one of your triangles, being careful not to cut too much off or cut into the other triangle. This will be used as your crown’s pointy end later on. Repeat this step with the remaining triangle. If you have a leftover triangle, you can cut off the tip and use it for another craft project. Although, you could keep it as a spare if something goes wrong later on. While you’re cutting, be sure to remove any loose pieces of paper or tape.
It’s important to be careful when cutting off the tip of your triangle so that you don’t damage the rest of your crown. Take your time and make sure each step is completed correctly for a successful outcome.
9. Fold Each Triangle Into a Smaller Triangle
Fold each triangle into a smaller triangle by bringing up its bottom corner to meet its top corner. Unfold them and repeat this step so that you have two creases running down each triangle’s center. This should create six smaller triangles. Then, fold each of these smaller triangles in the same manner. You should end up with 18 mini-triangles for each large triangle you started out with. When you’re done, your paper will look like a set of stairs!

It may seem like a lot of folding, but this is an important step in creating the intricate design of your crown. Make sure each fold is precise and creased firmly for a clean look. Otherwise, your crown may look messy or fall apart easily.
10. Bend Each Edge Inward
Take each edge of your paper and bend it inward along its middle line so that it creates a curved shape. This will make up the detailed design of your crown’s points. Make sure the edges are evenly bent and that they match up with each other. This will create a symmetrical look for your crown’s final shape.
If you find that one edge is more curved than the other, gently unfold it and adjust it until both sides are even. This may take some practice to customize your crown further. You can add decorations such as glitter, stickers, or colored markers. You could also try different types of paper to create a unique look. Don’t be afraid to let your creativity shine through and make this origami crown truly your own!
By following these steps, you can create a beautiful origami crown that is perfect for any occasion. Whether you want to make it as a gift or simply enjoy the art of paper folding, this project is sure to be a hit! With just a few supplies and some patience, you’ll have your very own origami crown in no time. Enjoy!
You Can Check It Out to Seamlessly Change Colors in Crochet Amigurumi
Things to Consider When Making an Origami Crown :
1. Choose the Right Paper:
When making an origami crown, it is important to choose the right kind of paper. Thin origami paper works best as it is easier to fold and cut. You can also use thicker cardstock or other types of craft paper if necessary. You can even recycle old magazines or newspapers by cutting them into squares and using them for your origami projects.
The paper you choose should also be easy to fold and crease but not so thin that it tears easily. You can test the paper’s thickness by gently folding and creasing a small corner before starting your project.
2. Follow Instructions Carefully:
Origami can be tricky. It is important to read the instructions carefully and make sure you understand each step before attempting to make an origami crown. A mistake in one step could cause your final product to be a mess, so take your time and be precise.
You can also find helpful video tutorials online that show you exactly how to make an origami crown. These can be especially useful if you are a visual learner. It’s always a good idea to practice on scrap paper before using your desired paper to make the final product.
3. Take Your Time:
Origami takes patience and practice. Don’t rush through the instructions and be sure to double-check each step as you go. It may take a few tries before you get it just right, but with patience, you will eventually have a beautiful origami crown.
You can also take breaks in between steps to stretch your hands and relax your mind. Being too tense or frustrated can make the project more difficult, so remember to enjoy the process.
4. Use Different Colors:
For an even more impressive crown, try using multiple colors of paper or cardstock. This will give your crown a unique look and can also be used to make different sections or designs. It’s a great way to add your own personal touch to the project. But remember, cutting and folding multiple sheets of paper may take more time and precision, so be prepared for a bit more of a challenge.
You can also decorate your crown with markers, glitter, or stickers to make it even more eye-catching. This is a great way to personalize your crown for a special occasion or event.
5. Make It Personal:
Once you have mastered the basics of origami crowns, try adding personal touches such as writing a special message, adding beads or other decorations, or even forming patterns with the paper. The possibilities are endless! Not only does this make your crown unique and special, but it also adds an extra layer of fun to the project.
These five tips should help you create a beautiful and unique origami crown. With patience and practice, you will be able to make one that is truly fit for a king or queen! Good luck!
You Can Check It Out To Fasten off Crochet
How Do You Make a Dutch Origami Crown?
Making a Dutch origami crown is similar to making any other type of origami crown. Start by cutting two rectangles out of your chosen paper, one slightly larger than the other. Fold each rectangle into thirds, then cut them in half diagonally. Take one of the triangles and fold it in half lengthwise, then secure the sides to form a cone shape. Do the same with the remaining triangle, then attach the cones together at their points. Finally, use a ribbon or string to secure the crown together at the base. With practice and patience, you’ll have a fantastic Dutch origami crown!

You Can Check It Out to Make a Magic Ring Crochet Left Handed
Additional Tips:
- If you want to make a larger or smaller crown, simply adjust the size of your starting paper.
- Use different types of paper or cardstock to create unique and interesting textures for your crown.
- You can also add embellishments such as glitter, sequins, or stickers to personalize your origami crown even further.
- For a more sturdy crown, you can use a thin wire or pipe cleaners to reinforce the base of your crown. Just be sure to cover it with paper or decorations.
- Practice makes perfect! Don’t get discouraged if your first few attempts at making an origami crown don’t turn out exactly as you’d like. Keep practicing and soon enough, you’ll be a pro at making them.
- Have fun and be creative! Don’t be afraid to experiment with different techniques or decorations to make your origami crown truly one-of-a-kind. So go ahead, grab some paper and start folding – the possibilities are endless!
Conclusion:
You can make an origami crown following the instructions in this blog post. With just a few folds, you can create a paper crown that’s fit for a king or queen. You can use colored paper to add some extra pizzazz to your origami crown or keep it simple with white paper. Whether you’re making an origami crown for yourself or as a gift for someone else, the process is sure to be enjoyable.
We hope this guide on how to make an origami crown was helpful. Please share it with your friends on social media if you find it useful. And be sure to check back here soon for more informative guides like this one.
You Can Check it Out Make Origami Stem