
Are you looking for ways to add a little sparkle to your t-shirts, bags, or hats? Look no further than Cricut iron-on glitter vinyl! This vinyl is a fun and easy way to customize any piece of fabric, and with the help of your Cricut machine, the possibilities are endless.

In this beginner’s guide, we will go over everything you need to know about how to use cricut iron on glitter vinyl.
Can You Use Cricut Iron on Glitter Vinyl?
If you’re a DIY enthusiast, you might wonder whether you can use Cricut Iron on Glitter Vinyl for your next project. The answer is yes! This vinyl is perfect for adding bold, eye-catching details to any surface. With its adhesive backing and glittery finish, it will surely give your project that extra sparkle. And, with Cricut technology, you can easily cut out any design or shape you want, making it simple to create custom designs that are truly one-of-a-kind.
So, whether you want to add some pizzazz to a t-shirt, personalize a tote bag, or create a festive banner, Cricut Iron on Glitter Vinyl is an excellent choice. So get ready to flex your creative muscles and add some glitz and glamour to your next project!
Why Should You Use Cricut Iron on Glitter Vinyl?
Cricut Iron on Glitter Vinyl is the perfect addition to any crafter’s collection. Not only does it come in an array of shimmering colors, but its high-quality material is also meant to last, making it ideal for various projects.
Whether you’re personalizing a t-shirt, creating dazzling tote bags, or making a stunning piece of wall art, Cricut Iron on Glitter Vinyl will give your work a touch of sparkle and shine that will surely catch everyone’s eye.
Plus, it’s easy to use with any Cricut cutting machine. With limited time and a tight budget, using Cricut Iron on Glitter Vinyl can be a time-saving solution to customizing any project. So, why settle for basic when you can add a touch of glam to all of your crafting endeavors?
The Beginner’s Guide on How to Use Cricut Iron on Glitter Vinyl
Step 1: Set Up Your Design in Cricut Design Space
Before using Cricut iron-on glitter vinyl, you’ll need to create a design in Cricut Design Space. To do this, open up the program and create a new project. From there, you can select a pre-made design or create your own. Once your design is complete, mirror it so that it appears backward. This is important because when you iron the vinyl onto your fabric, you’ll flip it over so the design appears correctly.

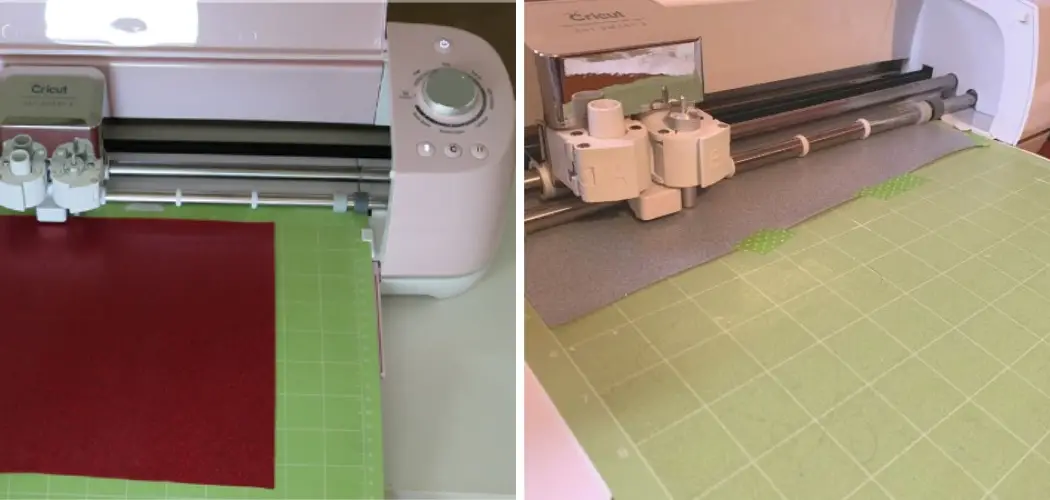
Step 2: Cut Your Design
Once your design is set up, it’s time to cut your Cricut iron-on glitter vinyl. Load the vinyl into your Cricut machine and select the iron-on glitter vinyl setting. This will ensure that the machine cuts the vinyl correctly. Once the cutting is complete, remove any excess vinyl from around your design.
Step 3: Transfer Your Design to Your Fabric
After your design is cut, it’s time to transfer it to your fabric. Lay your fabric flat and place your design with the glitter side facing up onto the fabric. Cover the design with a thin, clean towel and apply heat and pressure with a hot iron. Hold the iron in place for 25-30 seconds, and then carefully peel off the clear liner from the vinyl. If the vinyl hasn’t adhered to your fabric, repeat this process until it has.
Step 4: Take Care of Your Finished Product
Once your design is safely on your fabric, it’s important to ensure that it lasts. Wash the fabric inside out and hang it to dry to keep the vinyl from damage. You can also use a press cloth between the iron and the vinyl if you need to iron out any wrinkles. Avoid using fabric softener or bleach on the fabric, as these can damage the vinyl over time.
Step 5: Add Extra Touches
If you want to add some extra flair to your design, try layering different colors of Cricut iron-on glitter vinyl. You can also use a heat press machine for even application and long-lasting results. And don’t be afraid to experiment with different fabrics and materials, such as tote bags or hats.

Step 6: Troubleshooting
If you encounter any issues during the transfer process, don’t panic. Some common problems include the vinyl not sticking to the fabric or wrinkles in the design. If this happens, simply repeat the transfer process until it adheres properly. You can also try adjusting the heat or pressure settings on your iron.
Step 7: Have Fun with Your Creations!
The possibilities are endless now that you know how to use cricut iron on glitter vinyl. Use it to create personalized gifts, decorate clothing and accessories, or add a unique touch to home decor. With practice and creativity, you’ll become a pro at using this fun and versatile crafting material.
So go ahead, have fun, and let your imagination run wild with Cricut iron-on glitter vinyl! And don’t forget to share your creations with others for inspiration and enjoyment.
5 Considerations Things When You Need to Use Cricut Iron on Glitter Vinyl
1. Design and Size
When using Cricut iron on glitter vinyl, it is important to consider the size and design of the project. Depending on the size of the project, you may need to use multiple pieces of vinyl or a larger piece of vinyl that can be cut into smaller pieces. Additionally, it is important to consider the complexity of the design and if it will require multiple layers or colors.
2. Temperature Settings
It is also important to consider the temperature settings when using Cricut iron on glitter vinyl. Different fabric types require different temperatures for the adhesive to properly bond with the fabric.

For example, cotton requires a higher temperature than polyester or nylon fabrics. It is important to read the instructions for your specific type of fabric before setting your machine’s temperature settings.
3. Pressure Settings
In addition to temperature settings, pressure settings are also important when using Cricut iron on glitter vinyl. The pressure settings determine how much force is applied when pressing down on the fabric and will affect how well the adhesive bonds with the fabric. It is important to adjust your pressure settings according to your specific type of fabric in order to achieve optimal results.
4. Heat Resistant Mat
When using Cricut iron on glitter vinyl, it is important to use a heat-resistant mat beneath your project to protect both your work surface and your machine from damage caused by excessive heat transfer from your project. A heat-resistant mat should be used whenever possible, as it will help ensure no damage occurs during the application or removal of the adhesive from any surface.
5. Peel-Away Backing
Finally, it is important to consider whether or not you need a peel-away backing when using Cricut iron on glitter vinyl. Peel-away backing helps ensure that all parts of your project are properly adhered together and prevents any air bubbles from forming between layers during the application process. It also makes removal easier as you can simply peel away any excess material without damaging any part of your project.
Benefits of Using Cricut Iron on Glitter Vinyl
Transform your fabrics into eye-catching and unique designs by using Cricut’s Iron on Glitter Vinyl! This innovative product offers a range of benefits that make it perfect for all your crafting needs. Firstly, it’s incredibly easy to use – simply cut out your design using the Cricut machine and then transfer it onto your desired fabric using the iron.

Secondly, the glittery finish adds a touch of sparkle and glamour to your creations, perfect for adding a touch of glamour to everyday clothing items and special occasion pieces. In addition, the vinyl is incredibly durable, meaning you can wash and wear your creations repeatedly without worrying about the design peeling or fading. Cricut’s Iron on Glitter Vinyl is the perfect solution whether you’re a crafting enthusiast or simply looking to add some personality to your wardrobe.
Some Common Mistakes People Make When Trying to Use Cricut Iron on Glitter Vinyl
Cricut iron on glitter vinyl can add the perfect touch of sparkle to any project, but it can also be frustrating to work with if you don’t know what you’re doing. One of the most common mistakes people make when using this type of vinyl is not preheating their iron or heat press. Let your machine heat up for a few minutes before applying the vinyl to ensure it adheres properly.
Another mistake is not using enough pressure when ironing or pressing the vinyl. This can cause the glitter to flake off or not stick at all. Lastly, some people forget to use a Teflon sheet or parchment paper when ironing the vinyl, resulting in a messy cleanup and ruined project. Remembering these simple tips can make all the difference in your glitter vinyl projects!
Can I Wash Items that Have Been Decorated with Cricut Iron on Glitter Vinyl?
Have you ever found yourself staring at a beloved item, covered in glittery wonder, and wondering if it’s lost its shine? Fear not, fellow crafter! The answer is yes; you can absolutely wash items decorated with Cricut iron on glitter vinyl. While it may seem daunting to throw your masterpiece into the washing machine, rest assured that the high-quality vinyl is designed to survive washing cycles with ease.
Whether it’s a shirt, a bag, or even a hat, you can keep your glittery creation shining bright for the world to see. So go forth, embrace the sparkle, and live your crafty dreams to the fullest!
Conclusion
Cricut iron-on glitter vinyl is a fun and easy way to personalize any piece of fabric. By following these five simple steps, you can take your designs and turn them into a reality. With the Cricut machine and a little creativity, the sky’s the limit! So what are you waiting for? Start personalizing your products today with Cricut iron-on glitter vinyl! Thanks for reading our post about how to use cricut iron on glitter vinyl.