
Do you remember the days spent in your childhood making paper horses? Though time may have passed since those days and we’ve all outgrown them, there is still something nostalgic about folding a piece of paper into a tiny creature with wings. It is important to know how to make a paper horse.

Even today, it can be therapeutic to take some time away from life’s chaos and create a beautiful mini-work of art. In this blog post, we will provide all the steps necessary for making your very own paper horse. With just some drops of glue, sturdy paste, and precise folds, you will be able to produce an incredibly detailed model that could bring any adult back to their past!
What is a Paper Horse?
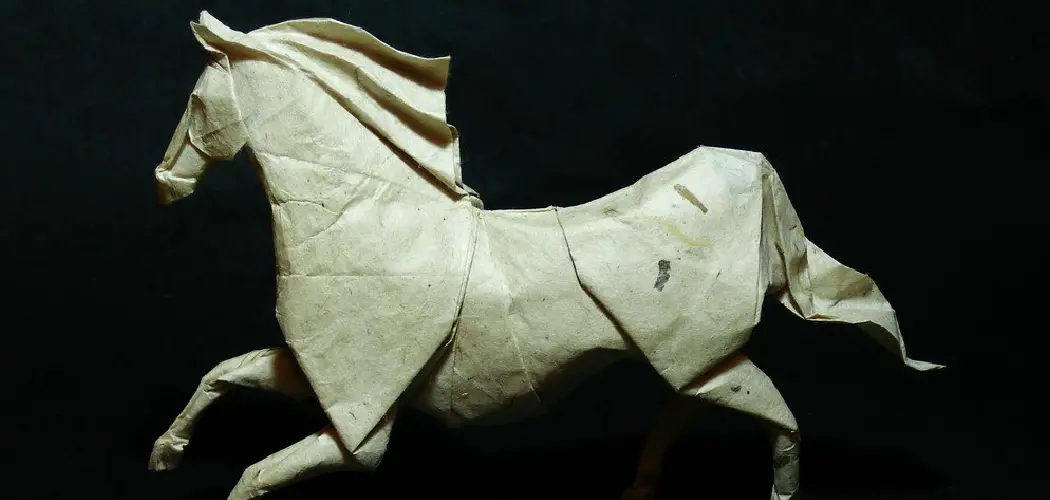
A paper horse is an origami figure made by folding a single piece of paper into the shape of a horse. It is a traditional art form that originated in Japan and has since spread to different parts of the world. The word “origami” comes from the Japanese words “ori,” meaning fold and “kami” meaning paper.
Origami can be used to create various shapes and objects, but the horse is one of the most popular designs. It is not only easy to make but also has a rich cultural significance. In Japanese culture, the horse symbolizes strength, loyalty, and success.
Why Make a Paper Horse?
Making a paper horse can be a fun and rewarding activity for people of all ages. Not only does it allow you to tap into your creative side, but it also helps improve hand-eye coordination and concentration. Plus, the end result is always impressive and can make for a great decoration or gift.
In addition to its artistic value, making a paper horse also has mental health benefits. The process of folding and creating something with your hands can be meditative and a great way to destress. It is also a simple and affordable activity that can help take your mind off every day worries.
Tools You Will Need
1. Two Sheets of White Paper (or One Sheet of Colored Paper):
To begin making your paper horse, you will need two sheets of white paper or one sheet of colored paper. The white paper is typically used for the main body of the horse, while the colored paper can be used for decorative purposes such as the mane or tail.
2. Scissors:
A pair of scissors will come in handy when cutting out certain shapes and making precise cuts, so make sure to have them on hand.
3. Glue:
A bottle of glue is necessary to attach different parts of the paper horse together. You can use any type of glue, but we recommend a non-toxic one for safety purposes.
Top 10 Instructions Guide on How to Make a Paper Horse:
Step 1: Fold the Paper in Half Lengthwise
Making a paper horse is a fun and easy craft that takes only minutes to complete. Start by taking any size square piece of paper. Then, take the two longer sides and fold them together half lengthwise. Unfold, then fold again widthwise with the shorter sides together. Unfold one last time to reveal a diamond shape.
Now draw two ears atop the folded corners of the diamond and add facial features as desired for your masterpiece. When done with this, take the point at the bottom and bring it up towards the middle, then flip down from there to create four legs extending from the bottom point. Last but not least, you now have a paper horse that can be colored and enjoyed!
Step 2: Have Two Creases
Making a paper horse is easier than you think! Start by making two creases that form a cross on one side of the paper. You can then fold each corner of the cross inwards so that they meet at the center. With good folds, your horse will soon be complete!

After this, it’s time to customize your horse with details such as legs and ears. For an extra special touch, you can also add things like a mane and tail made from colorful ribbons or twine. Creative additions will bring your horse to life and bring a big smile to any child’s face. It’s time to start folding; have fun making your paper horses!
Step 3: Flip the Paper Over
Making a paper horse is surprisingly easy! All you need is a sheet of paper and two hands. Start by flipping the sheet over so that the backside is facing up. Then, carefully fold the bottom corner upwards towards the center of your sheet of paper. You’ll quickly see a point emerging from the bottom, which will be part of your horse’s body.
Now that you have this point use it as a guide for folding each side up under and to the center point, creating an even surface for your crafting project. Before long, you’ll have an elegant paper horse ready to liven up any environment or join in any game you can imagine. It’s simple enough for children and adults alike – so get started today!
Step 4: Fold Both Sides Inwards
To create a paper horse, start by folding a triangle in half. Take each side of the triangle and fold both sides inwards so that they meet in the middle; this will form the neck of your horse. You need to be gentle when manipulating the paper, as too much pressure or an inconsistent fold could ruin the result.

The next steps involve carefully folding out from each corner of the triangle to create the head and mane of your horse, as well as its four legs. Continue with small incremental folds until you have crafted your unique paper horse!
Step 5: Fold the Top Corner of Your Triangle
Making a paper horse is a craft that all ages can enjoy! To begin, you will need a square piece of paper. With the paper flipped to its clean side, fold the two opposite corners inwards and then fold the remaining two corners inwards so that they just touch the center of your paper, creating a tidy triangle shape.
After creating your triangle base, fold the topmost corner downwards so your triangle creates a point at what would be your horse’s head. Simply unfold and refold this same corner to create extra details on the horses’ features before coloring or drawing on them as desired. Follow these simple steps to create your perfect paper horse – it’s that easy!
Step 6: Make Two Small Cuts on Each Side
After that, it’s time to give your paper horse some ears! Take each side of the folded paper and make two small cuts near the top of the ends. Make sure not to cut too close to the center fold – this will ensure that the ears remain intact rather than becoming detached from the paper. Once your horse’s ears are cut, carefully unfold the paper and be sure to admire your lovely creation!
Step 7: Fold the Bottom Corner of Your Triangle
Once the triangle is complete, it’s time to shape the paper horse! Folding the bottom corner of the triangle upwards will give your horse a pair of hind legs. Be sure to fold it towards yourself and press down firmly on both sides to make the legs crisp and even.
After the legs have been successfully folded, you should now have a four-sided figure that has taken shape from your initial triangle. Your paper horse is already looking great! Now, all you need to do is secure the figure with staples or tape so that your creation remains standing tall.
Step 8: Glue Them Onto the Sides
Creating a paper horse is an entertaining and creative way to spend an afternoon! Once you get the steps down, all you need to do is print out a template, cut it out, and fold it according to directions. Then, you can use glue or paste to hold the folds together and give your horse some personality. It’s an enjoyable activity that all ages can participate in!
You can even experiment with different colors of paper textures or add fun decorations like glitter or stickers for an extra special touch. This is a simple craft that can be enjoyed by everyone and will result in a beautiful paper horse to show off.
Step 9: Pull Out the Top Part
Once you’ve glued everything together, it’s time to pull out the top portion of the paper horse. Be careful not to rip or wrinkle your creation – but don’t worry too much if it isn’t perfect! After all, every horse is unique and yours should be too. Now it’s time to get creative with decorations and colors!

For children, this step can encourage imagination and fine motor skills. They can add details such as hooves or a tail while practicing hand-eye coordination, all while having fun! For adults, this step is a chance to relax and let your creativity flow – whether that means adding intricate designs or keeping it simple and elegant. Make your paper horse truly one-of-a-kind!
Step 10: Enjoy Your Paper Horse
Congratulations, you have now successfully made a paper horse! Whether you followed the steps precisely or added your own unique touch, the result is a fun and colorful addition to any room. This craft can be enjoyed by all ages and is perfect for rainy days or family gatherings.
Not only does making paper horses provide a creative outlet, but it also encourages patience and perseverance. It’s important to take your time and make careful folds to achieve the desired outcome. The end result will not only be a beautiful paper horse but also a sense of accomplishment and pride in your creation.
And there you have it! You now have your very own paper horse. How does it look? We hope this blog post helped bring back some fond memories from childhood and inspired you to make something magical! Have fun with your crafty creations and happy folding!
How Much Will It Cost?
The cost of making a paper horse is minimal as it only requires a square piece of paper and some basic crafting materials like glue, scissors, and markers. These items can easily be found at home or purchased from a local craft store for a low price.
However, the value of creating something with your own hands and the joy it brings is priceless. Making a paper horse is not only a fun activity but also a great way to spend quality time with friends and family. So why not give it a try and see what you can create? Happy crafting! # EN-US End of Section
Tips on Making a Paper Horse
1. To make a paper horse, you’ll need a sheet of construction paper, a pair of scissors, and some glue. You can also use markers or crayons to decorate your horse if you like.
2. Fold the construction paper in half lengthwise. This will be the body of your horse.
3. Next, cut out a head and neck shape from the folded paper. Make sure to leave enough space for the neck so that you can glue it onto the body later.
4. Then, cut out four leg shapes from the paper. Two of the legs should be slightly longer than the other two, as these will be the back legs of your horse.
5. Now it’s time to start assembling your horse! Begin by gluing the head and neck onto the body. Then, glue on the legs. If you want, you can add some decorations to your horse at this point, such as a mane or tail.
6. Once you’ve glued all of the pieces together, set your horse aside and wait for the glue to dry completely. This usually takes about an hour or so.
7. Once the glue is dry, your paper horse is ready to play with! You can make a stable for it by folding another piece of construction paper in half and gluing it around your horse’s body.
How to Make a Nostalgic Toy: DIY Paper Horse Tutorial
Crafting nostalgic toys is a fun activity to bring out your inner child and express creativity. For example, one craft project is making a paper horse.
This easy DIY involves drawing a template for your paper horse on a piece of tracing paper, cutting out the template from tracing paper, using carbon transfer paper to put the outline onto card stock, cutting out the horse from multiple layers of cardstock, rolling the cardstock into its finished shape, using tacks or brass to keep it in shape, adding decoration such as rhinestones or sequins to give it more charm and pizzaz, and finally creating the reins with thin strips of yarn.

With this tutorial, you can make yourself a special one-of-a-kind toy that will make you feel sentimental every time you look at it.
You Can Check It Out To Crochet Bunny Ears for Hat
Frequently Asked Questions:
Q: Are There Any Other Animals I Can Make Using This Technique?
A: Yes! You can use the same steps to create other paper animals such as a cat, dog, or even a dinosaur. Simply adjust the shape of the template and add unique features to make it your own. You can even create a whole paper zoo!
Q: Can I Use Different Types of Paper to Make My Paper Horse?
A: Absolutely! You can use any type of thin, sturdy paper such as construction paper, cardstock, or even patterned scrapbook paper. Just make sure the paper is easy to fold and cut. You can also experiment with different colors and textures to make your horse truly unique.
Q: Can I Do This Project With Young Children?
A: While this project involves using scissors and glue, it can definitely be done with adult supervision for younger children. You can even simplify the steps by pre-cutting some of the shapes beforehand and letting the children decorate their own horses with markers or stickers. This is a great way to introduce children to crafting and encourage their imagination.
Q: Can I Keep My Paper Horse as a Decoration?
A: Of course! Your paper horse can be proudly displayed on a shelf or desk, adding charm and nostalgia to any room. You can even make multiple horses in different colors and sizes to create a fun display. Just be careful not to get them wet or they may lose their shape. So go ahead and start crafting your own paper horse today! The possibilities are endless, so let your creativity run wild.
Conclusion
So, there you have it! A step-by-step guide on how to make a paper horse. We hope you found this helpful and that you now feel confident in your ability to make your paper horse. If you want to share your finished product with us, we would love to see it! Send us a picture of your horse on our Facebook page or tag us on Instagram.
You Can Check It Out to Make Paper Flowers for Mother’s Day