
Crocheting is a delightful and rewarding craft that allows you to create beautiful, handmade items. If you’re seeking to add a touch of charm to your home decor, crocheting a star pillow is an excellent project. Star-shaped pillows can be a whimsical addition to your living room or bedroom, infusing your space with a touch of magic and creativity.

In this article, we will walk you through the step-by-step process of how to crochet a star pillow. From choosing the right yarn and hook to deciphering crochet patterns and assembling the pillow, we’ll cover all the essential aspects to help you create a star-shaped pillow that will be a cherished item in your home. Let’s embark on this crafting journey and make a cozy, starry haven for your home.
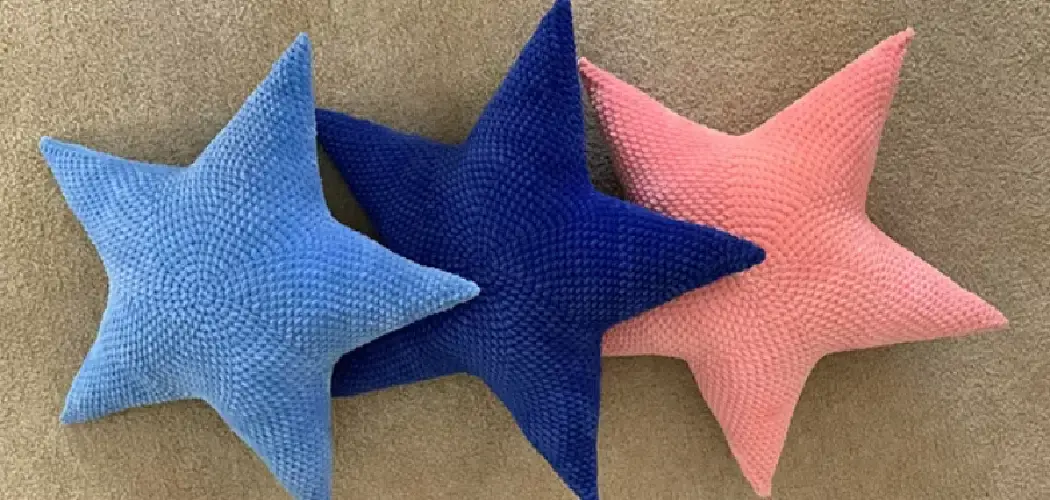
The Appeal of Crochet Star Pillows
There’s no doubt that star pillows are the perfect addition to any home decor. These cute and whimsical accessories can add a touch of charm and personality to any room, making them a popular choice for both crafters and non-crafters alike.
But why specifically crochet star pillows? What makes them so appealing compared to other types of decorative pillows?
For one, crochet star pillows have a unique and handmade feel to them. Unlike store-bought pillows, each crochet star pillow is one-of-a-kind, as no two stitch patterns or color combinations are ever quite the same. This makes them a truly special and personalized addition to any space.
Additionally, crochet star pillows are incredibly versatile. They can be made in various sizes and colors, allowing you to easily match them to any existing decor. They can also be used in a variety of ways, from being placed on couches and beds to being hung on walls as decorative art pieces.
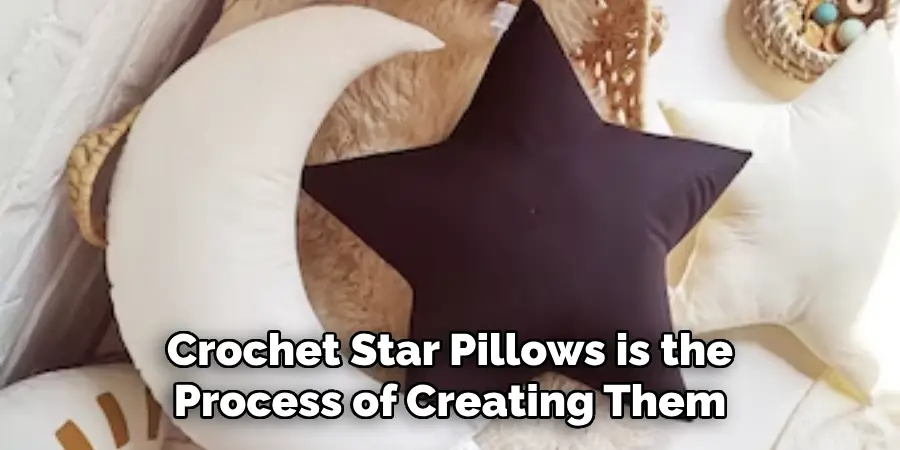
But perhaps the biggest appeal of crochet star pillows is the process of creating them. Crocheting is a highly relaxing and therapeutic hobby, making it the perfect way to unwind after a long day. And seeing your finished product in the form of a cute and cozy star pillow is incredibly satisfying.
Moreover, crochet star pillows are perfect for both beginners and experienced crocheters. With only basic stitches needed to create them, they are great for those just starting out with crochet. And for more advanced crocheters, there’s endless room for creativity and experimentation when it comes to stitch patterns and designs.
10 Methods How to Crochet a Star Pillow
1. Gather Materials
Before you start crocheting your star pillow, make sure that you have all the necessary materials ready. You will need a crochet hook, yarn in your desired color, a pair of scissors, and a tapestry needle for weaving in the ends. It is also helpful to have a stitch marker or safety pin to keep track of your stitches as you work. However, if you do not have a stitch marker, you can use a piece of scrap yarn or even a paperclip as an alternative.
2. Make the Foundation Chain
The foundation chain is the base of your star pillow and it should be made up of an even number of stitches. To make the chain, start by making a slip knot on your crochet hook and then pull a loop through it with your hook. Continue pulling loops through each other until you have reached the desired length for your foundation chain.
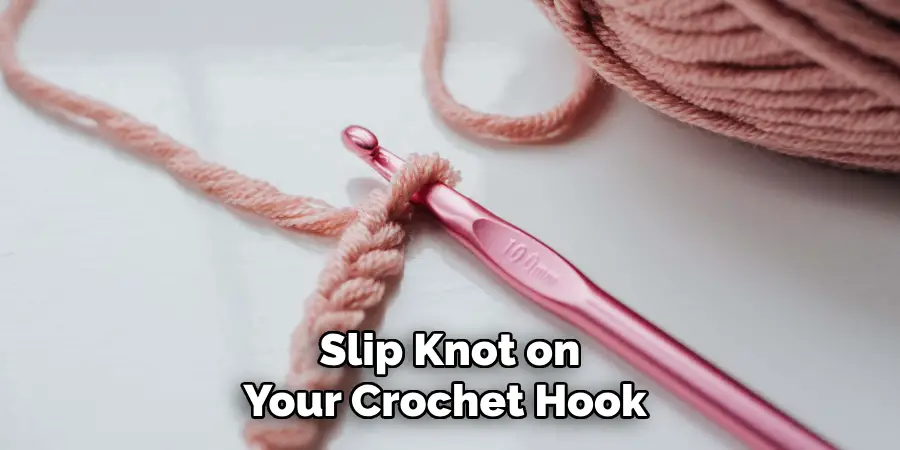
While it is important to make sure that your foundation chain is not too tight or too loose, do not worry about making the stitches perfect as they can be adjusted later. Once you have completed the foundation chain, you can start working on the first row of your star pillow.
3. Single Crochet Stitches
Once you have made your foundation chain, it is time to begin single crocheting around it. To do this, insert your hook into the second chain from the hook and pull up a loop (you should now have two loops on your hook). Then yarn over and pull through both loops on your hook to complete one single crochet stitch.
Repeat this process until you have worked all the way around your foundation chain and back to where you started. You should now have a round of single crochet stitches.
Single crochet stitches are often used in amigurumi and other small projects, as they create a tight and dense fabric. They are also commonly used for adding borders or edging to larger projects.
4. Half Double Crochet Stitches
To create half-double crochet stitches, insert your hook into the next stitch from where you left off with single crocheting and pull up a loop (you should now have three loops on your hook). Yarn over again and pull through all three loops to complete one half-double crochet stitch.

Keep repeating this process until you reach the end of the row or round that you are working on. This stitch is slightly taller than a single crochet stitch and can be used to create more intricate designs within your star pillow, such as raised bumps or zig-zag patterns.
5. Double Crochet Stitches
For double crochet stitches, insert your hook into the next stitch from where you left off with half double crocheting and pull up a loop (you should now have four loops on your hook). Yarn over once more and then pull through all four loops to complete one double crochet stitch.
Continue repeating this process until you reach the end of the row or round that you are working on. Double crochet stitches are taller and have looser tension than half double crochet stitches, making them great for creating more open and airy designs in your projects.
There are several variations of double crochet stitches that you can try as well. For example, the extended double crochet stitch involves pulling up an extra loop before completing the usual double crochet steps, resulting in a longer stitch.
6. Treble Crochet Stitches
Treble crochet stitches are created by inserting your hook into the next stitch from where you left off with double crocheting and pulling up a loop (you should now have five loops on your hook). Yarn over once more and then pull through all five loops to complete one treble crochet stitch. Keep repeating this process until you reach the end of the row or round that you are working on.

This stitch is great for adding height to your project and can be used in various combinations and patterns to create unique designs. You can also use treble crochet stitches to add texture and dimension to your project by working them into different stitches or skipping certain stitches.
7. Increase Stitches
Increasing stitches is important when creating shapes like stars because it helps give them their shape by adding extra stitches at certain points in each round or row that make up its shape..
To increase stitches while crocheting, simply work two sts into one st instead of just one st as usual – this will add an extra st in that spot, which will help give shape to whatever project you’re working on! Practice increasing stitches by making triangles, squares, and circles to get comfortable before trying out a star pillow.
8. Decrease Stitches
Decreasing stitches is also important when creating shapes like stars because it helps give them their shape by decreasing extra sts at certain points in each round or row that make up its shape..
To decrease sts while crocheting, simply skip one st instead of working two sts into one st as usual – this will take away an extra st in that spot, which will help give shape to whatever project you’re working on! For example, to decrease sts in a round, you could crochet two sts together instead of working into each st separately.
9. Join Rounds/Rows Together
When joining rounds/rows together while crocheting stars, it’s important not to forget about joining any remaining sts together at each corner point. To do this, simply across both sides of each corner before continuing onto another round/row -this will ensure that all corners are securely joined together so they don’t come apart during use!

This is especially important when making a star pillow, as the corners of the pillow need to be sturdy and reinforced.
10. Finishing Touches
Once all rounds/rows have been joined together, it’s time for some finishing touches, such as weaving in any loose ends or adding decorative details like pom-poms or tassels if desired.
Once these steps are completed, then congratulations –your star pillow is ready for use! Although crocheting a star pillow may seem daunting at first, it’s a fun and rewarding project that can be enjoyed by beginners and experienced crocheters alike.
Things to Consider When Crocheing a Star Pillow
Crocheting a star pillow is a fun and creative project that can add a touch of charm to any room. Whether you’re an experienced crocheter or new to the craft, creating a star-shaped pillow can be both challenging and rewarding. However, there are some important things to consider before embarking on this project.
Firstly, it’s vital to choose the right yarn for your project. The type and weight of the yarn will greatly impact the size, shape, and overall appearance of your star pillow. A thicker, bulkier yarn will result in a larger and more structured pillow, while a thinner yarn may produce a smaller, softer pillow.
It’s also important to consider color when choosing your yarn. Bright and bold colors can make the star design pop, while neutral or pastel shades can create a more subtle and delicate look.
Secondly, you’ll need to choose the right crochet hook for your yarn. The size of your hook will determine the size of your stitches and ultimately affect the overall size of your pillow. It’s important to match your hook size with the recommended size on the yarn label for the best results.
Common Mistakes to Avoid When Crochet a Star Pillow
When it comes to crocheting a star pillow, there are some common mistakes that beginners and even experienced crocheters may make.
Starting with the wrong hook size
Using the wrong hook size can greatly affect the end result of your star pillow. If you use a smaller hook than recommended, your stitches will be too tight and the pillow will end up stiff and uncomfortable.

On the other hand, using a larger hook than recommended can result in loose stitches that may cause your pillow to lose its shape over time. It is important to follow the recommended hook size for your chosen yarn in order to achieve the desired outcome.
Not counting stitches correctly
Counting stitches is crucial in crochet, especially when creating a star-shaped pattern. Skipping or adding stitches can throw off the entire design and make it difficult to create an even and symmetrical pillow. Make sure to count your stitches after every row or round to ensure accuracy and a smooth finish.
Not using the correct yarn type
Using the wrong type of yarn can also affect the overall look and feel of your star pillow. A thicker or thinner yarn than recommended can alter the size and texture of your final product. It is important to use the suggested yarn type for your chosen pattern in order to achieve the desired result.
Conclusion
As you have seen, in this blog post we discussed how to crochet a star pillow from start to finish. We have gone through all the necessary supplies needed, adequate stitching techniques and instructions necessary for success. With this step-by-step tutorial, you should be able to create a unique and stylish star pillow in no time.
After finishing your star pillow, why not give it away as an extra special gift or keep it for yourself? Whatever decision you make, surely one of these eye-catching pillows will add flare to any room in the house. Remember that practice makes perfect and if at first you don’t succeed, simply try again until successful.