
Machine binding is a popular and efficient technique for finishing a quilt, providing a clean and professional look. Unlike traditional hand binding, machine binding allows for quicker stitching and a more secure hold. Whether you’re a beginner or an experienced quilter, learning how to machine bind a quilt is a valuable skill to master.

In this article, we will explore the step-by-step process of machine binding a quilt, from preparing the binding strips to attaching the binding with precision. We will also discuss tips and techniques for achieving neat corners and a smooth finish.
With the right tools and methods, you’ll be able to confidently machine bind your quilts, saving time and creating beautifully finished pieces that will be cherished for years to come.
Importance of Machine Binding for a Professional and Durable Quilt Finish
Machine binding is an important part of quilt making and can be the difference between a professional and durable finish, or an amateurish and potentially vulnerable one. Machine binding offers superior strength to traditional hand stitching, ensuring that your quilt will last for years to come without suffering from wear and tear.
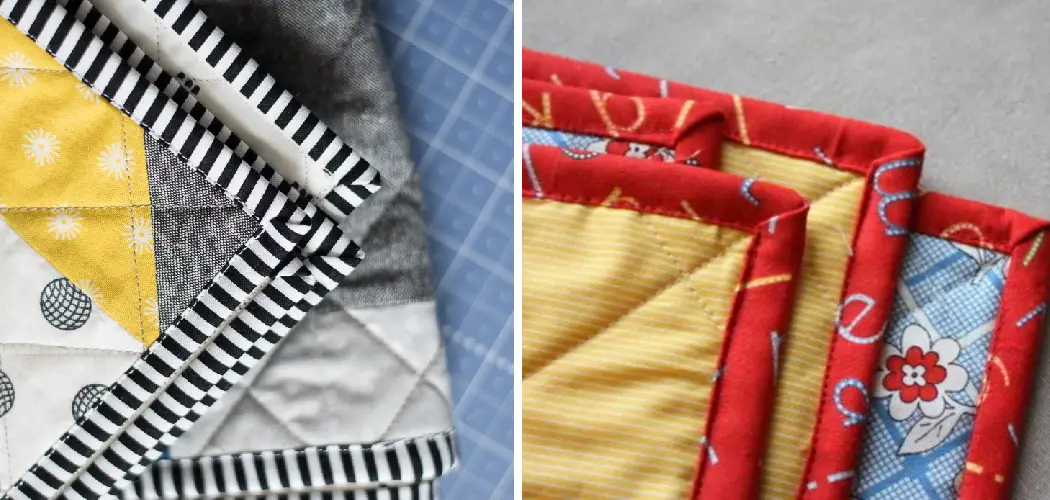
Machine binding also provides a much neater look which enhances the overall appearance of the quilt. Finally, machine binding ensures that all edges are securely held together and will not unravel or come apart over time. With careful attention to technique and a few simple tools, you can achieve a professional-looking finished product with minimal effort.
The process for machine binding is quite straightforward. It involves cutting the fabric into strips that are wide enough to cover the quilt’s edge (typically 1/4 inch) and then folding it in half lengthwise with right sides facing each other.

The folded strip is then pinned onto the wrong side of the quilt, starting at one corner and ending at another, making sure to leave enough excess fabric so that it can be tucked under when sewing. Once everything is pinned in place, it is sewn with an overcast stitch. Finally, the edges of the binding are turned to the front of the quilt and secured with a zigzag or decorative stitch.
By machine binding your quilts, you can ensure that they will last for years while still having a professional look. It’s important to keep in mind that this process requires patience and precision, so make sure to take your time and practice on some scrap fabric before tackling pre-cut pieces. With enough practice, you can master this skill and enjoy beautiful finished quilts!
The Concept of Machine Binding in Quiltmaking
Machine binding is a popular quiltmaking technique that involves sewing the edges of the quilt to a fabric backing or border. This technique is used to give the quilt a professional, finished look and to create a stronger, longer-lasting edge.
Machine binding requires only basic sewing skills and can be completed relatively quickly compared to other methods of finishing a quilt. In this tutorial, we will explore how to machine bind a quilt properly.
Once you have decided on the backing or border for your quilt, begin by trimming the batting and backing down to size so that they are flush with each other at all sides of the quilt top.
Next, fold over one long side of the backing onto itself about 1/4” and press it in place with your iron. Now, pin the backing to the quilt top at the edge of the fold, making sure that both edges are even.

Using a sewing machine, stitch around all four sides of the quilt. When you reach a corner, stop about 1/2” away from it and backstitch for reinforcement. Clip any threads left over from the stitching process. Now unfold one side of the remaining backing fabric and press it flat with an iron; this will give you an extra 1/4″ seam allowance for finishing later.
Fold each side of the backing fabric onto itself until it meets up with its corresponding stitching line on either side of the quilt. Pin everything in place and sew the seam allowance down using a straight stitch. When you reach the corners, pivot slightly away from them to make sure you get a nice crisp corner.
10 Methods How to Machine Bind a Quilt
Method 1: Prepare the Binding Strips with Precision and Care:
Begin by cutting your binding strips to the desired width, typically 2.5 inches. Ensure that the strips are cut on the straight grain of the fabric for optimal stability. Join the strips together at a 45-degree angle, creating one continuous binding strip. Press the seams open to reduce bulk and achieve a smooth finish.
Method 2: Measure the Quilt Perimeter Accurately:
To determine the length of binding needed, measure the perimeter of your quilt. Add an additional 10-12 inches to allow for joining, finishing, and any adjustments during the binding process. Accurate measurements are essential to ensure a well-fitted and professionally finished binding.
Method 3: Attaching the Binding with Precision and Control:
To attach the binding to the quilt, leave a tail of approximately 6-8 inches and align the raw edges of the binding strip with the raw edges of the quilt, starting in the middle of one side. Use binding clips or pins to secure the binding in place, ensuring it lays flat and even along the quilt edge. This step is crucial for achieving a neat and professional appearance.

Method 4: Sewing the Binding Seam with Care and Consistency:
Using a straight stitch or a decorative stitch of your choice, sew the binding to the quilt, approximately ¼ inch from the edge. Take care to maintain a consistent seam allowance throughout the process, ensuring that the stitching is evenly spaced and secure. A walking foot or an even-feed foot can be helpful to prevent any fabric shifting or distortion during sewing.
Method 5: Achieving Mitered Corners for a Polished Look:
When you approach a corner, stop sewing a quarter-inch before reaching it. Fold the binding strip up, creating a 45-degree angle, and then fold it back down, aligning it with the next side of the quilt. This technique creates a mitered corner with a clean and professional appearance. Pin the corner in place and continue sewing along the next side, repeating the process for each corner.
Method 6: Joining the Binding Ends with Precision and Seamlessness:
When you reach the starting point, stop sewing a few inches before the end of the binding. Trim the excess binding, leaving a tail of approximately 6-8 inches. Overlap the tails, mark the overlap point, and trim the excess.
Open the binding strips and sew them together with a diagonal seam, aligning the edges precisely. Trim the seam allowance and press the joint open for a flat finish that seamlessly connects the binding ends.
Method 7: Securing the Binding Seam for Durability and a Neat Appearance:
To ensure the binding stays in place and maintains its integrity, stitch in the ditch, sewing along the seam line between the binding and the quilt. This stitching method not only secures the binding on the front but also catches the binding edge on the back, creating a durable and visually appealing finish.
Method 8: Exploring Decorative Stitches for Personalization and Artistic Flair:
To add a unique touch to your quilt binding, consider exploring decorative stitches available on your sewing machine. Try stitches such as zigzag, scallop, or blanket stitch along the edge of the binding to enhance its visual appeal. Test the stitches on a scrap piece of fabric before applying them to your quilt, allowing you to experiment and unleash your creativity.

Method 9: Alternative Binding Methods for Variety and Innovation:
While traditional binding involves folding the binding over the quilt edge and stitching it in place, consider alternative binding methods to add variety and innovation to your quilting projects.
Explore techniques such as flange binding, faux piping, or a facing finish to achieve different effects and visual interest. These methods can create unique borders or highlight specific elements of your quilt design.
Method 10: Pressing and Final Touches for a Professional Finish:
Once the binding is securely attached and stitched, take the time to press the quilt to ensure a smooth and neat finish. Set your iron to the appropriate temperature for the fabric and gently press the binding, encouraging it to lie flat and blend seamlessly with the quilt. Pay attention to any loose threads and trim them for a clean and professional appearance.
Some Common Mistakes When Machine Build a Quilt
When machine binding a quilt, it’s important to be aware of some common mistakes that can easily be made. Following are six mistakes to be mindful of:
1. Not Cutting Binding Strips Correctly:
When cutting the binding, make sure you cut the strips on the lengthwise grain so that they will lay flat around the quilt’s edges during sewing and finishing. Also, it’s important to have an accurate 1/4-inch seam allowance when attaching them to your quilt top to prevent ugly puckers.
2. Not Joining Two Binding Strips Correctly:
Make sure you join the two strips at a diagonal and not in a straight line. This avoids having bulky seams overlapping in one place which can cause problems when machine stitching the binding down.
3. Using Too Much Fabric in the Folded Edge of Bias Binding:
When you are folding a bias binding over the edge of the quilt, be mindful to not use too much fabric. Too much bulk here can cause problems when sewing and it may also affect how the finished edge will look.

4. Not Trimming Seam Allowance Before Turning Binding:
Make sure you trim your seam allowance before turning your binding to the back side of the quilt. This will give a neater finish to your edges and make sewing them down easier.
Conclusion
Quilting is an age-old traditional craft that has been passed down through generations. Not only does the practice of quilting help you create a custom item that will last for many years, but it also allows you to enjoy the satisfaction of a job well done.
Machine binding a quilt may seem challenging, but with patience and good instructions, anyone can learn this art. If you followed our advice in this blog post, then you should be feeling confident and ready to tackle your next basting project.
Now that you know the basics of how to machine bind a quilt, why not take what you learned and try a new pattern? With so many quilt designs available, rest assured that possibilities are endless. The satisfaction of seeing your hard work come together will make the extra effort all worth it. So get out there and start machine binding!