
Are you looking for the perfect way to bring a spooky touch to your Halloween decorations? If so, why not try out hanging some witch hats? From vintage-style Victorian silhouettes to more modern designs, witches’ hats are an iconic element of many costumes and decorations. Hanging them in your home or outdoor space is a great way to ensure everyone knows what time of year it is!
Whether you’re just trying to spruce up your regular decorations or want to create a unique Halloween display, here are some tips for how to hang it.

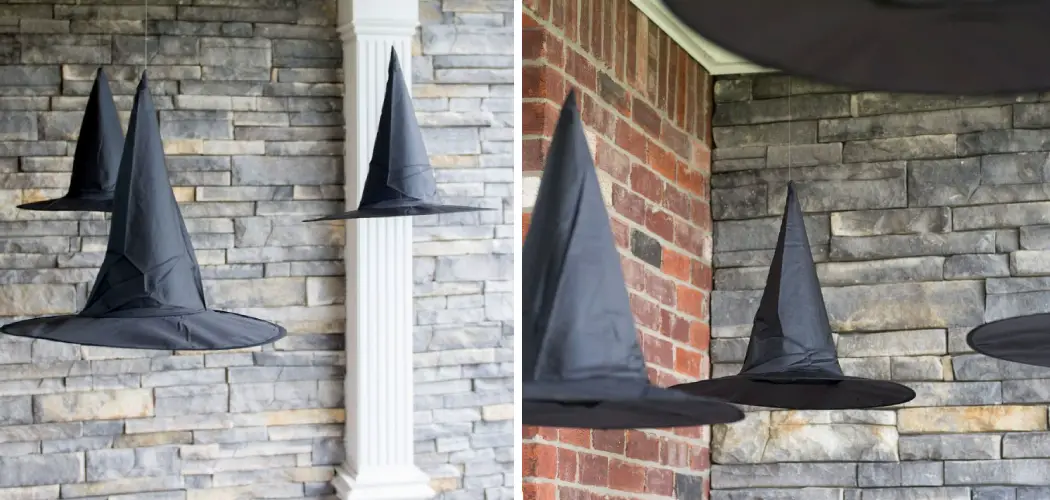
In this blog post, we’ll show you exactly how to hang witch hats without damaging walls—no matter where you want them displayed. So, let’s get started with these fun and easy instructions!
Is It Safe to Hang Witch Hats on Walls?
The short answer is yes. With the right tools and techniques, you can hang witch hats on walls without damage. The trick is to use special adhesive strips or hooks designed for hanging lightweight decorations like witches’ hats and other wall décor.
These adhesive strips come in various shapes, sizes, and materials. Choosing the type that best suits your needs is important, as some are designed specifically for fabric decorations like witches’ hats, and others are better suited for heavier items.
In general, however, all of them should be able to hold a lightweight witch hat without damaging the wall or leaving any residue behind.
What Will You Need?
Before you can hang up your witch hats, you’ll need a few supplies. You’ll need:
- Witch Hats (of course!)
- Command Hooks or screws and anchors (depending on the surface)
- A Drill (if using screws and anchors)
- Measuring Tape
- Level/Plumb Line
Once you have all the supplies, it’s time to get started!
10 Easy Steps on How to Hang Witch Hats
Step 1.Select the Spot:
Begin by choosing the spot where you want to hang your witch hat. This could be on your wall, door, or even the ceiling. Use your measuring tape to ensure the hat will be at the desired height. If you’re hanging more than one hat, leave enough space between them so they won’t overcrowd the area.

Step 2: Determine the Weight of Your Hats:
It’s important to consider how much your hats weigh before deciding which hanger to use. If your hats are lightweight (less than 5 pounds), a Command Hook will be sufficient. For heavier hats, use screws and anchors to ensure they don’t come down or pull off the wall.
Step 3: Mark Your Spot:
Once you’ve determined where and how you’ll be hanging your witch hats, mark the spot with a pencil. This will make it easier to install the hangers later on. As much as possible, make sure your marks are level and plumb.
Step 4: Install Your Hangers:
Now it’s time to install your hangers. If you’re using Command Hooks, just peel off the adhesive backing and firmly press them onto the wall at your marked spots. If you’re using screws and anchors, use a drill to make the holes and then insert your screws.
Step 5: Attach Your Witch Hats:
You can use heavy-duty string or wire to attach your witch hats to the hangers. Tie one end of the string around each hat and secure it firmly. Then, loop the other ends over your hooks or screws. Ensure they are secure and not too tight so the hats are not damaged.
Step 6: Adjust and Arrange:
Take a step back and observe your hats. Do they hang the way you envisioned them? If not, it’s fine to make adjustments. You may need to adjust the strings’ length or the hats’ positions to achieve your desired look. Also, consider the rotational position of your hats. Depending on the designs, you might want them facing a certain direction.

Step 7: Ensure Safety and Stability:
Double-check to ensure that all hats are securely fastened and are not at risk of falling or being blown away by wind (especially for outdoor decorations). If necessary, you can add more anchors or hooks for added safety. Safety is paramount, especially if the hats are hung in high-traffic areas.
Step 8: Keep Cleaning:
Be sure to clean your witch hats and hangers periodically. This will ensure they stay looking new and make them last longer. For Command Hooks, just remove them from the wall and wipe away any dirt or debris with a damp cloth. For other types of hangers, use a soft-bristled brush to scrub away any dust or dirt gently.
Step 9: Store Properly:
When not in use, store your witch hats somewhere safe and dust-free. This will help prevent any damage to the material or decorations on them. If you have multiple hats, consider investing in some storage containers, such as plastic bins or garment bags, for easy organization.
Step 10: Enjoy Your Witch Hats:
Once your hats are hung, it’s time to admire your handiwork! These decorations will surely bring a spooky and festive atmosphere to any space, whether indoors or outdoors. Remember to use them for other occasions, such as Mardi Gras celebrations or themed parties. They are the perfect addition to any seasonal display.
Following these ten steps, you can easily hang your witch hats without damaging walls or surfaces. Have fun decorating!

5 Additional Tips and Tricks
- When hanging witch hats, make sure they are securely attached to the surface. You can use tacks, nails, or adhesive strips to ensure they stay in place.
- To create a spooky effect with your witch hats, attach mini-lights or glow-in-the-dark stars around the edges of each hat. This will create a whimsical atmosphere for your home.
- If you want to hang multiple witch hats, try staggering the heights. This will add visual interest and make it look like a coven of witches gathering in one spot!
- For a dramatic effect, you can also suspend witch hats from the ceiling or above doorways. Just remember to use sturdy materials like fishing lines or monofilament.
- Finally, don’t forget to accessorize your witch hats! Add bits of fabric, ribbons, feathers, or any other spooky items to make them look unique and eye-catching.
With these tips in mind, you can easily hang witch hats and create a magical atmosphere in your home!
5 Things You Should Avoid
- Avoid hanging witch hats near fireplaces, candles, or any flame sources. These hats are often made of fabric or paper, which can easily catch fire and pose a safety risk.
- Do not hang witch hats in locations where they obstruct doorways, windows, or walkways. You don’t want them to become a nuisance or cause accidental trips or falls.
- Resist the temptation to over decorate your witch hats. Overloading them with accessories could make them too heavy and increase the chance of them falling.
- Avoid using materials that can damage your walls or ceilings, such as heavy duty nails or screws. Opt for non-damaging alternatives like adhesive hooks or strips.
- Lastly, do not hang your witch hats in areas exposed to extreme weather conditions. The wind, rain, or sun can damage them and lessen their lifespan.
By avoiding these common mistakes, you can ensure your witch hats remain a fun, safe, and striking addition to your Halloween decor.
How Do You Hang Witches Hats and Candles?
Hang witch hats and candles together for a truly spooky effect! Just be sure to use proper materials that are heat resistant, like metal hooks or clips. Ensure the candles aren’t too close to the hat’s fabric so as not to cause any fires. You can add accessories like ribbons, small skulls, or other items to give the witches hat a bit of extra flair.

Finally, remember to check the candles frequently and blow them out when you finish your display. This will ensure that there won’t be any dangerous fires or smoke in your home as you enjoy a spooky Halloween celebration!
Moreover, you can also hang witch hats with strings of lights for an extra mystical feel. Twinkle lights or battery-operated fairy lights add a bit of magic to any room, and the colors of each light will create a beautiful contrast against the dark material of the hat. You can even add small charms and trinkets to the strings to make your display unique.
Hanging witch hats and candles is a great way to add a touch of Halloween magic to your home. All you need are the right materials, some creativity, and an eye for detail and you’ll be ready to create something truly spooky!
Conclusion
In conclusion, hanging witch hats can be easy and inexpensive. Using simple materials and easy-to-follow instructions, you can make your home look spooky in no time. Plus, with the right decorations, you can create a festive atmosphere for all your Halloween activities.
Hopefully, the article on how to hang witch hats was informative and gave you some useful ideas. So use what you’ve learned in this post and get those witch hats up today! And don’t forget – when it comes to décor, creativity is king!
So make sure to explore other options as well and come up with something truly unique and amazing. Have fun with it, and enjoy the season with friends and family! Now go out there, get your supplies ready, and have a spooky good time!