
Are you looking for a way to create something special and unique that will help engage, comfort, and soothe your child or grandchild? Have you heard of taggie blankets and wondered how they work?
If so, then this post on how to make a taggie blanket is for you! We’ll dive into learning the key techniques involved in making a taggie blanket from scratch – from material selection to choosing the color pattern.

In addition, we’ll discuss how these special blankets can provide wonderful tactile stimulation as well as emotional security for young ones who are just starting out discovering their world. So grab your supplies and let’s head off on an exciting project that will show just how creative and thoughtful parenting can be.
What is Taggie Blanket?
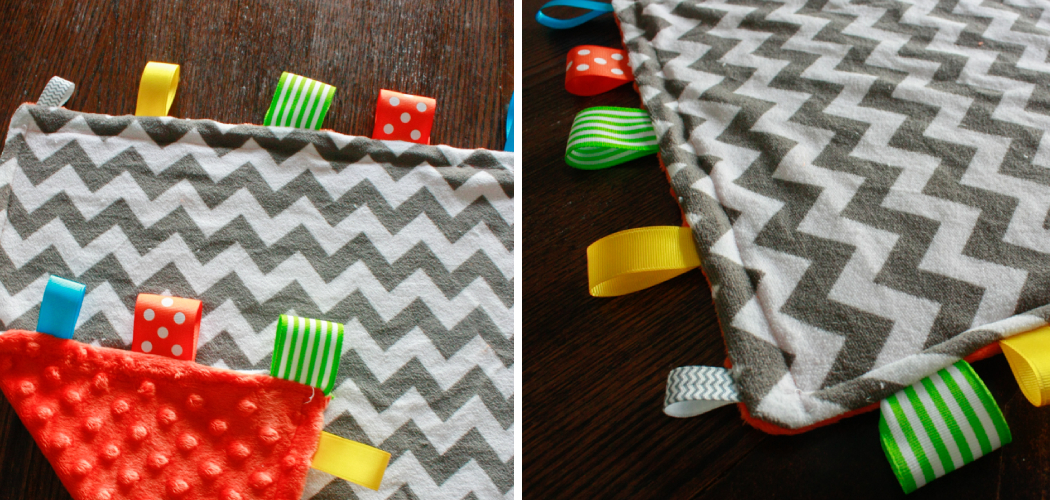
A taggie blanket is a type of baby blanket that’s made up of fabric squares with satin ribbons attached in each corner. The satin ribbons provide extra visual and tactile stimulation, which can help engage and soothe the child. These blankets are also known as “tagging” because they feature tags on each ribbon that have brightly colored designs and patterns.
Taggie blankets are incredibly easy to wash and maintain, making them a great choice for busy parents. They’re also lightweight enough that they can be easily carried around by the little ones themselves! And with its soft texture and bright colors, this blanket is sure to become a favorite in no time at all.
Needed Tools and Materials
Given below is a list of the essentials you’ll need to make your own taggie blanket:
- Fabric (Choose Something Lightweight and Soft With a Brighter Color Pattern)
- Satin Ribbon (Preferably in Bright Colors)
- Scissors
- Seam Ripper or Hand-sewing Needles
- Thread for Hand Sewing
- Pins
- Iron and Ironing Board
- Marker or Pen

10 Step-by-step Guidelines on How to Make a Taggie Blanket
Step 1: Cut Out the Fabric Pieces
Begin by cutting the fabric into 16-inch squares. You’ll need two of these for each taggie blanket, so make sure you have enough fabric to accommodate that. If you’re making multiple blankets, it can be helpful to lay all of the pieces out and mark them with a marker or pen. It makes the assembly much easier! But if you’re making just one blanket then that won’t be necessary.
Step 2: Prepare the Satin Ribbon
Next, cut 4 lengths of satin ribbon for each square. You want these to measure approximately 8” in length; if they are too long, simply trim them to the desired length. It’s also important to keep the ribbon pieces separate so you don’t get them mixed up. This will save you a lot of headaches down the line. You’ll also need to cut a piece of contrasting thread for each ribbon.
Step 3: Attach the Ribbon
Once you’ve cut out your fabric pieces and have prepared the ribbon, it’s time to attach them! Place the two squares of fabric right sides together and pin all four corners. Then, place one piece of ribbon in each corner, making sure that the raw edges of the ribbon are flush with the edges of the fabric. Stitch each corner securely using a hand-sewing needle and thread.

Step 4: Sew Together
Once you’ve attached all four pieces of satin ribbon, it’s time to sew together your taggie blanket. Use pins to keep everything in place and then stitch around the edges of the blanket, leaving a 1/2” seam allowance.
You can also use a seam ripper to open up the blanket if you want to add extra embellishments or decorations. But if you’re simply creating a basic taggie blanket, then this step isn’t necessary.
Step 5: Iron and Finish
Now it’s time to neaten up your work! Flip the taggie blanket right side out, press it with an iron, and finish by making sure all of your stitches are secure. You can also add any extra decorations you want to the blanket at this stage, such as embroidery or appliqué. However, if you’re new to sewing and just want to make a basic taggie blanket then this step isn’t necessary.
Step 6: Add the Tags
Once your blanket is stitched and pressed, it’s time to add the tags! Use a safety pin to attach them securely to each corner. If you’re using multiple colors of ribbon, make sure you use tags that coordinate with their respective ribbons. This will help ensure a polished and finished look to your taggie blanket! But if you’re just making a basic blanket then this step isn’t necessary.
Step 7: Embellish as Desired
The fun part! Now that your taggie blanket is finished, you can add any additional embellishments that you desire. Whether it’s a few extra ribbons or a cute appliqué, the possibilities are endless! It’s also a fun way to personalize the blanket and make it even more special to your little one.

Step 8: Wash and Dry
Before gifting or using your taggie blanket, make sure to wash and dry it according to the fabric’s instructions. This will help to remove any odors or excess lint from the fabric. It will also help the fabric keep its shape and color. But if you’re just making a basic taggie blanket then this step isn’t necessary.
Step 9: Gift Away!
Your taggie blanket is now ready to give away! You can either wrap it up as a gift or include it in a special basket with some other goodies for your little one. It’s sure to be appreciated no matter what. It’s also a great opportunity to express your love and creativity for your little one with this special handmade gift.
Step 10: Enjoy!
Last but not least, sit back and enjoy your work of art! You’ve successfully created a taggie blanket that is sure to provide comfort, security, and joy for years to come. Always remember that the love and effort you put into creating this special blanket will be remembered.
Making a taggie blanket from scratch doesn’t have to be daunting or time-consuming. With the right materials and some patience, you can make a beautiful blanket that will be cherished for years to come. So grab your supplies and get started on your own special project! You’ll be amazed at how quickly it comes together.
Following these guidelines on how to make a taggie blanket, you’ll be able to create a taggie blanket that is unique and stylish. And with its bright colors, tactile stimulation, and emotional security, it’s sure to become a favorite for your little one in no time at all. Good luck on your journey of creating something special!
Tips to Keep in Mind
- Be Sure to Select a Fabric That is Lightweight and Soft, as This Will Make the Blanket More Comfortable and Cozy.
- Also, Consider Using Brightly Colored Ribbons to Help Engage the Little One’s Senses.
- If You’re Feeling Adventurous, Try Adding Some Additional Embellishments Such as Appliqués or Embroidery!
- When Attaching the Ribbon Pieces to the Fabric Squares, Use a Simple Running Stitch to Make Sure That They Are Securely Attached.
- Finally, Follow the Fabric’s Washing and Drying Instructions Before Giving Away Your Taggie Blanket. This Will Help It Stay in Good Condition for Years to Come.

Making a taggie blanket is a great way to show your love and care for the little ones in your life. It’s sure to bring lots of comfort and enjoyment, as well as providing excellent tactile stimulation. So grab your supplies and get creative – you’ll be amazed at how quickly these special blankets come together! Happy crafting!
Frequently Asked Questions
Q: What Type of Fabric Should I Use for My Taggie Blanket?
A: For best results, opt for fabrics that are lightweight and soft. Consider selecting something with a pattern or bright colors to help engage the child’s senses. It’s also important to follow the fabric’s washing instructions before giving away your blanket.
Q: How Long Does it Take to Make a Taggie Blanket?
A: It typically takes about an hour or two, depending on the materials and embellishments you choose to use. Making these blankets can be quite therapeutic, so take your time and enjoy the process!
Q: How Do I Wash My Taggie Blanket?
A: It’s important to follow the fabric’s instructions for washing and drying. Generally, machine washing with cold water on a gentle cycle is ideal. Tumble dry low or lay flat to dry. You can also spot-clean any areas that need it.
Q: Can I Add Embroidery to My Taggie Blanket?
A: Absolutely! Adding embroidery is a great way to customize your taggie blanket and make it even more special. The possibilities are endless when it comes to embellishments – just let your creativity run wild!
Conclusion
To wrap it up, making a taggie blanket provides an unforgettable gift for your child or grandchild. They are unique and comforting and can be customized with images and colors of your choice.
They make a great present and provide hours of entertainment for little ones while they discover and feel the different textures on the blanket. So go ahead and try making a taggie blanket yourself- you’ll be amazed at how much fun it is!
Not to mention how quickly it becomes a cherished keepsake that will be treasured by your family for years to come. Now that you know the basics, challenge yourself to get creative with your own designs! Share pictures with us in the comments so we can see your end product and appreciate your craftsmanship! Thanks for reading this article on how to make a taggie blanket.