
If you’re just starting out with knitting and considering how to finish your project, learning how to knit a hat on circular needles might be the perfect solution. Not only is it relatively simple, but this method also allows you to use one continuous strand of yarn instead of cutting off pieces.

In this blog post, you will learn valuable information about casting on, knitting in the round, decreasing stitches correctly, and weaving in the ends – all important skills needed for completing a successful hat project!
Whether you’re an experienced or novice knitter looking for advice on finishing your next hat design or are just beginning to explore the world of crafting—this article has something special for everyone in need of help. So keep on reading to find out how to finish knitting a hat on circular needles and practice along as we discuss these necessary steps which will put your skillset into full action!
Is Learning Knitting Difficult?
No, learning how to knit is not as difficult as it may sound. With the right tools and supplies like circular needles, yarn, a tapestry needle, and scissors – you’ll be ready to start your project! Learning the basics of knitting is something that anyone can do, as long as they are willing to put in the time and effort.
Needed Tools and Supplies
Before diving into the steps for finishing your hat, let’s review the tools and supplies necessary for this project.
- Circular needles: These will be used to create a continuous loop of yarn in order to form the hat shape.
- Yarn: You’ll need enough yarn to reach the desired size of your hat.
- Tapestry needle: This will be used to weave in ends and attach any additional decorations like pompoms or tassels.
- Scissors: You’ll want a pair of scissors handy for snipping off excess pieces of yarn.
10 Steps on How to Finish Knitting a Hat on Circular Needles
Step 1: Casting
Cast on the desired number of stitches for your hat. Remember to count your cast-on stitches, as they are easy to miscount! Miscounting will lead to an inaccurate hat size and shape.
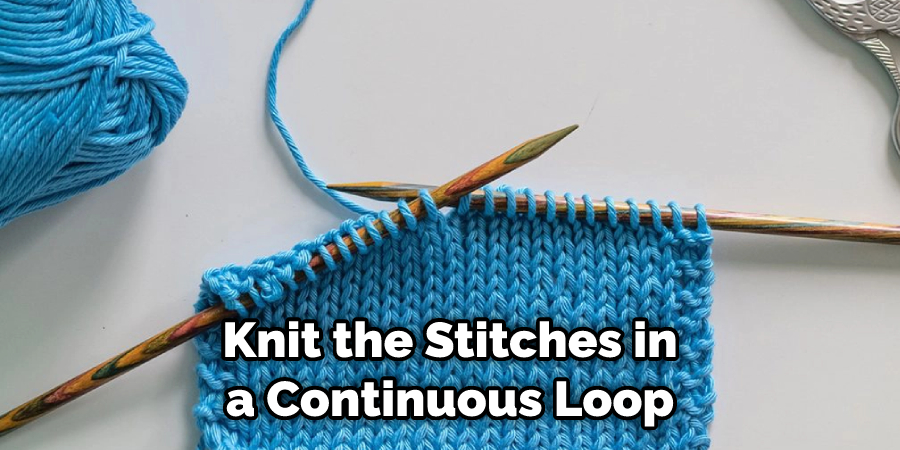
Step 2: Knitting in the Round
Using your circular needles, knit the stitches in a continuous loop until you reach the desired length of your hat. Make sure to switch between knitting and purling every round.
Step 3: Decreasing Stitches
When you’ve reached the desired length of your hat, start decreasing stitches until you have reached the desired width. How much you decrease depends on the size of your hat and how snugly it will fit on your head.
Step 4: Cut off the Yarn
Once you’ve decreased all of the necessary stitches for your hat, cut off a piece of yarn that is 12-18 inches long. Be careful not to cut too much off, as this will be used for weaving in the ends. You should be careful not to cut off the working yarn until you are ready to weave in all of your ends.
Step 5: Weave in Ends
Weave in both ends of your hat using a tapestry needle. This will secure all of your stitches and prevent them from unraveling. Weaving in the ends will also give your hat a neat, finished look.
Step 6: Pull Tight
Using the tapestry needle, pull both ends of the yarn tight so that there is no slack between the stitches. This will help ensure your hat looks nice even when it’s finished.
Step 7: Knot the Yarn
Once you’ve pulled the yarn tight, knot the ends together securely. This will give your hat a finished look and prevent any gaps from forming.
Step 8: Decorate
Now is the time to add any additional decorations like pompoms or tassels, if desired. Use the tapestry needle to attach these pieces securely to your hat.
Step 9: Block (optional)
If desired, you can block your hat after it is finished. Blocking will help even out any uneven stitches and ensure that the shape of your hat looks nice and neat. To block a hat, you’ll need to wet the hat, reshape it, and let it dry.
Step 10: Enjoy!
Once you have finished all of the above steps, your hat is now complete! How exciting! Now all that’s left to do is to enjoy wearing your beautiful creation.
We hope this article has been helpful in teaching you how to finish knitting a hat on circular needles. With these necessary steps, you’ll be able to complete your project with ease and confidence.

10 Tips to Avoid Mistakes
- Be sure to read the instructions carefully before beginning your project. Reading the instruction manual thoroughly will help to ensure that you understand the pattern, any special stitches required, and any other important details.
- Select a needle size that is appropriate for your yarn weight and project. Using needles that are too large or small can result in an unfinished hat or one with a strange shape.
- Always check your gauge before starting your hat. This will ensure that you get the proper fit for the size of your head or if you are knitting a project as a gift, the recipient’s head.
- Make sure to sharpen and lubricate your circular needles to prevent them from snagging on the yarn while you knit.
- Make sure you have the right number of stitches on each needle before beginning to knit with circular needles. The right number of stitches will ensure that the hat fits properly.
- Keep track of your stitch and row count at all times while knitting. This will help you to keep track of where you are in the pattern, avoiding any mistakes as a result of confusion or distraction.
- Be sure to measure your hat often as you knit in order to ensure that it is the right size and shape. Making adjustments as needed can help you avoid having to unravel your work and start over.
- Use stitch markers to indicate the beginning of each round so that when you switch needles or need to break from knitting for any reason, you will be able to find the correct spot to begin again.
- Make sure you have the proper number of rounds for your pattern before beginning to decrease stitches at the crown of the hat. This will help you avoid any confusion about how many rounds should be knitted for each size and shape of the hat that is being made.
- If a mistake is made, don’t be afraid to unravel the work and start over. It is better to correct mistakes now than have an unsatisfactory result later on.

Following these tips will help you finish your hat with ease and confidence. Knitting with circular needles can open up a world of possibilities for creating hats, scarves, sweaters,
Frequently Asked Questions
How Long Does It Take Finish Knitting a Hat on Circular Needles?
The amount of time it takes to finish a hat on circular needles will depend on the complexity and size of the project, as well as your own knitting skills. Generally speaking, you can expect a fairly simple hat to take 2-3 hours. But if you are making a more complex hat, the time could take significantly longer. Keep in mind that the more you practice, the faster and better your knitting will become.
Are Circular Needles Easier to Use Than Straight Needles?
That really depends on personal preference and the type of project you are working on. Some knitters find circular needles easier to use because they have fewer stitches dropping off at any one time, while others prefer the simplicity of working with straight needles. There is no right or wrong answer – what matters most is that you use whichever type of needle makes you feel more comfortable and enables you to create beautiful projects.
What Is the Best Way to Join Rounds When Knitting With Circular Needles?
The best way to join rounds when knitting with circular needles is by using the invisible join technique. To do this, insert the right-hand needle into the first stitch of the new round and wrap the yarn over it as if to knit. Then, pull through a loop and drop it off the left needle. This joins the end of each round and creates an almost seamless look.

Conclusion
Knitting a hat on circular needles is not difficult, and the steps are very straightforward. Just keep in mind that, like any other type of knitting project, the success of your hat will depend on having the right materials, taking accurate measurements, and following the instructions carefully.
With a bit of practice and patience, you’ll be able to create beautiful hats in no time.
By following the tips on how to finish knitting a hat on circular needles in this blog post, you will be able to finish knitting your hat quickly and easily. If you have any questions or need help, please feel free to contact us. We would be happy to assist you.
You Can Check It Out to Crochet a Pickle