
Are you looking for an interesting knitting technique that can add texture to your projects and create unique patterns? Then linen stitch may be just the thing you need! This versatile and seemingly complex stitch is actually very simple once mastered. It produces a tightly woven fabric with vertical stripes, making it ideal to use as a stand-alone material or to decorate other items such as clothing and accessories.

Linen stitch is one of those knitting techniques that instantly elevates your project. It’s a versatile, simple-to-execute stitch pattern that gives you the perfect combination of texture and drape, making it great for all kinds of projects.
In this blog post, we’ll cover everything you need to know about how to knit linen stitch – from the basics of getting started on a project with this tricky knit pattern to troubleshooting any issues that might crop up along the way!
What are the Use Cases for Linen Stitch?
Linen stitch can be used to make various items, from blankets and scarves to sweaters. It has a unique texture and drape that makes it perfect for creating garments with an eye-catching look.
For example, the linen stitch pattern is often used to create shawls or wraps with a lightweight, airy feel. It also looks great when used to knit a simple and snug hat or mittens.
Linen stitch can even be used for more decorative projects. For example, many knitters use it to make edgings for other items such as scarves and blankets. The texture of the linen stitch helps to define the edges of these pieces, making them look neat and tidy.
What Will You Need?
To start with linen stitches, you’ll need a few basic supplies. Start by gathering the following items:
- Yarn (choose any weight of yarn that is suitable for your project)
- Needles (choose needles that are the right size for your chosen yarn)
- Scissors
- Tapestry needle (optional – can be used to weave in ends when finished)
- Row counter (optional – this helps keep track of how many rows you have knitted).
Now that you have everything ready let’s move on to how to knit linen stitch!
10 Easy Steps on How to Knit Linen Stitch
Step 1. Cast the Required Stitches
Start by casting the required number of stitches onto your needles. It may vary depending on how wide you wish your project to be. Make sure that your stitches are evenly spaced and not too tight or loose. Because linen stitch is a knit and purl pattern, you will need an even number of stitches.
Step 2. Start Knitting
Next, begin knitting the linen stitch by purling one stitch, followed by knitting one stitch across the row. Continue this alternating pattern until you reach the end of your row. Be careful not to twist the stitches as you work. Otherwise, the pattern will be distorted.

Step 3. Knit in Rows
Keep knitting in rows until you’ve reached your piece’s desired length or width as you continue to work on your project. Make sure that each row begins with a different type of stitch (knit or purl) than how it ended (purl or knit). This ensures that each successive row creates a nice diagonal weave effect when finished.
Step 4. Bind off
Once you’ve reached your piece’s desired length or width, it’s time to bind off. To do this, simply knit two stitches together until one stitch is left on your needle. Cut off the yarn with a few inches of extra length and pull it through the remaining stitch to create a secure knot.
Step 5. Try it on
Finally, try on your finished piece to ensure it fits and looks like you envisioned. If everything looks good, congratulations – you have successfully mastered knitting linen stitch! Remember, if there are any issues, you can always try frogging your piece and starting again.
Step 6. Take Care of Your Piece
Now that you’ve finished knitting linen stitch, taking care of your piece is important. Hand wash it in cool water and lay it flat to dry. Doing this will help keep your project looking beautiful for years to come!
Step 7. Make Something New
Once you’re confident with knitting linen stitch, why not try to create something new? From hats and scarves to blankets and sweaters – the possibilities are endless! You can even try combining different yarn colors to create a unique color pattern.

Step 8. Share Your Projects
Don’t forget to share your finished projects with other knitters on social media or at craft fairs. Seeing how others have used the same techniques can be a great source of inspiration for future projects. And who knows – maybe you will even inspire someone else to start knitting linen stitch!
Step 9. Troubleshoot any Issues that Arise
If you experience any issues while working on your project, don’t worry! There are plenty of how-to guides, and video tutorials available online that can help you troubleshoot. Additionally, speaking to more experienced knitters can help you gain additional insight and advice.
Step 10. Enjoy the Process
Most importantly, don’t forget to enjoy the process! There is something special about knitting a project with your own hands – it takes time and effort, but it is always worth it in the end. So take your time, relax, and have fun while creating beautiful pieces using linen stitches. Happy knitting!
With these ten easy steps to knit linen stitch, you can start making beautiful projects such as scarves, blankets, hats, and sweaters. Remember to take care of your finished piece by hand washing it in cool water and laying it flat to dry.
You Can Check It Out to Crochet Shapes
5 Additional Tips and Tricks
- Use a thicker yarn when knitting linen stitch – this will help you to reduce the amount of stretching in your fabric and keep it more uniform.
- Be sure to keep your tension even when knitting linen stitch – this will ensure that the fabric remains uniform and consistent.
- Use a smaller needle size when knitting linen stitch – this will make it easier to create a tighter and more compact fabric.
- Count stitches carefully when knitting linen stitches – this will help ensure that your fabric is even and uniform.
- When knitting linen stitch, use a lifeline thread – this will help you to keep your fabric uniform, and in case of mistakes, it will be easier to rip back and re-knit.
These tips and tricks will help you knit a beautiful linen stitch fabric! Have fun crafting this timeless classic!

5 Things You Should Avoid
1. Do not pull too tightly on the yarn, or you may end up with an uneven fabric.
- Don’t skip any stitches, as this may affect how your linen stitch looks.
- Do not make too many increases or decreases at once; they should be done gradually over a few rows to avoid irregular patterns.
- Avoid using a too small needle for the yarn you are using, or it may create an awkward shape and look for your linen stitch.
- Try not to work too quickly, as this can cause mistakes and uneven stitches, resulting in an unsatisfactory finished product.
With practice, you will learn how to knit the linen stitch properly! Good luck!
What are The Different Pattern Variations?
1. Basic Stockinette Linen Stitch: This classic stitch is created by alternating rows of knit and purl stitches, making it reversible and suitable for any type of project.
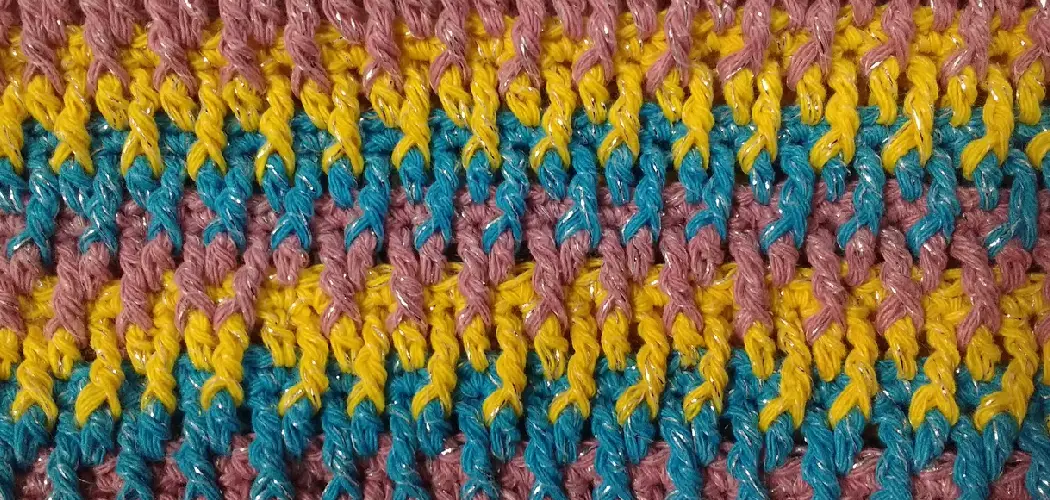
2. Two Color Linen Stitch: This variation uses two contrasting colors to create a striped pattern in your fabric.
3. Eyelet Linen Stitch: For this stitch, you can add an eyelet by yarn over and knitting two together in the same row, creating a lacy effect in your fabric.
4. Basketweave Linen Stitch: This version creates a more textured look with texture blocks of alternating knits and purls, using more than one color if desired.
5. Garter Linen Stitch: This stitch combines garter and linen stitches, creating a unique look with ridges in the fabric.

No matter which variation you choose, you are sure to have a beautiful fabric! Have fun exploring all the different possibilities that knitting linen stitch offers. Enjoy!
Conclusion
The linen stitch is an easy yet beautiful way to make unique textile projects. By following the step-by-step guide on how to knit linen stitch above, you can create your own linen stitch creations that will be admired and praised for years to come. You’ll enjoy the process of creating something with your own hands and see for yourself how satisfying it can be to work with beautiful yarn and knit a design from scratch.
Whether you are new to knitting or have been doing it for decades, this simple yet elegant pattern is a wonderful way to expand your skill set. With a few tools and some practice, you’ll soon find yourself knitting beautiful projects as if you were an experienced pro! Plus, when friends ask where you got that gorgeous knitted item, you can proudly say you made it yourself!
So join in on the fun and start conquering new linens stitches today!
You Can Check It Out to Crochet a Cup for a Top