
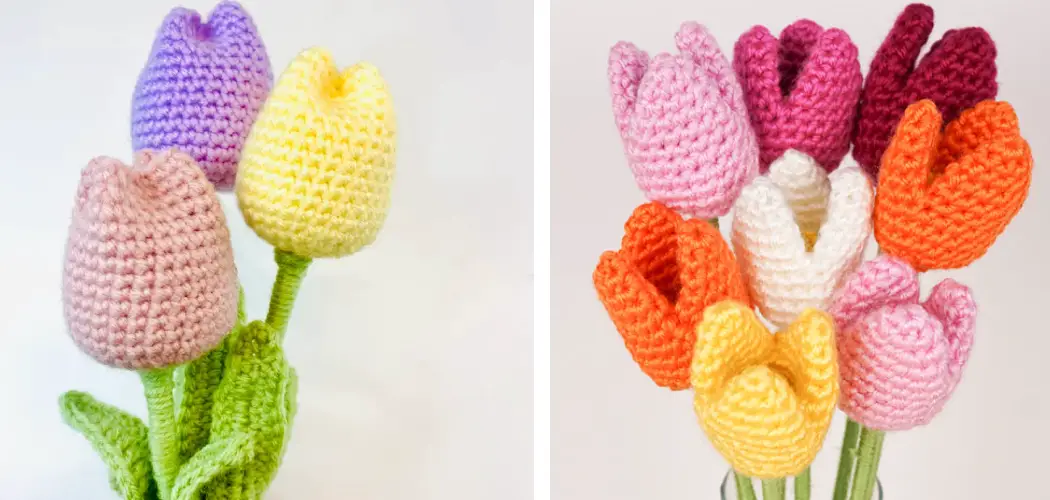
Crocheting tulip flowers is an excellent way to add texture, color, and sophistication to any project. Tulips are one of the most popular types of flowers among crocheters due to how easily they can be made and how versatile they can be in terms of style. Whether you’re looking for something simple or intricate, crocheting tulip flowers can give you exactly what you want.

Crocheting tulip flowers have a number of advantages. Firstly, it is simple and requires only basic crochet techniques, so even beginners can successfully create beautiful blooms. Secondly, the process itself is quite fun and relaxing as it involves creating intricate patterns with yarn over a hook. Lastly, there are endless possibilities for how to customize the design of the tulip flower and how to use it. It can be used to create various items, from decorative wall hangings to delicate jewelry pieces. In this blog post, You will learn in detail how to crochet tulip flower.
Materials You Will Need
Crochet Hook:
You will need a crochet hook that is suitable for the type of yarn you are using. Generally, a 3.5mm to 4mm hook works well with most yarns.
Yarn:
Choose any color or weight of yarn that you like. You can even mix and match different types of yarn to add texture to your flower.
Scissors:
You will need scissors to cut the yarn and trim any loose ends.
Tapestry Needle:
A tapestry needle is used to weave in the loose ends of yarn after completing your project.
Step-by-step Instructions for How to Crochet Tulip Flower
Step 1: Inspect the Supplies
To make a crochet tulip flower, you’ll need different colors of yarn, a crochet hook, and scissors. To begin making the flower, use one color of yarn to create a loop using a slip knot. You can use any color you like for the loop as it won’t be visible in the final product. Next, insert your crochet hook into the loop and tighten it. You are now ready to start crocheting. It’s important to have all your supplies ready and within reach before starting.
Step 2: Create the Chain
Next, use a single crochet stitch to create a chain of 10 stitches and add four more stitches to the chain. This will form the foundation of your flower. Take your second color of yarn and make another slip knot. Then, insert the hook into the 5th stitch of your foundation chain. Make a single crochet stitch and continue making three double crochet stitches in each succeeding stitch. Once you reach the end of your foundation chain, slip the stitch into the next stitch. This will create a circle and serve as the base for the rest of your flower.

Step 3: Make the First Petal
For the first petal, use the same color as your foundation chain. Insert the hook into any stitch of the circle and make a slip knot using a new yarn strand. Next, make one single crochet stitch followed by four double crochet stitches in that same stitch. Then, make four more double crochet stitches in each of the remaining stitches. Slip stitch into the first single crochet stitch to complete your first petal.
Step 4: Add More Petals
Next, use a new yarn color for each additional petal. Repeat the process in step three to create four more petals around the circle. Make sure to slip the stitch into the first single crochet stitch after completing each petal.
Step 5: Create the Stem
To make the stem of your tulip, use a new color of yarn and insert it into one of the stitches from your foundation chain. Then, create a single crochet stitch followed by four double crochet stitches in that same stitch. Continue making these stitches in each succeeding stitch until you reach the end of your foundation chain. Slip stitch into the first single crochet stitch to complete your stem.
Step 6: Form the Leaves
For the leaves of your tulip, use a new color of yarn and insert it into one of the stitches from your foundation chain. Then, create a chain of four stitches. Once done, slip the stitch into one of the double crochet stitches from the first row of petals. Make another chain of four stitches and slip the stitch into the next double crochet stitch from the first row of petals. Do this until you reach the end of your foundation chain.
Step 7: Secure Loose Ends
After completing all the steps, it’s important to secure any loose ends by weaving them in with a tapestry needle. This will give your tulip a clean and polished look.
Step 8: Display Your Crochet Tulip Flower
Now that you have completed your crochet tulip flower, it’s time to display it! You can attach it to any project or make several more to create a beautiful bouquet. You can also use different colors and yarn weights to create unique variations of the tulip flower.
With these steps, you can easily make a crochet tulip flower. With any luck and lots of practice, you’ll be able to create many beautiful flowers in no time.
Tips for How to Crochet Tulip Flower
- Make sure to use a proper-sized crochet hook for the yarn you choose. A hook that is too small or too big can make crocheting tricky and difficult, resulting in an uneven finished product.
- Gently pull the yarn through the loops created when crocheting to ensure your stitches are tight and secure. For crocheting tulip flowers, you want to ensure that the edges of each petal are even and round for a neat look.
- Use light-colored yarn for crocheting tulip flowers, as it will be easier to see your stitches when crocheting. Darker colors can make it harder to see how the stitches fit together.
- Always use a yarn conditioner to keep the fibers in your yarn from unraveling or becoming too stiff and brittle. This will help ensure the durability of a crocheting tulip flower.
- Begin crocheting to crochet a tulip flower from the center outwards so that you can see how each petal or leaf fits into the overall pattern.
- To make crocheting tulip flowers look more realistic, incorporate a few green leaves on each petal or use different shades of yarn for the center and petals.
- When crocheting crochet tulip flowers, ensure that you work with even stitches and keep the tension in each stitch consistent.
- Lastly, take your time and enjoy crocheting tulip flowers. Crocheting should be a relaxing activity, so don’t rush it. Take breaks if needed, and remember that practice makes perfect.

How Do You Create the Foundation Chain?
You’ll need to make a foundation chain to create your crochet tulip flower. Looping stitches do this with the yarn that will form your base and support the bloom. Start by creating four chains, then link them together at the top with a slip stitch. Then, create another four chains and link them together. Repeat this process until you have a total of eight chains.
Next, you’ll want to make two double crochet stitches into the end of your first chain. Working from left to right, place the hook in the second chain and make one single crochet stitch. You should alternate between single and double crochet stitches across your foundation chain. Once you reach the end, make a single crochet stitch in the last chain and slip-stitch it to the beginning of your foundation chain.
Are There Any Special Techniques Required for Creating a Tulip Flower?
- The tulip flower is one of the most iconic and beautiful crochet projects. To crochet a perfect tulip, you must have some basic crochet knowledge and techniques. Here are the steps for how to make a tulip:
- Start by creating your base chain with 6-7 stitches. Pull the yarn through each stitch to create a loop, and then slip the stitch into the first stitch to join the round.
- Now, you will start creating petals of your tulip flower. To make each petal, you need to crochet seven double crochets (DC) in each chain space from the base chain round.
- Once you have finished crocheting 7 DC, chain one stitch and turn your work, then crochet 3 DC in the first chain space and one single crochet (SC) in each of the remaining six chain spaces.
- Finally, to complete your tulip flower, slip stitch into the first chain space to fasten off your yarn. Your tulip flower is now complete.
By following these steps, you can easily create a beautiful tulip flower. With practice and patience, it’s possible to make several different types of crochet tulips.
What is the Best Way to Finish Off a Crochet Tulip Flower?
When you are making a crochet tulip flower, the finishing touches can make all the difference. A good finishing touch will bring out the beauty of your finished project and ensure that it looks amazing. Here are some tips on how to finish off your crochet tulip flower in style:
- Weave in ends: This should always be done when you are creating any crochet project. In the case of a tulip flower, it is especially important as all of the petals will be connected somehow, leaving many ends to weave in. Use a yarn needle and matching yarn to carefully weave in each end so that they won’t unravel or stick out from your finished project.
- Create a stem: To give your tulip a realistic look, you can create a stem that will attach to the bottom of your flower. This is best done with green yarn, as other colors may not look as natural. Using single crochet stitches, work in a long line up from the bottom of your flower, creating a stem that will be the perfect length for your tulip.
- Add leaves: To give your tulip an extra touch of realism, slip-stitch a couple of green leaves along the stem of your flower. You can make them as big or small as you like and use any color yarn to get the desired effect.

Once you have used these tips to finish off your crochet tulip flower, it will look stunning and be ready to add a touch of beauty to any project. So don’t forget the finishing touches- they can make all the difference.
Do You Need to Call a Professional?
No. Crocheting a tulip flower is not difficult and requires basic crochet skills. Most beginners can make a simple tulip with some practice and patience. However, if you are looking for something more intricate or just need help getting started, there are plenty of resources available online to help you out. There are many tutorials, videos, and books dedicated to how to crochet a tulip flower, and with the help of these resources, you can quickly learn how to make a stunning tulip.
Additionally, many professional crocheters offer private lessons or workshops if you would like to learn how to make a more complex design. So don’t be afraid to take on this project- with the right tools and guidance, you can easily make a beautiful crochet tulip flower.
How Much Will It Cost to Crochet Tulip Flower?
Crochet tulip flower projects can vary in cost depending on the supplies you need. The cost of making a crocheted tulip flower is minimal if you already have yarn, a crochet hook, and stuffing material.
However, if you don’t have these items on hand or want to work with high-quality materials, it will cost a bit more. The price of yarn and hook sizes can vary significantly, so it’s important to shop around and compare prices before starting your project. Additionally, if you plan on buying stuffing material or other supplies, such as buttons or fabric scraps for the center of the flower, that will add to the overall cost.

Frequently Asked Questions:
Q: Can I Use Any Type of Yarn to Crochet a Tulip Flower?
A: Yes, you can use any type of yarn for your project. However, keep in mind that different types of yarn will create different textures and appearances. It’s best to experiment with different types of yarn to see which one you like best. You can also combine different types of yarn for a unique look.
Q: How Long Does It Take to Crochet a Tulip Flower?
A: The time it takes to crochet a tulip flower will depend on your skill level, the complexity of the design, and how much time you have available. A simple tulip can be completed in just a few hours, while more intricate designs may take longer. With practice and experience, you can crochet a tulip flower quickly and efficiently.
Q: Can I Adjust the Size of My Crochet Tulip Flower?
A: Yes, you can easily adjust the size of your crochet tulip flower by using a different hook size or adding more rounds to your pattern. Keep in mind that changing the size may also affect the overall appearance and proportions of your tulip. It’s best to practice and experiment with different sizes until you find the perfect fit for your project.
Q: Can I Use a Different Stitch to Crochet My Tulip Flower?
A: While the instructions and steps outlined in this guide use double crochet stitches, you can certainly experiment with different stitches to create unique tulip designs. Single crochet or half double crochet can also be used to create beautiful tulip flowers. It’s up to your personal preference and creativity. With the right stitch and yarn combination, you can create a stunning crochet tulip flower that is truly one of a kind. So, don’t be afraid to try new stitches and techniques to make your tulips stand out in any project.
Conclusion
One potential disadvantage of crocheting tulip flowers is that finishing the project can take a lot of time and patience. It requires immense attention to detail, as mistakes in the pattern or technique could ruin the design. Additionally, if one does not have access to the specialized tools needed for crocheting, such as a quality crochet hook and yarn, it can be difficult to complete the project successfully. Knowing how to read patterns and follow instructions correctly is also important to get a successful outcome.
In conclusion, crocheting a tulip flower is a fun and easy project for anyone to complete. It requires only basic crochet skills and the simple technique of making a chain stitch and single crochet stitches. With just a few supplies, such as yarn, a crochet hook, and some scissors, you can create beautiful tulips in no time. Whether you want to embellish a hat or add some flowery decorations, learning to crochet tulip flowers is sure to come in handy. I hope reading this post has helped you learn how to crochet tulip flower. Make sure the safety precautions are carried out in the order listed.
You Can Check It Out to Knit a Leaf