
Weaving in ends while knitting is an important step when you’re finishing your project. It prevents loose ends from unraveling and ensures that the fabric won’t come apart easily. Weaving in ends also helps to give a neat, professional finish to your work, especially if it will be worn or given as a gift.

Weaving in the ends of your project is an important finishing touch that adds a professional look to your finished product. Weaving in the ends will also help secure the yarn, so it won’t unravel or come loose over time. Weaver in ends while knitting is simple and easy once you get the hang of it. In this blog post, You will learn in detail how to weave in ends while knitting.
How Often Should You Weave in Your Ends While Knitting?
Ideally, you should be weaving in the ends of your work after each section or milestone of the project is completed. For instance, when you finish a round or two of a pattern repeat, or when you have finished a full section, it is best practice to weave in your ends.
Doing this ensures that the end of your work is neat and secure and will not unravel. Furthermore, this will also help keep the yarn from tangling as you move on to other sections of your project.
If possible, try to avoid leaving any tails of yarn that are longer than 4-5 inches. If you need to leave a long tail, secure it properly and weave it in at the end. It is also important to know that different fibers may require additional steps or special care when weaving in ends.
For instance, the wool yarn should not be pulled too tightly since it may be prone to felting. Similarly, synthetic fibers can be slippery and should be secured with a few knots and some weaving in the ends.
Step-by-step Instructions for How to Weave in Ends While Knitting
Step 1: Inspect the Ends of Your Knit Item
Before attempting to weave in the ends of your knitting project, inspect them carefully. Check to see if they have been cut too close or have uneven edges that could create a hole in the fabric when woven in. If there are any signs of possible issues, snip off a few millimeters from both ends and re-inspect before moving further.
Step 2: Gather Needed Materials
You’ll need a tapestry needle and some scrap yarn for weaving in the ends. If your knitting project is made of wool, use wool yarn for weaving in the ends; if it’s acrylic, use acrylic yarn, etc. Cut a length of scrap yarn and thread it through the eye of the tapestry needle. Leave a few inches of excess yarn on either side to easily pull it through if necessary.

Step 3: Align Your Ends with Each Other
Place your knitting project on a flat surface. Line up the two ends of your project to be woven in, ensuring they are as even as possible. Carefully insert the tapestry needle underneath several strands of yarn on one side of the knitting. This will help to anchor the yarn in place.
Step 4: Weave Over and Under Alternately
Begin weaving your needle over and under the strands of yarn on each side, alternating between them. Be sure to keep your tension even and not pull too tightly or too loosely. Continue weaving your needle over and under the strands of yarn until you have reached the last stitch on each side.
Step 5: Pull Yarn Through Loosely
Once through, leave a few inches of excess yarn before pulling it through loosely. Make sure that the tension is not too tight, as this could create a hole in the fabric. Cut off any excess yarn, leaving a few millimeters so that it won’t unravel. Finally, tie a secure knot at the end to ensure that your ends don’t come undone.
Tips for How to Weave in Ends While Knitting
- Always make sure to pull the yarn securely into the knitting fabric.
- Use a blunt-tipped tapestry needle or crochet hook to weave in loose ends.
- Weave the end of the yarn in and out of stitches for at least an inch (2.5 cm) so that it does not come undone easily.
- Make sure to weave in the loose ends securely, but without pulling too tightly, or it will make your knitting fabric pucker.
- Trim off any excess yarn that is sticking out.
- If you are weaving in more than one end, use different yarn colors so they can be easily distinguished from each other.
- To save time, weave in the ends as you go instead of leaving them all until the end.
- When weaving in more than one end, make sure to double-check that all of them are securely woven and hidden before finishing your project. This will help avoid any potential unraveling.
By following these tips for weaving in ends while knitting, you can rest assured that your finished product looks professional and well-crafted.

How Should You Treat Your Yarn Tails When Weaving in the Ends of Your Knitting Project?
When it comes to weaving in the ends of your knitting project, you want to ensure that you treat them with care. How you weave in your yarn tails can make a huge difference in the finished look of your project. Here are some tips for how to treat your yarn tails when weaving in the ends:
- Use a tapestry needle to weave in your yarn tails. A tapestry needle is designed especially for weaving in ends and will make the task much easier than using regular needles.
- Securely knot your yarn tails at least twice before trimming them off. This will help ensure that they don’t come undone.
- Use a blunt tip rather than a sharp point when weaving in your yarn tails. A sharp point can easily split the yarn, causing it to unravel or weaken the structure of your project.
- If you need extra security for your project, weave over and under several stitches, going back and forth to create a more secure weave.
- Finally, trim your yarn tails so that they are flush with the fabric of your project. This will help them stay securely in place and look neat when you’re done.
By following these steps for weaving in ends while knitting, you can ensure that your project will look neat and professional.
How Can You Hide Your Yarn Tails When Weaving in the Ends of Your Knitting Project?
- Cut the yarn, leaving a tail of approximately four inches.
- Thread the tail onto a tapestry needle if the yarn is thicker than size 10; otherwise, use a crochet hook.
- Insert the needle through several stitches on the wrong side of your work horizontally and in one direction, weaving it in and out of the stitches.
- After weaving in a few inches, snip off any excess yarn that is still sticking out.
- Repeat steps 3 and 4 until all of the tail is woven in.
- Pull gently on the tail to help secure the weave and ensure it doesn’t come undone when washed.
- Cut off any remaining visible yarn, and voila! You’re finished weaving in the ends of your knitting project.
Weaving in the ends of a knitting project is an important step that should not be overlooked, as it helps keep your work neat and tidy. By following the steps above, you can easily and expertly weave in your yarn tails to give your finished garment a professional touch.

What Techniques Should You Use When Weaving in the Ends of Your Knitting Projects?
- Plan How You Will Weave In the Ends: Before you start weaving in the ends, it’s important to think ahead and plan how you will do so. If possible, try to ensure that the tails of your yarn face opposite directions when you weave them into your knitting project. This will help keep them from unraveling.
- Weave in the Ends: To weave in the ends, use a yarn needle to thread the end of your yarn through the stitches of your knitting project. Make sure to insert your needle into the stitches that are closest to where you tied off and make small loops as you pull the yarn through. This will help secure the tails in place.
- Secure the Tail: Once you have woven in the ends, use your needle to tie a knot around one of the stitches closest to where you tied off. This will help ensure that the tails don’t come undone or unravel. Make sure to pull the knot tight before trimming away the excess yarn.
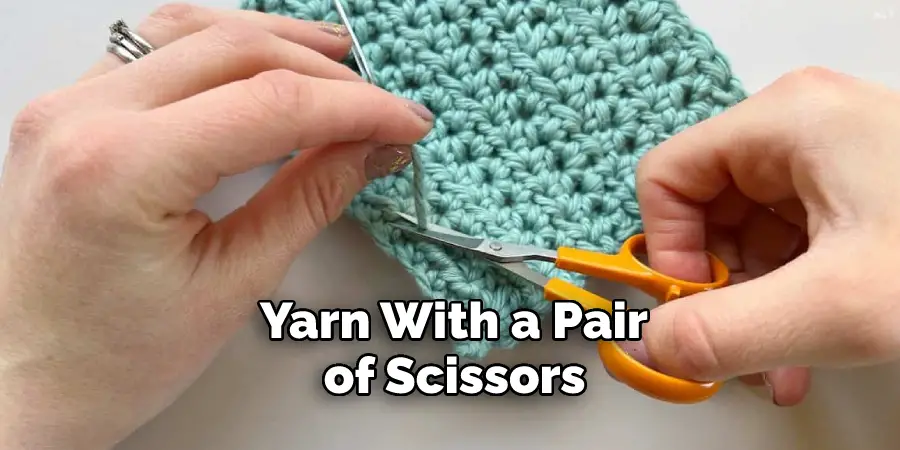
- Trim the Excess Yarn: Once you have securely tied off the tails, trim away any excess yarn with a pair of scissors. This will help keep your knitting project clean and neat.
When weaving in the ends of your knitting project, it’s important to take your time and double-check your work. Having secure tails will help ensure that your project doesn’t unravel and look its best.
Conclusion
In conclusion, weaving in ends while knitting is an essential part of the finishing process that should not be overlooked. It is important to take time to properly weave in your yarn tails so that your finished item can look neat and professional.
With practice, weaving in ends will become a fast and easy task. By using different techniques, such as the basic overcast stitch or the jobless jog, you can create a beautiful finish to your knitting.
With the right materials and practice, weaving ends while knitting will become an essential part of your knitting process. I hope reading this post has helped you learn how to weave in ends while knitting. Make sure the safety precautions are carried out in the order listed.
You Can Check It Out to How to Knit a Leaf