
As the sun’s warm embrace heralds the arrival of summer, there’s no better accessory to complement your style and shield you from its rays than a crocheted summer hat. Crocheting a summer hat is not only a creative endeavor but also a practical one, allowing you to fashion a chic and personalized accessory that perfectly suits your taste.

The art of crochet offers a wonderful canvas for bringing your hat to life – from choosing the yarn’s color and texture to selecting a design that reflects your personality.
In this article, we’ll embark on a journey through the essential steps of how to crochet a summer hat. Whether you’re strolling along the beach, attending outdoor events, or simply enjoying the sunny days, your handmade crocheted hat will not only provide protection but also showcase your crafting prowess.
So, gather your supplies, pick a breezy pattern, and let’s unravel the world of crocheting a stylish summer hat.
The Summer Hat Crochet Project and Its Practicality
Crocheting a summer hat is not only an enjoyable project to take on, but also a practical one as well. In the hotter months of the year, when the sun is shining and temperatures are high, having a light and breathable hat can be essential for protecting your head from harmful UV rays. The crochet fabric gives it much more ventilation than that of other hat materials, making it the ideal choice for beating the heat.
Additionally, a crochet summer hat can be incredibly useful for keeping your head cool during outdoor activities such as walking, biking or playing sports. When designed properly may also provide you with enough shade to protect you from getting sunburnt, allowing you to enjoy the outdoors without worrying about skin damage.
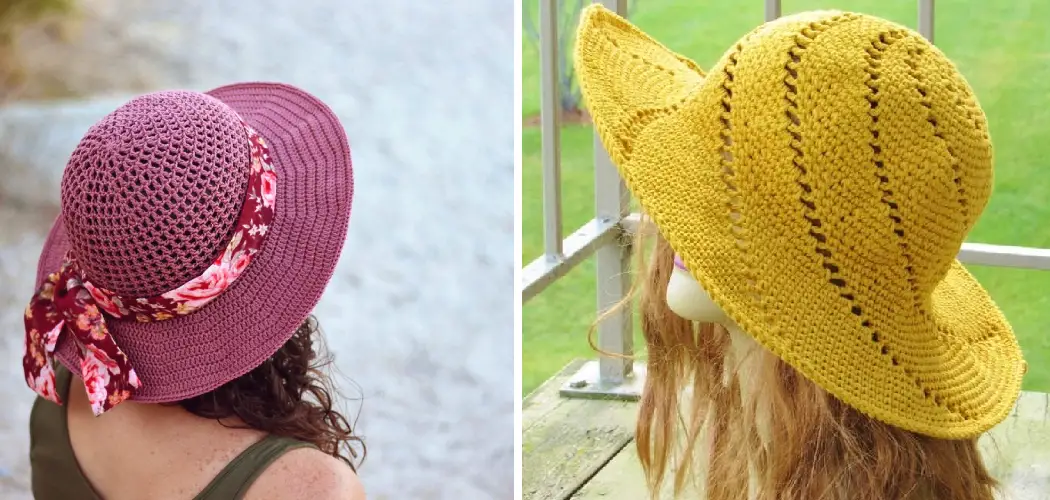
By being able to choose your own colors and patterns, a crochet summer hat can also be a great way to express your individual style and show off your creative flair. Whether you prefer bold, bright hues or subtle pastels, the options are limitless when it comes to crafting the perfect summer accessory.

Overall, crocheting a summer hat is an enjoyable and practical project that brings both utility and style to your wardrobe. With a few simple steps, you can create something unique and stylish that will keep you looking cool on even the hottest days of summer.
Importance of Selecting Suitable Materials for Comfort and Style
When crocheting a summer hat, it is important to select materials that suit the occasion. Depending on how warm or cool you want the hat to be, you can choose from a variety of materials such as wool, cotton and linen – all of which provide different levels of warmth and breathability.
For example, when crocheting a sun hat for sunny days, cotton is a lightweight and comfortable option. Wool, on the other hand, is better suited for colder days due to its natural insulation properties.
Additionally, you may choose to use different colored yarns for more vibrant designs or opt for neutral shades that will still keep you stylish and cool during the summer months.
There are also some specialty materials available such as bamboo and hemp which can provide a unique look and feel while still providing breathability and comfort. Whatever material you decide on, make sure it is comfortable and stylish so that your summer hat will look great throughout the season.
Once you have chosen your materials, it’s time to get started on crafting your perfect hat. Gather all of your supplies such as yarn, needles, hooks, scissors and any other items you will need. To ensure your hat fits perfectly, take measurements of the head circumference and decide what size to make it.

Many crochet patterns come with instructions for making different sizes so you can find one that is suitable for your needs. After all of this is taken care of, it’s time to get crocheting!
Yarn Choices Suitable for Warm Weather
When it’s too hot to bear wearing a heavy woolen hat, you can still crochet one that is lightweight and breathable. Cotton yarns are ideal for summer hats since they come in a variety of colors and are great at keeping cool. Bamboo rayon also has excellent cooling properties but does not have the same softness as cotton.
Acrylic fibers are often more affordable than cotton or bamboo rayon but may not be as cooling. For those who want to crochet a summer hat with a bit of sparkle, there are even metallic yarns available in many colors.
When selecting the yarn for your project, consider the crochet stitch pattern you plan to use and how it will affect the drape of the fabric. A stitch that creates a loose fabric will require a lighter-weight yarn. Crocheting with multiple strands of yarn held together or using an extra-large crochet hook can help to create a more airy style.
No matter the material you select, always read the care instructions carefully and choose your size accordingly. Different materials may have varying degrees of shrinkage when washed, so make sure to measure your finished work against the recommended size.
With the right material and care instructions, you can have a lightweight and stylish summer hat that will keep you cool and comfortable all season long!

10 Steps How to Crochet a Summer Hat
Step 1: Gather Your Materials and Tools
Before you dive into crocheting your summer hat, ensure you have all the necessary materials and tools on hand. Your list will include:
Yarn: Opt for a lightweight, breathable yarn in a color that resonates with your summer style. Natural fibers like cotton, linen, or bamboo are ideal choices for a comfortable and airy feel.
Crochet Hooks: Select a hook size that matches the yarn you’ve chosen. A larger hook will create a looser, more open stitch pattern, perfect for warm weather.
Tape Measure: A tape measure will help ensure the right fit for your hat, as well as guide you in creating the right dimensions for various parts.
Stitch Markers: These handy tools will help you keep track of stitch counts, especially when working in the round.
Yarn Needle: A yarn needle is essential for weaving in loose ends and finishing touches.
Scissors: A trusty pair of scissors will be needed to cut yarn and trim excess material.
Step 2: Choose a Hat Pattern
Select a crochet pattern that suits your style and skill level. There’s a wide array of summer hat patterns available, from simple and elegant to intricate and bohemian.
Choose a pattern that aligns with your desired aesthetic, whether it’s a classic sun hat, a floppy beach hat, or a trendy wide-brimmed design. Carefully read through the pattern instructions to understand the required stitches and techniques.
Step 3: Gauge Swatch
Before diving into the main part of your hat, create a gauge swatch using the chosen yarn and hook size. Crocheting a small square using the specified stitch pattern will help you ensure that your hat will be the right size and fit according to the pattern’s instructions.

Measure the swatch’s dimensions and compare them to the gauge information provided in the pattern. Adjust your hook size if necessary to achieve the correct gauge.
Step 4: Start with the Crown
Begin crocheting your summer hat by creating the crown. This is the part that sits on top of your head. Depending on the pattern, you might need to start with a magic circle or a starting chain. Follow the pattern’s instructions to crochet the specified number of stitches into the chosen starting point.
Work in the round, increasing the stitch count evenly to create a flat circle. Your crown will gradually take shape as you continue crocheting round after round. Once you’ve crocheted the specified number of rounds, fasten off your work and move on to the next step.
Step 5: Work the Body of the Hat
Transition to working in the round without increasing to create the body of the hat. Depending on your chosen pattern, you might use a combination of different stitches to achieve the desired texture and style.
Work the stitches according to the pattern instructions, making sure to maintain the correct stitch count. Continue working in rounds until the hat reaches the desired length. Remember to try on the hat occasionally to ensure it fits snugly without being too tight or too loose.
Step 6: Shape the Brim
As you approach the desired length for your summer hat, it’s time to shape the brim. The brim’s shape can vary widely based on the pattern you’re following and your personal preference. Some patterns call for a flat, even brim, while others may have a more curved or wavy edge.

To shape the brim, follow the pattern’s instructions, which will guide you in achieving the intended shape and style. Some patterns may also suggest incorporating different stitch patterns or edgings for the brim to add an extra touch of detail. Once you finish shaping the brim, fasten off and weave in any remaining ends.
Step 7: Customize the Brim Size
The brim’s size can be adjusted to your preference. For a smaller brim, crochet fewer rounds; for a larger brim, crochet more rounds. This customization allows you to tailor the hat to your desired level of sun protection and your personal style.
As you crochet the brim, continue to follow the pattern’s instructions for stitch placement and shaping. Once you’ve reached the brim size that you want, fasten off your yarn.
Step 8: Finishing Touches
With the brim completed, it’s time to weave in any loose ends to give your hat a polished appearance. Thread a yarn needle with the loose yarn ends and weave them discreetly into the stitches on the inside of the hat.
Make sure all the ends are securely fastened to prevent unraveling. If desired, you can also add decorative elements to further enhance your summer hat’s appearance. Crocheted flowers, ribbons, or buttons can add a charming touch and make your hat truly unique.
Step 9: Blocking
Blocking is an essential step that helps shape your crocheted hat and ensures it lays flat and even. Depending on the yarn you’ve used, you can choose between wet blocking or steam blocking. For wet blocking, immerse your hat in water, gently shape it to the desired dimensions, and allow it to dry.
Steam blocking involves using a steam iron (with a pressing cloth) to shape the hat by applying heat and steam. Blocking enhances the overall appearance and fit of your hat, ensuring it looks perfect and ready to wear.

Step 10: Put on Your Summer Hat
Now that you’ve created a beautiful crocheted summer hat, all that’s left is to put it on and enjoy the compliments! Whether you use it for added sun protection while walking outdoors or simply as a fashionable accessory, your handmade hat is sure to make a statement.
Create multiple hats in different colors and styles for an array of chic summer looks. Have fun experimenting with stitch patterns, shapes, and embellishments to truly make it your own. Enjoy wearing your unique summer hat!
Conclusion
Learning how to crochet a summer hat is an exceptionally fulfilling experience, and it’s sure to spark your creativity while providing you with a unique conversation piece.
After following this tutorial, you now have the skills to make beautiful and colorful creations for yourself or your loved ones. The possibilities are endless when learning this craft – from making hats and scarves to stuffed animals and ponchos!
Moreover, crocheting is a great way to express yourself while also adding beauty to any winter wardrobe. If you’ve gathered all of your materials and feel equipped enough, give it a try today – you never know what exciting projects you can come up with! So grab those needles (and hooks!) and get going on making your very own summer hat. Good luck!