
Do you want to give your crochet hat a homemade touch? Adding a pompom to the top of any type of crochet hat is an easy and affordable way to customize it. If you’re looking for a simple way to make your own custom-made pom-poms, then this article is for you! Here, we will discuss how to make a pompom for a crochet hat, which includes step by step instructions and tips for ensuring that it looks perfect. Read on if you are ready to become a pompom making expert in no time at all!

If you have ever tried to crochet a hat, then you know how important having the right finishing touches can be. Whether you’re making a beanie with an added pompom detail or looking for that perfect color contrast with your winter accessories, making sure your project has unique and stylish details is all about finding the right accents.
If you want to learn how to make a pompom for your next crochet hat project, we’re here to provide an easy-to-follow tutorial! With just some basic household materials and simple steps, anyone can create beautiful poms that will add texture and flavor to even the plainest of hats. Keep reading to find out what else you need in order to craft yourself a stunningly cozy accessory!
Why May You Want to Make a Pompom for a Crochet Hat?
One may want to make a pompom for a crochet hat for many reasons. Such as:
1. Gives Your Hat an Extra Bit of Flair and Style
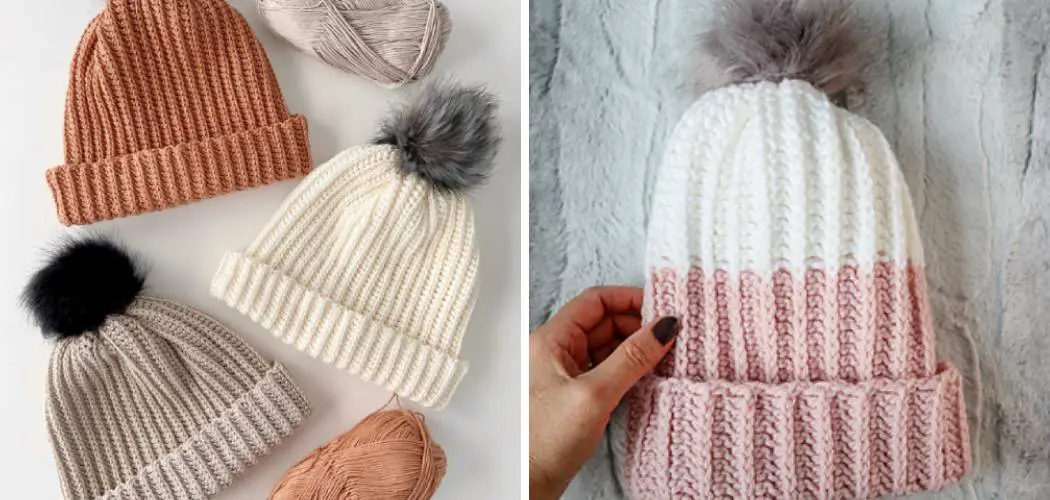
Adding a pompom is one of the best ways to make a crochet hat stand out. Whether small and subtle or big and bold, adding a pompom can take your crocheted hat from ordinary to extraordinary.
2. Makes Your Hat Cute & Cozy
Pompoms are incredibly soft, fluffy, and warm. Adding one to the top of a crochet hat gives it an extra level of softness and comfort, making it even cuddlier. Also, depending on the yarn you choose, they can add a pop of color that catches the eye.

3. It’s Fun & Easy to Do
Making a pompom is surprisingly simple and enjoyable. Playing around with different colors and materials makes it easy to customize your crochet hat however you want it. Plus, it’s just plain fun to make something of your own.
Now that you know why you may want to make a pompom for a crochet hat, let’s look at how actually to do it! With the right materials, techniques, and steps, you can easily create beautiful and unique pompoms that will bring life to any crocheted hat. Follow the instructions below, and you’ll be well on your way to making a crochet hat with a pompom that will look great!
How to Make a Pompom for a Crochet Hat in 6 Easy Steps
Step 1: Gather Your Supplies
The first step is to ensure you have all the supplies you need. You will need two pieces of cardboard cut into circles, some yarn in the color of your choice, scissors, and a ruler or tape measure.
Step 2: Trace the Circles on the Cardboard
Once you have all the supplies ready, take one piece of cardboard and use the ruler or tape measure to trace two circles. The size of the circle will depend on how big you want your pompom to be, but we recommend a diameter of around 6 inches for an average-sized pompom.
Step 3: Cut out the Circles
Using scissors, carefully cut out the circles that you have traced. You should now have two circles of cardboard with a hole in the middle. Also, make sure that the circles are cut in a straight line so they will be easy to stitch together later.
Step 4: Wind the Yarn
Take one of the cardboard circles and start wrapping yarn around it. Make sure to wrap tightly and evenly all the way round, ensuring no gap between wraps. This will ensure your pompom is nice and fluffy.

Step 5: Cut the Yarn
Once you have finished winding, cut the yarn with scissors so that it is about 2 inches longer than the cardboard circumference. This will give you some extra yarn to tie off your pompom when you are done.
Step 6: Stitch Together and Tie Off
Place the second cardboard circle on top of the first one. Now stitch together both pieces with a needle and thread, making sure to leave a hole in the middle. Once you have done this, pull the extra 2 inches of yarn through the hole and tie it off tightly. You should now have your pompom ready for use!
With these easy steps, you should now have the perfect pompom for your crochet hat in no time!
Some Extra Tips to Make a Pompom for a Crochet Hat
1. Do Not Make the Pompom Too Tight
This is very important! The pompom should be slightly loose and fluffy so that it’s easy to attach to the crochet hat. It won’t look good or stay in place if you make it too tight. Also, make sure not to overdress the pompom by adding too much yarn.
2. Choose the Right Yarn
When picking out a yarn for your pompom, choose one that matches the color and texture of your crochet hat. The type of yarn you use will also affect the size of the pompom, so make sure you pick something that’s suitable for your project.
3. Use a Pompom Maker
Using a pompom maker is an easy way to make consistent and even-shaped pompoms. You can buy one from craft stores or online, so it’s definitely worth investing in one of these if you want the perfect pompom for your crochet hat.
4. Watch How You Cut the Yarn
When it comes time to cut the yarn, make sure that you don’t cut too deeply into the pompom. If you do, it will lose some of its fluffiness and shape. It’s best to use sharp scissors to get a nice clean cut.

5. Finish the Edges
Finishing the edges of the pompom with a thin layer of yarn is important, as this will help it hold its shape and stay secure on your crochet hat. Just make sure that you don’t use too much yarn here, or else it could make the pompom look bulky.
Making a pompom for a crochet hat can be a fun and rewarding experience as long as you follow the steps mentioned above. With these tips in mind, you’ll be able to make beautiful and stylish pompoms that will add the perfect finishing touch to your crocheted hats.
Frequently Asked Questions
What Precautions Should be Taken for Making a Pompom for a Crochet Hat?
When making a pompom for a crochet hat, it is important to take some precautions so that the pompom is secure and looks good. First, make sure to measure the size of your crochet hat before beginning. This will help ensure the pompom isn’t too big or too small for the hat. Secondly, make sure to use high-quality yarn that won’t fray when cut.
Can I Use Any Type of Yarn to Make a Pompom for a Crochet Hat?
You can use any type of yarn when making a pompom for a crochet hat, but it is important to select the right one based on the strength needed. For example, if you plan to use your crochet hat in wet or windy conditions, you’ll want to use a more durable yarn that won’t fray easily.
How Do I Attach the Pompom to My Crochet Hat?
Once your pompom is made, the next step is attaching it to the hat. If you’re using a crochet hook, insert the hook through the top of the hat and then loop the yarn from your pompom around it. Make sure to pull it tightly so that it’s secure. Alternatively, you can use a needle and thread to sew the pompom onto the hat for an even more secure attachment.

Conclusion
Crafting a beautiful pompom for your crochet hat adds an extra layer of fun to the process. Not only is it a great way to add personality and character, but it can also be part of your own self-expression, making your handmade creation truly unique. Be prepared to make it a labor of love by taking time with each step and enjoying the process. Have patience with yourself, and keep in mind that practice makes perfect.
Now you know how to make a pompom for a crochet hat quickly and easily. With this simple method, you can create a unique accessory for your handmade hat that will make it look extra special. Experiment with different yarn colors and textures to get the perfect pompom for your crochet project. Have fun crafting!