
If you’re a crochet enthusiast seeking to merge your crafting skills with the beauty of nature, crocheting a tree can be a wonderfully imaginative project.

Just as trees symbolize strength, growth, and life, crocheting a tree allows you to infuse the essence of nature into your artistic endeavors. This creative journey combines the intricacies of crochet stitches with the organic forms of trees, resulting in a unique and captivating masterpiece.
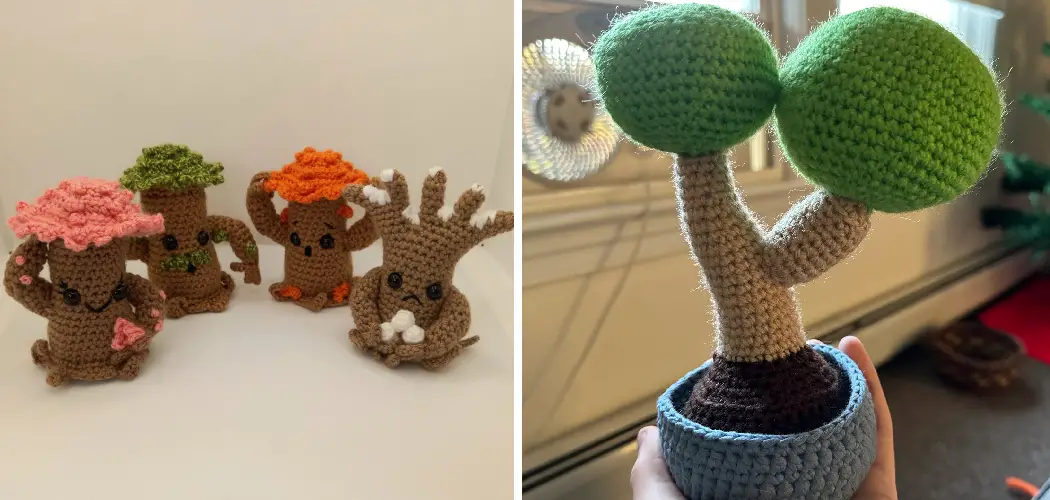
Whether you’re aiming to craft an enchanting wall hanging, a decorative centerpiece, or a charming addition to your home decor, crocheting a tree offers a captivating and rewarding experience.
In this article, we’ll delve into the essential steps and techniques required how to crochet a tree, from selecting the right yarn colors to intricately crafting the branches and leaves. Get ready to bring the outdoors indoors and embark on a crochet adventure that celebrates the beauty of nature.
The Tree Crochet Project and Its Creative Potential
Crochet is an immensely satisfying hobby. Not only does it provide a creative outlet, but it can also produce wonderful works of art that you can show off for years to come. A great example of this is the Tree Crochet project, which allows you to create beautiful trees out of yarn or thread. This project will require some patience and practice, but in the end, you’ll be proud of the results.
To begin, you’ll need to choose a pattern for your tree. You can find plenty of free patterns online or in craft stores. Once you have chosen your pattern, it’s time to gather your materials. This project will require yarn or thread, depending on the type of tree you’re making, as well as a crochet hook and scissors.
Next, you should start creating the trunk of your tree. This will involve crocheting a series of vertical loops in tight rows. As you continue to add more loops, make sure to keep the previous row tight and even. Once you have completed the trunk, it’s time to begin adding in the branches.

The next step is to create the branches of your tree. Start at the bottom of the trunk and begin crocheting a series of horizontal loops, forming small pockets for each branch. As you work up the trunk, remember to keep the rows even and tight. You can also add texture to your work by creating small “branchlets” off of each main branch.
Importance of Selecting Suitable Materials for the Project
Making sure to select the right materials for your project is essential when it comes to crocheting a tree. You’re going to need an assortment of different types of yarn, all in coordinating colors. Cotton yarn offers good drape and durability and works well for this type of project.
It is also easier to work with because it does not stretch like acrylic or wool yarn. You should also buy a crochet hook that is the right size for working with your yarn. This will help you achieve neat stitches and create an even-looking tree. If you want to give your tree texture, consider investing in some textured or novelty yarns too.
Never underestimate the importance of having suitable stuffing for your project as well. Polyester stuffing is lightweight and pliable, and won’t become lumpy or saggy over time. Make sure you have plenty of it handy while crocheting your tree, so you can stuff the parts as you go along.
Finally, you should also arrange for some decorative embellishments to add a special touch to your tree. Ribbons, buttons, beads, and other trinkets can be added to your tree for a truly unique, personalized look.

Yarn Choices for Different Parts of the Tree
Different colors of yarn can be used to create a more beautiful tree. For the branches, you may want to use a thicker and darker color yarn for a more realistic look. For the leaves, you may want to experiment with different colored yarns – green is usually the most common choice but other colors such as yellow, orange or pink can also add an interesting effect.
When choosing yarn for the trunk of the tree, consider using a lighter shade such as beige that will stand out against the darker colors used to create the branches and leaves. Experimenting with different shades may help you create a unique look for your crochet tree!
No matter which type of yarn you decide to use, make sure it is suitable for crocheting. The best types of yarn to use for this project include wool, acrylic or cotton. These materials are strong and will result in a durable tree that will last for years to come!
Additionally, it is important to choose the right hook size depending on the gauge of your chosen yarn. This will ensure that you can crochet tight enough stitches so that your tree has an even appearance when finished.
Once you have chosen the perfect yarn for your crochet tree, it’s time to get started! Follow the instructions provided in this guide and soon you will have a beautiful crocheted tree that you can proudly display or use as a gift. With a little creativity and patience, anyone can learn how to crochet a tree – so let’s get started!

When it comes to crochet decorations for your tree, the possibilities are endless. You can use different stitches such as single, double or half-double to create interesting patterns on the leaves and branches.
10 Steps How to Crochet a Tree
Step 1: Gather Your Materials and Tools
Before embarking on your crocheting journey, ensure you have all the necessary materials and tools. Your supplies will include:
Yarn: Choose shades that mimic the colors of trees, such as various greens for leaves and browns for the trunk. The yarn’s texture and thickness determine the tree’s appearance, so select yarn that suits your desired style.
Crochet Hooks: Depending on your chosen yarn, select crochet hooks of appropriate sizes to achieve the desired tension and texture.
Stuffing: Acquire stuffing material to give your tree volume and dimension. This can be fiberfill or any other soft, pliable material.
Yarn Needle: A yarn needle is essential for weaving in loose ends and sewing parts together.
Scissors: Reliable scissors are necessary for cutting yarn and trimming excess material.
Step 2: Start with the Trunk
Begin your crocheted tree by working on the trunk. Using brown yarn, start with a foundation chain that corresponds to the width of your desired trunk.

From there, work a series of stitches, such as single crochet, half double crochet, or double crochet, depending on the texture you want to achieve. Crochet the trunk in rows until it reaches your preferred length. Adjust the width by increasing or decreasing stitches as needed.
Step 3: Shape the Trunk
To give your tree trunk a lifelike appearance, introduce various stitch heights and techniques. Incorporate front post and back post stitches to simulate the texture of tree bark. This additional detail adds depth and authenticity to the trunk, making it a captivating focal point of your crocheted tree.
Step 4: Create the Branches
With the trunk complete, shift your focus to crafting the branches. To achieve a natural look, create smaller chains of stitches that branch out from the main trunk. Vary the length and thickness of these chains to mimic the growth patterns of real trees. Attach the branches to the trunk using slip stitches or single crochet stitches, securing them firmly in place.
Step 5: Crochet the Leaves
Crafting the leaves is a pivotal step in bringing your crocheted tree to life. Choose shades of green yarn that resemble real leaves. A common technique for crocheting leaves is to work multiple double crochet stitches into a single stitch, forming a cluster. Experiment with the number of stitches to create leaves of varying sizes. Attach the leaves to the ends of the branches using slip stitches.

Step 6: Incorporate Texture
To enhance the visual interest of your crocheted tree, consider introducing texture to the leaves. Experiment with different stitch patterns to simulate the veins and contours found on actual leaves. The V-stitch, for example, can create an open and airy appearance, while the shell stitch adds dimension and intricacy.
Step 7: Craft Additional Layers
The allure of a full, lush tree lies in its layers of foliage. Crochet multiple layers of leaves, varying their placement and size as you ascend the branches. This layering technique adds depth, dimension, and an element of realism to your crocheted masterpiece.
Step 8: Introduce Color Variations
To replicate the vibrant hues seen in real trees, consider incorporating different shades of green into your crocheted foliage. Transition between lighter and darker greens to mimic the play of light and shadow. This technique elevates the visual richness of your crocheted tree, evoking the diverse colors found in nature.
Step 9: Add Final Details
As you approach the completion of your crocheted tree, pay attention to the finer details that contribute to its authenticity. Use a yarn needle to meticulously weave in any loose ends, ensuring that your tree maintains a polished and seamless appearance. Adjust the positioning of leaves and branches to achieve a harmonious and aesthetically pleasing composition.
Step 10: Mount or Display Your Crocheted Tree
With your crocheted tree completed, consider how you wish to display your masterpiece. Depending on your preferences and the intended location, you have several options. You can attach your tree to a canvas or a wooden backing for added stability.
Alternatively, frame it within a shadow box to create a three-dimensional effect that draws attention to the depth of your crocheted foliage. Hanging your creation as a unique wall decoration provides a focal point that showcases your creativity.
Things to Consider When Crocheting a Tree
When crocheting a tree, there are a few things to consider: yarn type, color selection, and stitching patterns. The type of yarn will determine how your tree looks when finished and the kind of texture it has.
Selecting the correct colors is important to create the look you want; for example, if you’re making an oak tree with leaves, you might want to use a variety of natural colors such as greens, browns, and tans.

Lastly, selecting the appropriate stitching patterns will create a realistic tree shape when pieced together. Depending on the look you’re aiming for, you may choose to make a straight trunk or one with branches that curve in different directions.
Don’t forget about adding embellishments like felt leaves or crocheted flowers to give your tree a bit of extra personality. With these tips in mind, you’re sure to have success creating your own unique crochet tree!
In addition to the materials mentioned above, it’s important to have some basic tools that will make crocheting your tree easier. For starters, be sure to get yourself a pair of scissors and a crochet hook that is appropriate for the type of yarn you are using.
Conclusion
All in all, crocheting a tree is a fun and unique way to add something special to your home. Whether you’re following a pattern or creating your own design, the process of making your very own tree can be both fulfilling and challenging while providing you with an end result that you can proudly show off. While it may take some hours before you reach the finish line, it will certainly be worth it in the long run.
If you ever find yourself feeling creative one day or want to learn a new skill, why not try out crocheting your own tree? After all, there’s no better time than right now to explore how wonderful crochet can be!
Don’t forget that with great skills come great responsibilities – so why not take up the challenge and teach others how to crochet a tree? Let us know in the comments below how your project turned out and share any words of wisdom you have for other people who want to give crocheting their own tree a try.