
Crocheting is a pleasant and relaxing hobby, that also has the added bonus of giving us some beautiful handmade pieces. Did you know crocheting can be used to make pumpkins? In this post, we’ll show you how to crochet a stem for a pumpkin—which means one more way to express your creativity!

We’re going to walk you through all the steps from choosing yarn and hooks, getting familiar with stitches used in crocheting stems, connecting your stem elements into one unit, as well as decorating ideas for your stem. So get ready – it’s time to learn to crochet a stem for a pumpkin!
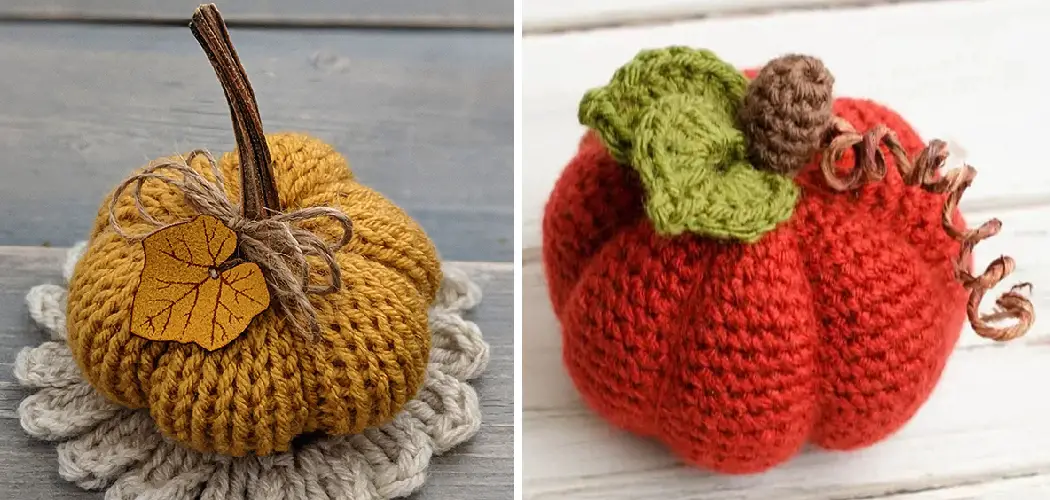
Enhancing the Realism of Crocheted Pumpkins
Adding a stem to a crocheted pumpkin is an easy way to make the finished project look even more realistic. The stem can be as long or short as desired, and created in different colors to achieve any desired effect. By following this simple tutorial, it will be possible for anyone to crochet a stunningly realistic stem for their crocheted pumpkin creation.
Materials Needed for Crocheting a Stem for a Pumpkin
To crochet a stem for a pumpkin, you will need the following materials:
- Worsted weight yarn in green
- Crochet hook size F (3.75mm)
- Yarn needle
- Stitch marker
Choosing the Right Yarn and Hook Size
The type of yarn you use and the hook size will depend on the size of the pumpkin stem you’re looking to create. A smaller pumpkin stem will require a thinner yarn and lighter hook, while a larger one may need something thicker and with a larger hook. Once you’ve determined the appropriate size, make sure to choose acrylic or cotton yarn so that your stem won’t stretch too much when crocheting it.

Using the right hook is also important in getting the desired outcome for your project. For smaller stems, start out with an H (5mm) crochet hook, increasing up to at least J (6mm) for larger stems. Any bigger than J (6mm), and it can be difficult to get a nice tight stitch.
Once you’ve selected the right yarn and hook size, it’s time to get started on making your pumpkin stem! Keep in mind that these instructions are only for a basic stem—you can always customize it if you’d like by adding other colors or unique stitches. With the help of this tutorial, you’ll have a beautiful crochet stem for your pumpkin in no time!
10 Steps How to Crochet a Stem for a Pumpkin
Step 1: Gather Materials
Before starting your crocheting project, gather all the necessary materials. You will need a crochet hook (size G or H works well), yarn in a suitable color for the stem (brown or green are popular choices), scissors, and a yarn needle.
Step 2: Make a Slip Knot
To begin crocheting the stem, make a slip knot by creating a loop with the yarn, then inserting the end of the yarn through the loop. Pull the yarn to tighten the loop around the hook.
Step 3: Chain Stitch Foundation
Create a chain stitch foundation by yarning over (bringing the yarn over the hook) and pulling it through the slip knot loop on the hook. Continue this process to make a chain of desired length, which will determine the height of your stem. A chain of about 10 stitches is a good starting point.
Step 4: Single Crochet in Second Chain
Insert the hook into the second chain from the hook, yarning over, and pulling the yarn through the chain stitch. Yarn over again and pull through both loops on the hook. This is a single crochet stitch. Repeat this process for each chain stitch in the foundation row.
Step 5: Single Crochet in Each Stitch
Continue working single crochet stitches in each chain stitch across the row until you reach the end. This will create a solid row of single crochet stitches.

Step 6: Chain One and Turn
After completing the first row of single crochet stitches, chain one and turn your work. This chain one acts as the turning chain and helps maintain the height of the stitches.
Step 7: Single Crochet in Each Stitch of the Previous Row
Work a single crochet stitch in each stitch across the row. Repeat this process for each subsequent row until your stem reaches the desired length. For a typical pumpkin, crocheting 4-6 rows should be sufficient.
Step 8: Decrease Stitches
To shape the top of the stem, you will need to decrease stitches gradually. To do this, single crochet two stitches together by inserting the hook into the first stitch, yarning over, and pulling through.
Then insert the hook into the next stitch, yarning over, and pulling through. Yarn over again and pull through all loops on the hook. Repeat this decrease stitch every few stitches until you have decreased enough to form a tapered end.
Step 9: Fasten Off
Once you have reached the desired tapered end, fasten off your yarn. Cut the yarn, leaving a tail of a few inches. Pull the tail through the last loop on the hook to secure it. Weave in any loose ends using a yarn needle to ensure a tidy finish.
Step 10: Attach the Stem to the Pumpkin
Using the tail you left when fastening off, attach the stem to the top of your crocheted pumpkin. Thread the yarn needle with the tail and sew the stem securely to the pumpkin by stitching through both the stem and the pumpkin. Make several stitches around the base of the stem to ensure it stays in place.
Things to Consider When Crocheting a Stem from a Pumpkin
1. Choose the Right Yarn:
Select a durable and comfortable yarn, such as acrylic or cotton. Consider choosing a thicker yarn if desired.

2. Think About Color:
Pick colors that coordinate with your pumpkin’s skin for a realistic look. Or, experiment with bright colors to contrast your pumpkin. Whatever color you choose, make sure to buy enough yarn to complete the project.
3. Get Creative:
Have fun with the design of your stem try different techniques like adding small leaves or crocheted vines to make it unique! You can also experiment with different colors or materials. Add embellishments like buttons, beads, or even a tiny stem cap to make your pumpkin stand out.
Once you’re satisfied with the design of your stem, sew it onto the top of your pumpkin and your project is complete!
4. Measure Before You Start:
Measure the diameter of the pumpkin at its widest point so you know how long to make your stem. You’ll need to double the length of the stem for your crochet piece. For example, if you want a stem 3 inches long on your pumpkin, you should crochet a stem that is 6 inches long.
5. Make it Secure:
Use hot glue gun or another adhesive to securely attach the finished stem to your pumpkin when complete. This will ensure that it stays in place and won’t come off easily.
Some Common Mistakes When Crocheting a Stem from a Pumpkin
When crocheting a stem for a pumpkin, there are common mistakes that can occur. To ensure you don’t make any of these errors, here are some common mistakes to watch out for:
1. Making the Stem Too Thin or Too Thick
The ideal thickness of the stem should be approximately 1/4 inch in diameter. If the stem is too thin it will be weak and may break easily; if the stem is too thick it won’t fit properly into the pumpkin.
2. Not Using Enough Stitches
When crocheting a stem for a pumpkin, it is important to use enough stitches to keep your work tight and maintain its shape, otherwise, your work could become misshapen over time.

3. Not Finishing the Stem Properly
The way you finish your stem is key to making sure it stays together securely. You should use a slip stitch or reverse single crochet (crab stitch) to ensure that the stitches stay in place and do not unravel.
Conclusion
Crafting your own crocheted pumpkin stem is shockingly easy and makes for an adorable addition to any artificial pumpkin! With the basic supplies you should have everything you need, and the process is straightforward. By following these simple instructions, you can now make a one-of-a-kind stem using just a bit of yarn and crochet hook.
Whether you plan on decorating for Halloween, Thanksgiving or fall in general – crocheting yourself a special stem will add a little homegrown touch to your jack-o-lanterns this year. So don’t wait! Get crocheting now with how to crochet a stem for a pumpkin and see just how creative you can get with your autumn decorations!