
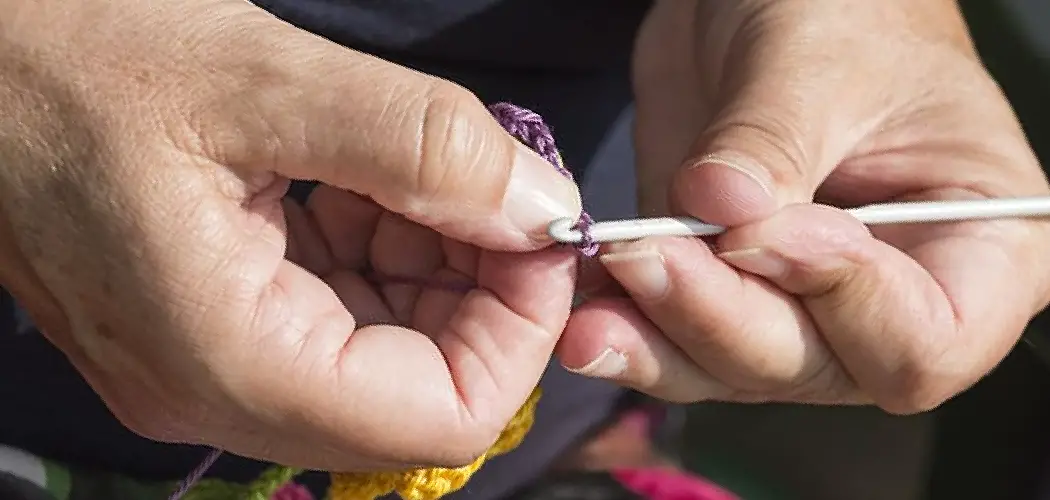
Are you new to crocheting? If so, one of the first and most important things you’ll need to learn is how to hold a crochet hook. Holding your hook and yarn correctly will help you create even stitches and neat fabric.
If you’ve ever wanted to learn how to crochet but weren’t sure of the process or what tools are necessary–not worry! Crocheting is a fun and easy craft that anyone can learn. One of the most important steps in picking up this hobby is learning how to correctly take hold of your hook and yarn so that you can start stitching away.

Read on for more essential tips on how to hold a crochet hook and yarn, as well as information about different types of hooks and varieties of yarn commonly used for crocheting.
What Will You Need?
The first step in learning how to crochet has the right tools. You’ll need the followings:
- A crochet hook
- Yarn
- Scissors
- Hair clip or stitch marker
- Tape measure (optional)
- Crochet pattern (optional)
Now that you have all of your materials let’s look at how to hold them.
8 Easy Steps on How to Hold a Crochet Hook and Yarn
When it comes to holding a crochet hook, you can use two different types of grips: the pencil grip and the knife grip. Both methods work well, so it’s up to your preference.
Step 1. Choose the Grip:
The pencil grip is how most people start out when they crochet. To use this method, hold the pencil-like hook in your dominant hand with the hook facing toward your body.

The knife grip is similar to how you would hold a kitchen knife. To use this method, hold the hook in your dominant hand, with the hook facing away from your body. Whichever grip you choose, it should feel comfortable and natural for you.
Step 2: Choose Your Yarn:
Once you’ve chosen a grip, it’s time to select some yarn! Depending on the type of project you are working on (dishcloths, blankets, baby booties, etc.), there are different types of yarn that will work best for each job. Generally speaking, lighter-weight or “fingering weight” yarns are best for small projects like amigurumi and lace work, while thicker or “bulky weight” yarns are better for things like blankets and sweaters.
Step 3: Prepare Your Yarn:
Before you start stitching, preparing your yarn for use is important. To do this, ensure your yarn’s ends are free from knots or tangles. It’s also helpful to attach a hair clip or stitch marker midway through the strand of yarn so that you have an easy place to find it when you need it.
Step 4: Hold Your Crochet Hook in Your Dominant Hand:
Once you have chosen a grip and prepared your yarn, hold your crochet hook in your dominant hand, facing either towards or away from your body, depending on the grip you choose. You can rest your thumb and index finger on either side of the hook’s neck to help guide it as you work. It will take some practice to get used to how this feels, but eventually, it will become second nature.
Step 5: Wrap Your Yarn Around Your Crochet Hook:
Wrap the yarn around your crochet hook in a clockwise motion with the strand of yarn that is furthest from you. Make sure to keep it loose and not too tight. Don’t worry if it’s not perfect, you’ll get the hang of it with practice.
Step 6: Catch the Strand of Yarn With Your Hook:
Once you have looped the yarn around your hook, try to catch the strand of yarn with it and pull it through the loop. This will create a “slip knot,” which is how you start most crochet projects. You can also learn how to make other types of knots as well.

Step 7: Pull the Yarn to Adjust the Tension:
Once you have your slip knot in place, you can adjust how tight it is by gently pulling on the strand of yarn that is closest to you. This will help keep your stitches even and straight. If your yarn is too tight, it can cause your stitches to be too tight and difficult to work with.
Step 8: Place Your Non-Dominant Hand:
Place your non-dominant hand underneath the strand of yarn that is furthest from you. This will give you something to hold onto while you crochet and ensure your tension stays even. Additionally, this will help keep the yarn from tangling and knotting.
By following these ten easy steps, you’ll be ready to start your next project in no time. As you practice more and become familiar with holding a crochet hook and yarn, you’ll find that your projects will become easier and more enjoyable.
5 Additional Tips and Tricks
1. Make sure the thumb of your dominant hand is on top to help control how tightly you hold the yarn.
2. Don’t wrap the yarn around your fingers as this can affect how well you manipulate the hook.
3. Keep your arm and wrist relaxed while crocheting to avoid tension or cramps in your hands.
4. Make sure your crochet hook is not too slippery or sharp, as this can also cause discomfort when holding it for a long time.
5. When picking up the yarn with your crochet hook, keep a loose grip on both the yarn and hook so that you don’t pull too tight on either one. This will help create even more tension throughout the project and make it easier to work with.
Following these tips and tricks will help you hold your crochet hook and yarn in a comfortable way for longer periods of time, allowing you to create beautiful projects easily.

5 Things You Should Avoid
1. Don’t hold your crochet hook too tight. This can lead to strain in your hands and difficulty manipulating the yarn.
2. Don’t wrap the yarn around your fingers when you crochet. This can also cause strain, making it difficult to track how much yarn you have used.
3. Don’t grip the hook too close to the tip. You should hold the hook at least two inches from the end for maximum control.
4. Don’t forget about how you’re holding your yarn! If you don’t have enough tension on the yarn, keeping the stitches even and tight throughout your project will be difficult.
5. Don’t let go of both strands of yarn at once; always maintain separate tension on each strand with each hand. Doing so will help ensure that your stitches stay uniform as you work through a pattern.
Avoiding these mistakes will help you develop your technique and make crocheting more enjoyable for you. You can practice how to hold a crochet hook and yarn with the right tension to create beautiful projects.
5 Different Holds You Can Try
1. Pencil Grip: This is the most common grip used by crocheters and involves holding the hook like how you would hold a pen or pencil. This grip is great for precision and delicate stitches, but might cause wrist strain over time because of how much tension is placed on the thumb and index finger.
2. Knife Grip: Also known as the “gun grip”, this method requires that you place your middle finger on top of the hook and your thumb underneath it, essentially imitating how you would hold a knife while cutting something. This grip helps to reduce wrist strain by distributing the tension more evenly throughout your hand than with the pencil grip.
3. Overhand Grip: This style involves gripping the crochet hook from above in an overhanded manner instead of from below, like with the previous two grips (pencil and knife). By using this technique, you can crochet with less strain on your thumb and index finger while still having control over the hook.

4. Underhand Grip: As the name implies, this hold requires that you grip the crochet hook from below instead of from above. This grip is great for beginners as it allows for good control over the yarn without needing to use a lot of force or strain on your muscles.
5. Crocodile Grip: This style utilizes both the underhand and overhand grips simultaneously to reduce hand fatigue and cramping caused by repetitive motions when crocheting for long periods. The key is to keep your hands relaxed yet firmly gripping the hook and yarn to maintain control without straining your muscles.
No matter which grip you choose to use, the most important thing is that you feel comfortable and relaxed when crocheting. With a bit of practice, you’ll be able to find the perfect hold for your needs!
Conclusion
After reading this article on how to hold a crochet hook and yarn, you should feel comfortable and confident in your crochet skills. If you take the tips here to heart, you can make any crocheting dreams come true.
You’ll be able to make beautiful afghans or clothing items with your own two hands. You can easily join together with those who share a love for crafting and become part of a community dedicated to creating memories that will last a lifetime. With just one hook and a little bit of yarn, you, too, can make wonderful works of art!
So don’t delay—grab your supplies, get yourself organized, and start getting creative today!