
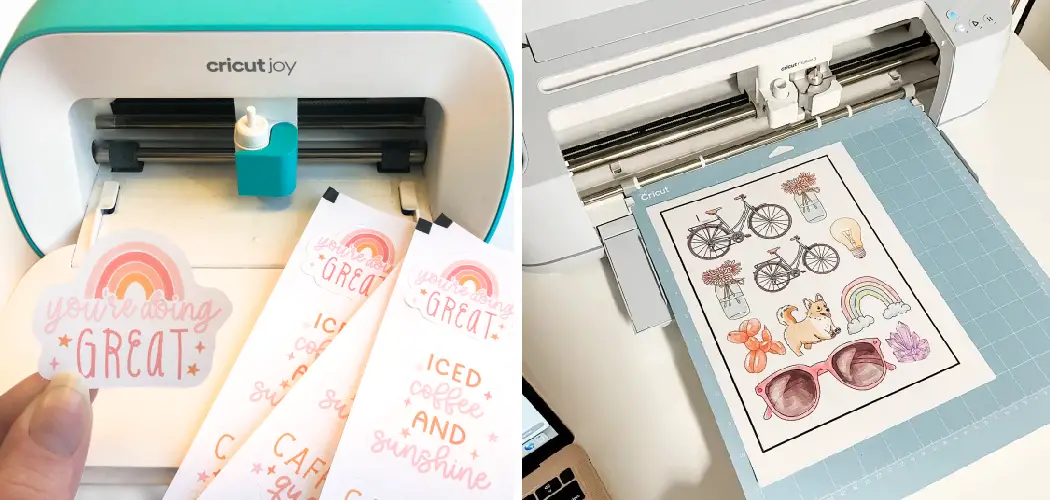
Are you looking to get creative and customize your own stickers? Are you interested in personalizing items, but lack the crafting supplies or intimidatingly large Cricut machines to do so? You’re not alone – thankfully, there’s now a way for anyone of any skill level to create custom die-cut sticker designs: the Cricut Joy!

This mini machine makes cutting and formatting stickers quick and easy with its intuitive design and clever features. In this blog post, we’ll show you how to make sticker with Cricut Joy so that your projects can stand out from the rest. So grab your favorite materials, fire up your machine, and let’s get started!
Tools and Materials You Will Need to Make Sticker With Cricut Joy
- Cricut Joy machine
- Inkjet printer or photo paper
- Vinyl sticker material
- Transfer tape
- Scissors or craft knife (optional)
Step-by-Step Guidelines on How to Make Sticker With Cricut Joy
Step 1: Prepare Your Design for Cutting
Before you can cut out your custom design, you’ll need to create it in cutting software such as Design Space. Design Space is available on both web and app platforms, making it easy for anyone to get started.
Preparing your design in Design Space is simple – all you have to do is upload the image file and adjust it to your desired size. Once you are happy with the look, click “Make It” and then select “Cut” in order to send the design to your Cricut Joy machine.
Step 2: Select Your Material Settings
Once your design has been uploaded to the machine, you can select the material type from the options list. The Cricut Joy is capable of cutting a variety of materials including vinyl, paper, fabric, cardstock, and more. Choose the “vinyl” option, then click “Continue.” This step is important for ensuring that your sticker will come out properly.
Step 3: Load Your Material Into the Machine
Before you can begin cutting, you need to make sure that your material is properly loaded into the Cricut Joy machine. Insert your vinyl sticker material onto the platform and use a craft knife or scissors to trim off any excess material. Once you have a clean edge, click “Go” to start cutting your design.

Step 4: Peel Off Your Sticker
Once the machine has finished cutting, carefully peel off the extra vinyl around the edges of your sticker. You should be left with a clear die-cut design that is ready to be applied to any surface you like. Peeling the extra vinyl off might require a bit of force, so make sure to be gentle when doing this step.
Step 5: Transfer Your Sticker
If you want to make sure that your sticker stays in place, you can use transfer tape to help it adhere better. This is a great way to add extra longevity and protection to your stickers. To do this, simply cut off a piece of transfer tape that is slightly larger than your sticker.
Peel off the backing paper and carefully stick the tape to the sticker. Then, slowly peel off the top layer of the transfer tape and carefully apply it to your desired surface.
And that’s it – it’s really that easy to make a sticker with Cricut Joy! Now that you know how, why not get creative and start making some awesome custom designs? Good luck, and have fun!
Additional Tips and Tricks to Make Sticker With Cricut Joy
1. Don’t forget to use transfer tape when you’re making stickers with Cricut Joy! This will help ensure that your design is transferred properly onto whatever surface it needs to adhere to.
2. If your sticker materials are particularly thick, you can adjust the blade depth accordingly to get a smoother cut. Experiment with different blade depth settings to get the best results.
3. Use the Print then Cut feature when making complex shapes or designs that don’t have a lot of detail. This will help ensure that your design is printed and cut with precision.
4. Try using multiple layers of materials for more dimension and texture in your stickers. Just make sure you adjust the blade depth and use transfer tape in between each layer.
5. Be sure to use a strong adhesive when applying your stickers to surfaces, such as walls or vehicles, that may be exposed to elements like rain or wind. This will ensure that your stickers will stay put!
6. Lastly, make sure to clean your Cricut Joy and materials regularly to ensure your projects come out looking their best. This will help keep the blades sharp and prevent any debris from messing up your designs.

Following these tips and tricks will help you get the most out of your Cricut Joy when creating fun and creative stickers! Have fun and enjoy experimenting with different materials, colors, and designs. Happy crafting!
Things You Should Consider to Make Sticker With Cricut Joy
1. Choose the Right Material:
Sticker-making with a Cricut Joy requires the right material. Adhesive vinyl is best for making stickers, as it’s easy to use and gives you a professional finish. You can also experiment with other materials like cardstock or fabric if you want to make more creative designs. Choosing the right material is key to making stickers with a Cricut Joy.
2. Pick the Right Design:
The design you choose will depend on how you plan to use your stickers. If you’re using them for decoration, pick something that matches your décor or style. For labels or reminders, opt for bold and simple shapes and text that will be easy to read and recognize. You can also find pre-made designs on Cricut, or use the design tools to create something unique.
3. Prepare the Design:
Once you’ve chosen your design, it’s time to prepare it for cutting with a Cricut Joy. Make sure all elements of the design are properly sized and grouped, as this will ensure a smoother cutting process. You may also want to add extra elements like borders or patterns to give your stickers more flair.
4. Cut It Out:
Now it’s time to cut out the design with your Cricut Joy. Make sure you have the correct settings for the material and size of your project, and cut it out using the Cricut app. Depending on the complexity of your design, this can take anywhere from a few minutes to several hours. Carefully remove your stickers from the mat once it is finished.
5. Apply and Enjoy:
Finally, you can apply your stickers to any surface of your choice. If you want a more permanent option, use transfer tape to move them onto surfaces like wood or glass. Once they’re in place, enjoy the results of all your hard work! With a little practice, you can make creative and unique stickers with your Cricut Joy.

Making stickers with a Cricut Joy is an easy and fun way to add personalized touches to any project. With the right materials, design, and technique, you’ll be able to create beautiful stickers that last for years to come. So what are you waiting for? Get crafting and give your projects a unique finishing touch with stickers made on your Cricut Joy.
Frequently Asked Questions
What Types of Materials Can I Use?
You can use adhesive vinyl, iron-on, cardstock, and other specialty materials to make stickers with Cricut Joy. The machine has a Smart Set dial setting that automatically adjusts the blade for your material type so you don’t have to do any guesswork.
How Do I Design My Sticker?
Create your design using either the Cricut Design Space software or a compatible third-party program like Adobe Illustrator. The Design Space library has thousands of images, fonts, and designs to help you get started. Once you’ve designed your sticker, upload it to your machine and let it do the cutting.
Can I Make Custom Shapes?
Yes! Cricut Joy can be used to create custom shapes and designs for your stickers, like circles, squares, or any other shape you can dream up. Just use the Design Space software or a compatible program to draw your shape and then upload it into the machine.
What Types of Projects Can I Use My Stickers On?
Stickers are a great way to add personality and flair to almost any project. Whether you’re dressing up your laptop, jazzing up a journal, or making an eye-catching sign, stickers can help you make it unique. They’re also perfect for scrapbooking, cardmaking, and more.

Conclusion
That’s it! You now know how to make sticker with Cricut Joy. With practice, you’ll get even better at making intricate designs that will turn heads wherever you put them. Once you feel comfortable with the basics of creating a personalized design, be creative and have fun with it.
Don’t forget to share your amazing handmade artwork and tag us on social media so we can see just what you’re capable of. Get creative and let your inner crafty thoughts flow! Happy crafting!
You Can Also Check This Out to Make a Beehive Craft Project