
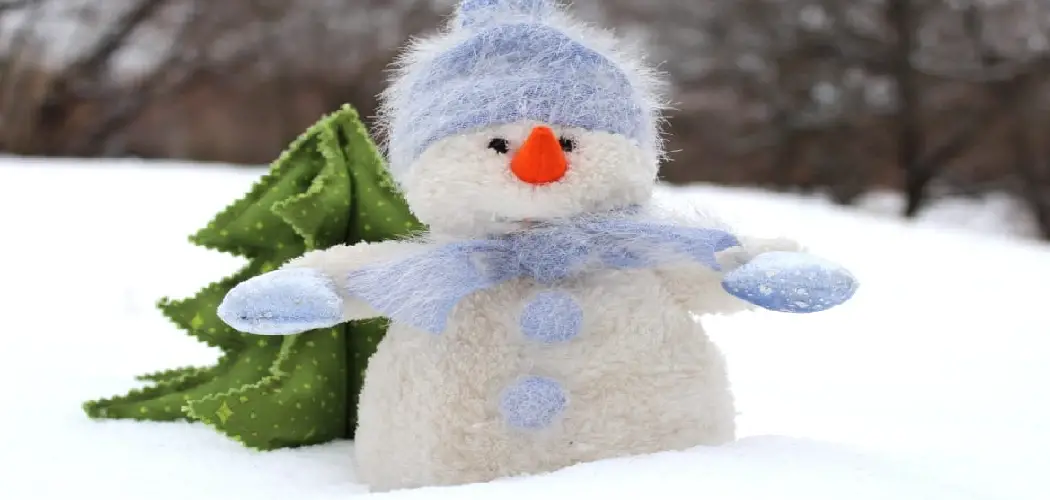
Are you looking for a fun winter project with your kids? Look no further! We’ll show you how to crochet your snowman. Whether it’s a playful addition to your Christmas décor or the perfect gift for an upcoming holiday party, this crocheted snowman will charm everyone who sees him.

Bring a touch of winter into your home and heart by creating your handmade snowman with crochet. With just a few basic supplies and patience, you can have an adorable snowman that will make any room in the house look brighter.
Whether it’s for beginners or experienced crocheters who want to add something special to their holiday decorations, this blog post provides all the details on how to craft your cute little snowman! Read on and learn how to crochet a snowman in no time!
What Will You Need?
To crochet your snowman, you’ll need the following materials:
- Yarn in white and black (for the eyes and buttons)
- A few yards of thread in any color for the scarf
- Crochet hook size 7mm or 8mm
- Stuffing material such as cotton batting or pillow stuffing
- Plastic safety eyes
- A tapestry needle
- Scissors
Once you have all the supplies, it’s time to get started!
9 Easy Steps on How to Crochet a Snowman
Step 1: Crochet the Snowman’s Body

Start by making a magic ring. In the magic ring, crochet six single crochets (sc). Pull the tail end of the yarn tightly to close the circle. This forms the top of your snowman’s body.
For the second round, make two single crochets in each stitch, giving you 12 stitches. For the third round, alternate between one single crochet and two single crochets in each stitch. You should end up with 18 stitches. Continue this pattern, increasing the number of single crochets between increased stitches each round (for example, two single crochets and then 2 in one stitch, then three single crochets and then 2 in one stitch, etc.) until you have the desired size for the body of your snowman.
Once you have the right size, continue to crochet without increasing the number of stitches each round to create the sides of the snowman’s body. When you are happy with the height, you can close the bottom by decreasing stitches each round until the bottom is closed.
Step 2: Crochet the Snowman’s Head
The process for crocheting the snowman’s head is similar to the body, but it will be smaller. Start with a magic ring, and crochet six single crochets (sc) within it. Pull the tail end of the yarn tightly to close the circle, forming the top of the snowman’s head.
Make two single crochets in each stitch for the second round, totaling 12 stitches. For the third round, alternate between one crochet and two single crochets in each stitch, ending up with 18 stitches. Continue this pattern, increasing the number of single crochets between increased stitches each round until you reach the desired size for your snowman’s head.
When the head is the right size, continue to crochet without increasing the number of stitches each round to create the sides of the snowman’s head. Once satisfied with the height, you can close the bottom by decreasing stitches each round until the head is closed.
Step 3: Attach the Head to the Body

Now that you have both the body and the head of the snowman, it’s time to attach them. Start by threading the tail of the yarn from the head through the tapestry needle. Then, hold the head and body together in the position you want them to be attached. Use the tapestry needle to sew the head to the body, going through both layers of crochet and pulling tightly. Continue sewing around the circumference of the head until it’s securely attached to the body. When you’re done, weave through the stitches at the end of the yarn to hide it. Now, you have your snowman’s basic form!
Step 4: Crochet the Snowman’s Arms
To create the arms for your snowman, start by making a chain of about 15 stitches for each arm. This will determine the length of your snowman’s arms. Then, turn and make a single crochet in the second chain from the hook and across each chain.
Once you’ve completed the row, you can make the branches of the snowman’s arms. To do this, choose three points along the arm and make a chain of five stitches at each point. Turn and make a single crochet in the second chain from the hook and in each chain across. Repeat this process for each branch.
Step 5: Attach the Arms to the Body
After you’ve crocheted both arms, it’s time to attach them to the snowman’s body. Thread the tail of the yarn from one arm through the tapestry needle. Position the arm where you want it to be on the body, making sure it’s at the right height. Then, use the tapestry needle to sew the arm to the body, passing through both layers of crochet and pulling tightly. Repeat this process until the arm is securely attached.
Do the same for the other arm. Once both arms are attached, weave in any remaining yarn ends through the stitches to hide them. Your snowman now has his arms!
Step 6: Crochet the Snowman’s Hat
Creating the snowman’s hat begins with making a slipknot on your crochet hook. Next, crochet a chain that’s long enough to fit around the top of the snowman’s head. This becomes the brim of the hat. Now, join the chain into a ring with a slip stitch, taking care not to twist the chain.
Make a single crochet in each chain around the ring in the first round. Continue these rounds without increasing or decreasing the height of the hat. Once you’re satisfied with the height, finish the hat and cut the yarn, leaving a long tail.
For the top part of the hat, start with a magic ring and make six single crochets within it. For the next rounds, increase the number of stitches evenly across each round until the top of the hat is slightly smaller than the bottom part. Once you reach the desired size, continue crocheting without any increases or decreases until you get the height you want for the top part. Cut the yarn once you’re done, leaving a long tail.
Step 7: Attach the Top Hat to the Brim
Now it’s time to join the top of the hat with the brim. Thread the long tail of the top part of the hat through your tapestry needle. Align the top part with the center of the brim, and sew them together using the tapestry needle, passing through both layers of crochet and pulling tightly. Continue around the circumference of the top part until it’s securely attached to the brim. Weave in any remaining yarn ends through the stitches to hide them. Your snowman now has a charming hat!
Step 8: Crochet the Snowman’s Scarf

The final touch for your crocheted snowman is a cozy scarf. To create the scarf, make a slipknot on your crochet hook. Next, chain a long enough length to drape around the snowman’s neck and hang down a bit on both ends.
For the first row, make a single crochet in the second chain from the hook and in each chain all the way across. Then, turn your work and chain one. Make a single crochet in each stitch across the second row. Repeat this process until the scarf has reached your desired width.
To finish off, simply cut the yarn, leaving a short tail, and pull it through the loop on your hook. Your snowman’s scarf is now ready!
Step 9: Attach the Scarf to the Snowman
To attach the scarf, simply drape it around the snowman’s neck. If you prefer, you can use a few stitches to secure it in place. Your crocheted snowman is complete, with a body, head, arms, a charming hat, and a cozy scarf! It’s the perfect handmade decoration for the festive season. Enjoy!
This tutorial has shown you how to crochet a snowman – from the body and head to the arms, hat, and scarf. Now that you know all the steps in crocheting a snowman, why not make one yourself? It’s sure to be an enjoyable experience that will fill your home with holiday cheer. Have fun crafting!
5 Additional Tips and Tricks

- Use a contrasting yarn color for the snowman’s eyes, nose, and mouth. This will make it easier to see them when finished.
- Avoid using too many stitches when crocheting your snowman, as this can cause him to look disproportionate. Smaller stitches are more aesthetically pleasing and will create a cuter final product.
- When stuffing your snowman, use batting or cotton balls rather than traditional polyfill for a more realistic look.
- If you want to give your snowman fun accessories, consider crocheting him a scarf, hat, and buttons!
- Remember the details. Add rosy cheeks with pink yarn and a smiley face for a true winter wonderland creation.
By following these tips and tricks, you can create the perfect crocheted snowman! Have fun and let your creativity run wild while crafting this cozy wintertime decoration.
6 Things You Should Avoid
- Crocheting too Loosely: It’s important to keep your stitches tight and close together so that the snowman doesn’t lose shape.
- Not Leaving Enough Yarn for Sewing: Make sure you leave a long tail of yarn when starting and finishing your work so that you have enough to sew the parts together.
- Skipping Stitch Chains: When making the hat’s brim, count each chain so that you don’t accidentally skip any stitches when joining them together in a ring.
- Not Checking the Size: To ensure your snowman looks right, measure it against a ruler to ensure it’s not too small or large.
- Attaching the Head too High on the Body: Make sure the head is attached at the right height so that your snowman looks proportionate and upright.
- Not Using Enough Stuffing: If you don’t, your snowman may turn out flat or misshapen. Be sure to stuff it generously so that it keeps its shape!
Now, you have all the tips and tricks for crocheting a snowman! With these helpful guidelines, you can create your own unique snowman in no time.
6 Different Design Ideas

- Add colorful decorations like streamers and flags to give your snowman a fun party look.
- Create an underwater-themed snowman with blue and green yarn, seashells, and starfish accents.
- Make a jolly Santa Claus snowman with a red hat and white beard.
- Fashion a classic snowman with a top hat, carrot nose, and a festive scarf.
- Try something new by turning your snowman into a cute animal like a bunny or bear!
- Add fun texture to your snowman using fuzzy yarn or a glittery finish.
Whatever style you choose, have fun, and be creative with your crochet snowman! You can even make him look different every time if you want! With these tips and design ideas in mind, you’ll be ready to start crocheting the perfect wintertime decoration!
Conclusion
Ultimately, you can turn a crafty hobby into making festive holiday decorations for your home or giving them as gifts. As soon as the snow begins to fly, take out your crochet supplies and start crafting an entire family of snowmen!
Before you know it, you’ll create Christmas wonders that will impress your family and friends. Crafting these winter chairmakers is easier than you may think, so don’t delay! Gather up your yarn and hook, and let the winter magic flow through your fingertips!
Hopefully, the article on how to crochet a snowman was useful to you and inspired you to start your own winter crochet project. If you struggle, don’t worry. Just take it one step at a time and have fun with it! Who knows? You may be able to create a masterpiece of crocheted snowmen that will last through the years.
Happy crocheting!