
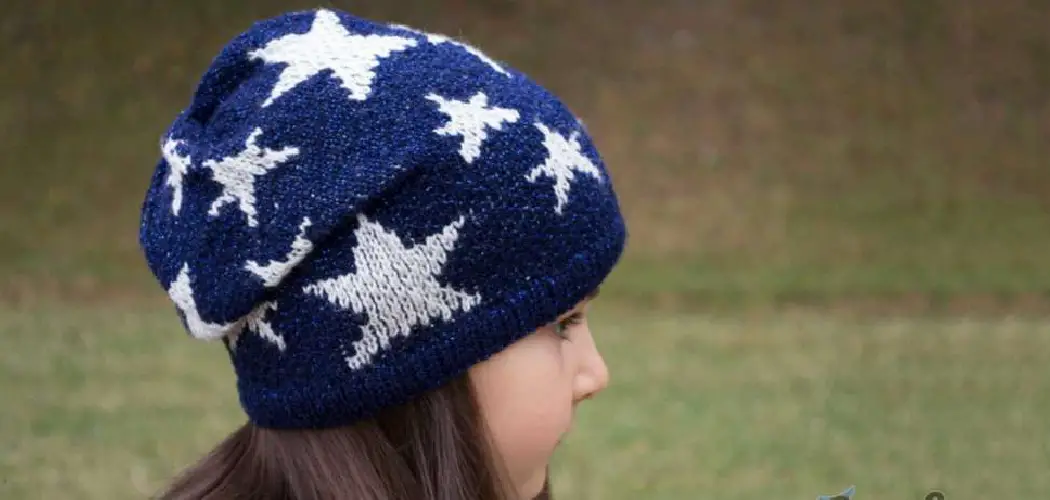
Whether you’re a beginner or an advanced crocheter, making a slouchy beanie is an enjoyable way to learn more about crochet and create something beautiful. Slouchy beanies are comfortable, stylish, and perfect for any season. They can also be made in sizes for all ages so everyone can have one. This guide will explain how to crochet a slouchy beanie from start to finish.

Crocheting a slouchy beanie has numerous advantages. It’s an easy, versatile project that can be customized to any size or style. The bulky yarn used in crochet creates a soft, warm, and comfortable fit.
Slouchy beanies can also be made with different yarn colors for added style and personality. Crocheting a slouchy beanie is a great way to learn crochet basics, as it only requires basic stitches. In this blog post, You will learn in detail how to crochet a slouchy beanie.
What Type of Stitch Should You Use for Your Slouchy Beanie?
The best stitch to use for a slouchy beanie is the half-double crochet (HDC) stitch. This gives your project a nice, thick texture without too much bulk. To begin, chain two stitches with your yarn and hook.
Then, make one HDC into the second chain from the hook. From there, make one HDC in each chain until the end of the row. After your first row is complete, continue making HDC stitches for a total of four more rows. This will give you enough material to start creating the shape of your beanie.
Once you’ve finished five rows, creating the slouchy shape is time. To do this, make two HDC stitches in each stitch of the last row. This will double the size of your project and give it a nice slouchy look. Continue making HDC stitches in each stitch until you’ve reached the right circumference for your head size.
Tools You Will Need
- Crochet Hook
- Yarn
- Tapestry Needle
- Scissors
- Measuring Tape
- Stitch Markers (Optional)
- Pom Maker (Optional)
- Buttons/Hair Clips (Optional)
- Ruler or Gauge Checker (Optional but recommended)
- Sewing Needles (Optional)
Step-by-Step Processes for How to Crochet a Slouchy Beanie
Step 1: Inspect Your Supplies
Gather your supplies and ensure you have everything you need to get started. You will need a crochet hook, about 150 yards of yarn, a tapestry needle, scissors, and a stitch marker. Start with a slip knot and then chain 80 stitches for an adult-sized beanie. If you need to adjust the size, add or subtract chains to increase or decrease the circumference of your beanie.
Step 2: Start the Brim
Once you have completed your chains for the brim, start by single crocheting in each chain stitch across. When you reach the end of the row, turn your work and chain one before turning back and working single crochet stitches across again. Do this until your brim measures about three inches long.
Step 3: Start the Body of the Hat
Once your brim is complete, start increasing in each stitch by working two single crochet stitches into one stitch. Do this until you reach the end of the row and then turn your work and chain one before turning back and repeating this process. Continue increasing in every other stitch until your hat measures about six inches from the brim.
Step 4: Start Shaping the Crown
Once your hat has reached the correct height, start decreasing in each stitch by working two single crochet stitches together. Do this until you reach the end of the row, and then turn your work and chain one before turning back and repeating this process.
Continue decreasing in every other stitch until you reach the top of your hat and can close the crown with a slip stitch. Once your hat is complete, weave in all of your ends using the tapestry needle and scissors.
By following these simple steps, you can easily learn to Crochet a Slouchy Beanie. With a bit of patience and practice, you will be an expert in no time.
Safety Tips for How to Crochet a Slouchy Beanie

- Ensure that your work area is well-lit and free from distractions to minimize the chances of making mistakes while crocheting.
- Use the correct size crochet hook for the yarn you are using, as this will affect your gauge and tension.
- Be sure to read the instructions on a pattern before beginning the project.
- Check your stitches carefully as you go along, and make sure to count them regularly throughout the project.
- If using multiple colors, be sure to carry the color not in use snugly up the side of your work, so it does not get lost or become unraveled.
- Do not pull on or tug the yarn too tightly, as it can affect your tension and the overall look of your piece.
- When changing colors, weave in the ends securely to prevent them from coming undone or getting snagged on something.
- Take regular breaks so that you do not become overwhelmed or exhausted while crocheting a slouchy beanie. This will also help to ensure that your stitches remain consistent and even.
By following these safety tips, you can crochet a slouchy beanie with ease and confidence.
How Long Should You Make the First Row of Your Slouchy Beanie?
The first row is critical when you start to crochet a slouchy beanie. It determines your hat’s circumference and influences the finished product’s overall shape. Generally speaking, you should make the first row between 4-5 inches in length for an average adult size.
You can always add or subtract stitches in later rows to adjust the circumference if necessary.
To ensure a consistent and even shape, use an adjustable ring when starting your beanie, or measure each row with a measuring tape or ruler as you go. Make sure to secure all your stitches firmly so that they don’t unravel or come undone. With the right amount of patience and practice, you’ll be able to crochet the perfect slouchy beanie.
How Should You Join the Two Sides of Your Slouchy Beanie Together?
Once you have crocheted two sides of your slouchy beanie and they are the same size, it’s time to join them together. To do this, align the two sides so that the wrong side faces outwards on each one, and then use a yarn needle to sew through both pieces at the top and bottom.

Make sure to sew through the same stitch on both pieces. Keep repeating this process until all of the stitches have been joined together, and then knot off your yarn and weave in any loose ends.
This method should result in a neat and secure seam that will hold your slouchy beanie together. You can also use this same technique to join two sides of crocheted projects, such as a blanket or scarf.
How Should You Care for and Store Your Crocheted Slouchy Beanie?
- Hand washing is the best option for cleaning a slouchy beanie. Use cold water and gentle detergent to avoid stretching or damaging your crochet project.
- Blot out excess moisture with a towel, then place it on a drying rack and let it dry completely before storing.
- It’s important to store the beanie away from direct sunlight, preferably in a cool, dry place.
- To store your slouchy beanie, fold it carefully so that it does not stretch out of shape or lose its form. You can also use a hat box or fabric bag for long-term storage.
- use a hat box for long-term storage, which can cause mold and mildew.
- When you’re not wearing it, keep your slouchy beanie on a mannequin or hat form to help retain its shape.
- You can also store the beanie in an airtight container or vacuum-sealed bag for added protection.
- Finally, it’s important to use a gentle hand when taking the beanie on and off your head to avoid any stretching or damage.

By following these tips, you can properly care for and store your handmade slouchy beanie to look as good as new for years to come.
Conclusion
One of the main disadvantages of crocheting a slouchy beanie is that it can be time-consuming. Depending on one’s skill level, it could take several hours to complete the project.
Additionally, crocheting with multiple colors can be difficult, as they need to be alternated correctly to create the desired pattern. Furthermore, the slouchy beanie also requires a large amount of yarn, so it can be expensive to purchase.
In conclusion, crocheting a slouchy beanie is a fun and easy project for anyone with basic crochet skills.
With just a few supplies, you can create a stylish, comfortable beanie to keep your head warm all winter. All you need to do is follow the steps outlined in this blog to make your own unique slouchy beanie. I hope reading this post has helped you learn how to crochet a slouchy beanie. Make sure the safety precautions are carried out in the order listed.
You Can Check It Out to Fasten off Crochet